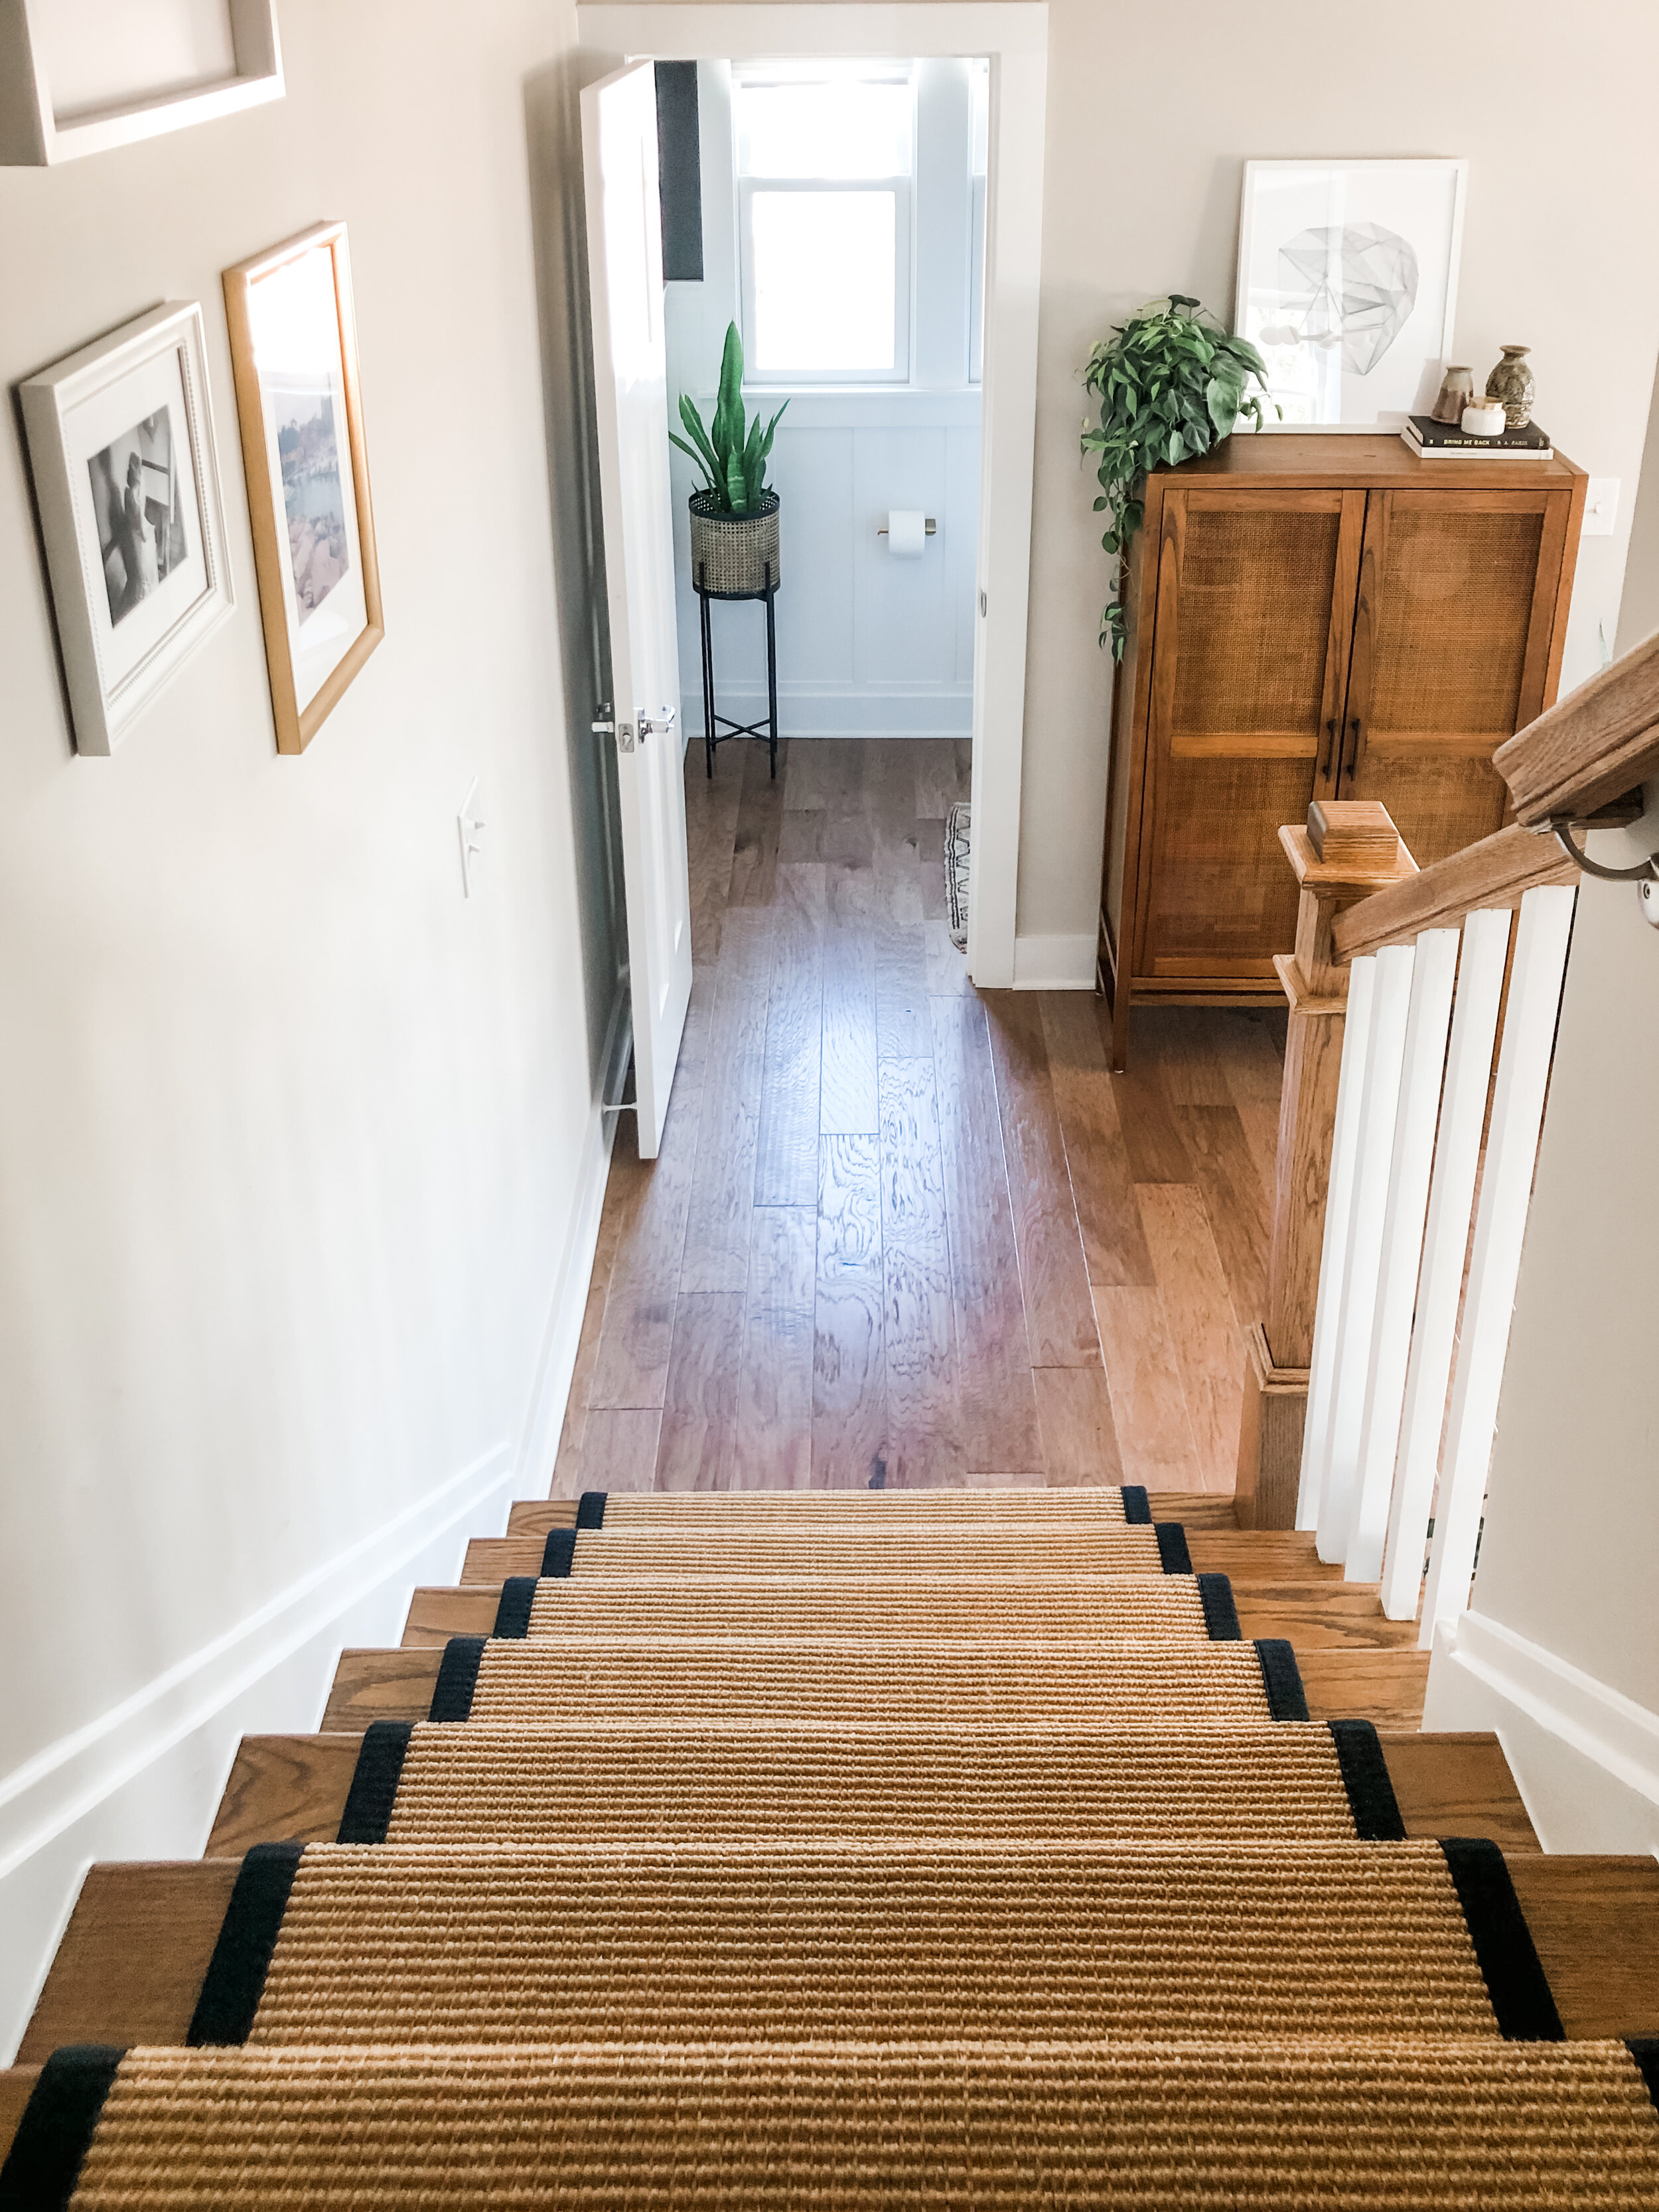
Installing Sisal Stair Runners
Our two straight and very steep staircases are safer (and prettier!) with this DIY. We’re sharing all the details about the process, cost and what we learned about ourselves.
Andrew and I have talked about this project in our fall project post, our goals for the new year post and (OMG!) the prep post…
We committed to a DIY after getting two quotes that were well out of our price point. We’re talking $5K+ for materials and labor… Eeeek!
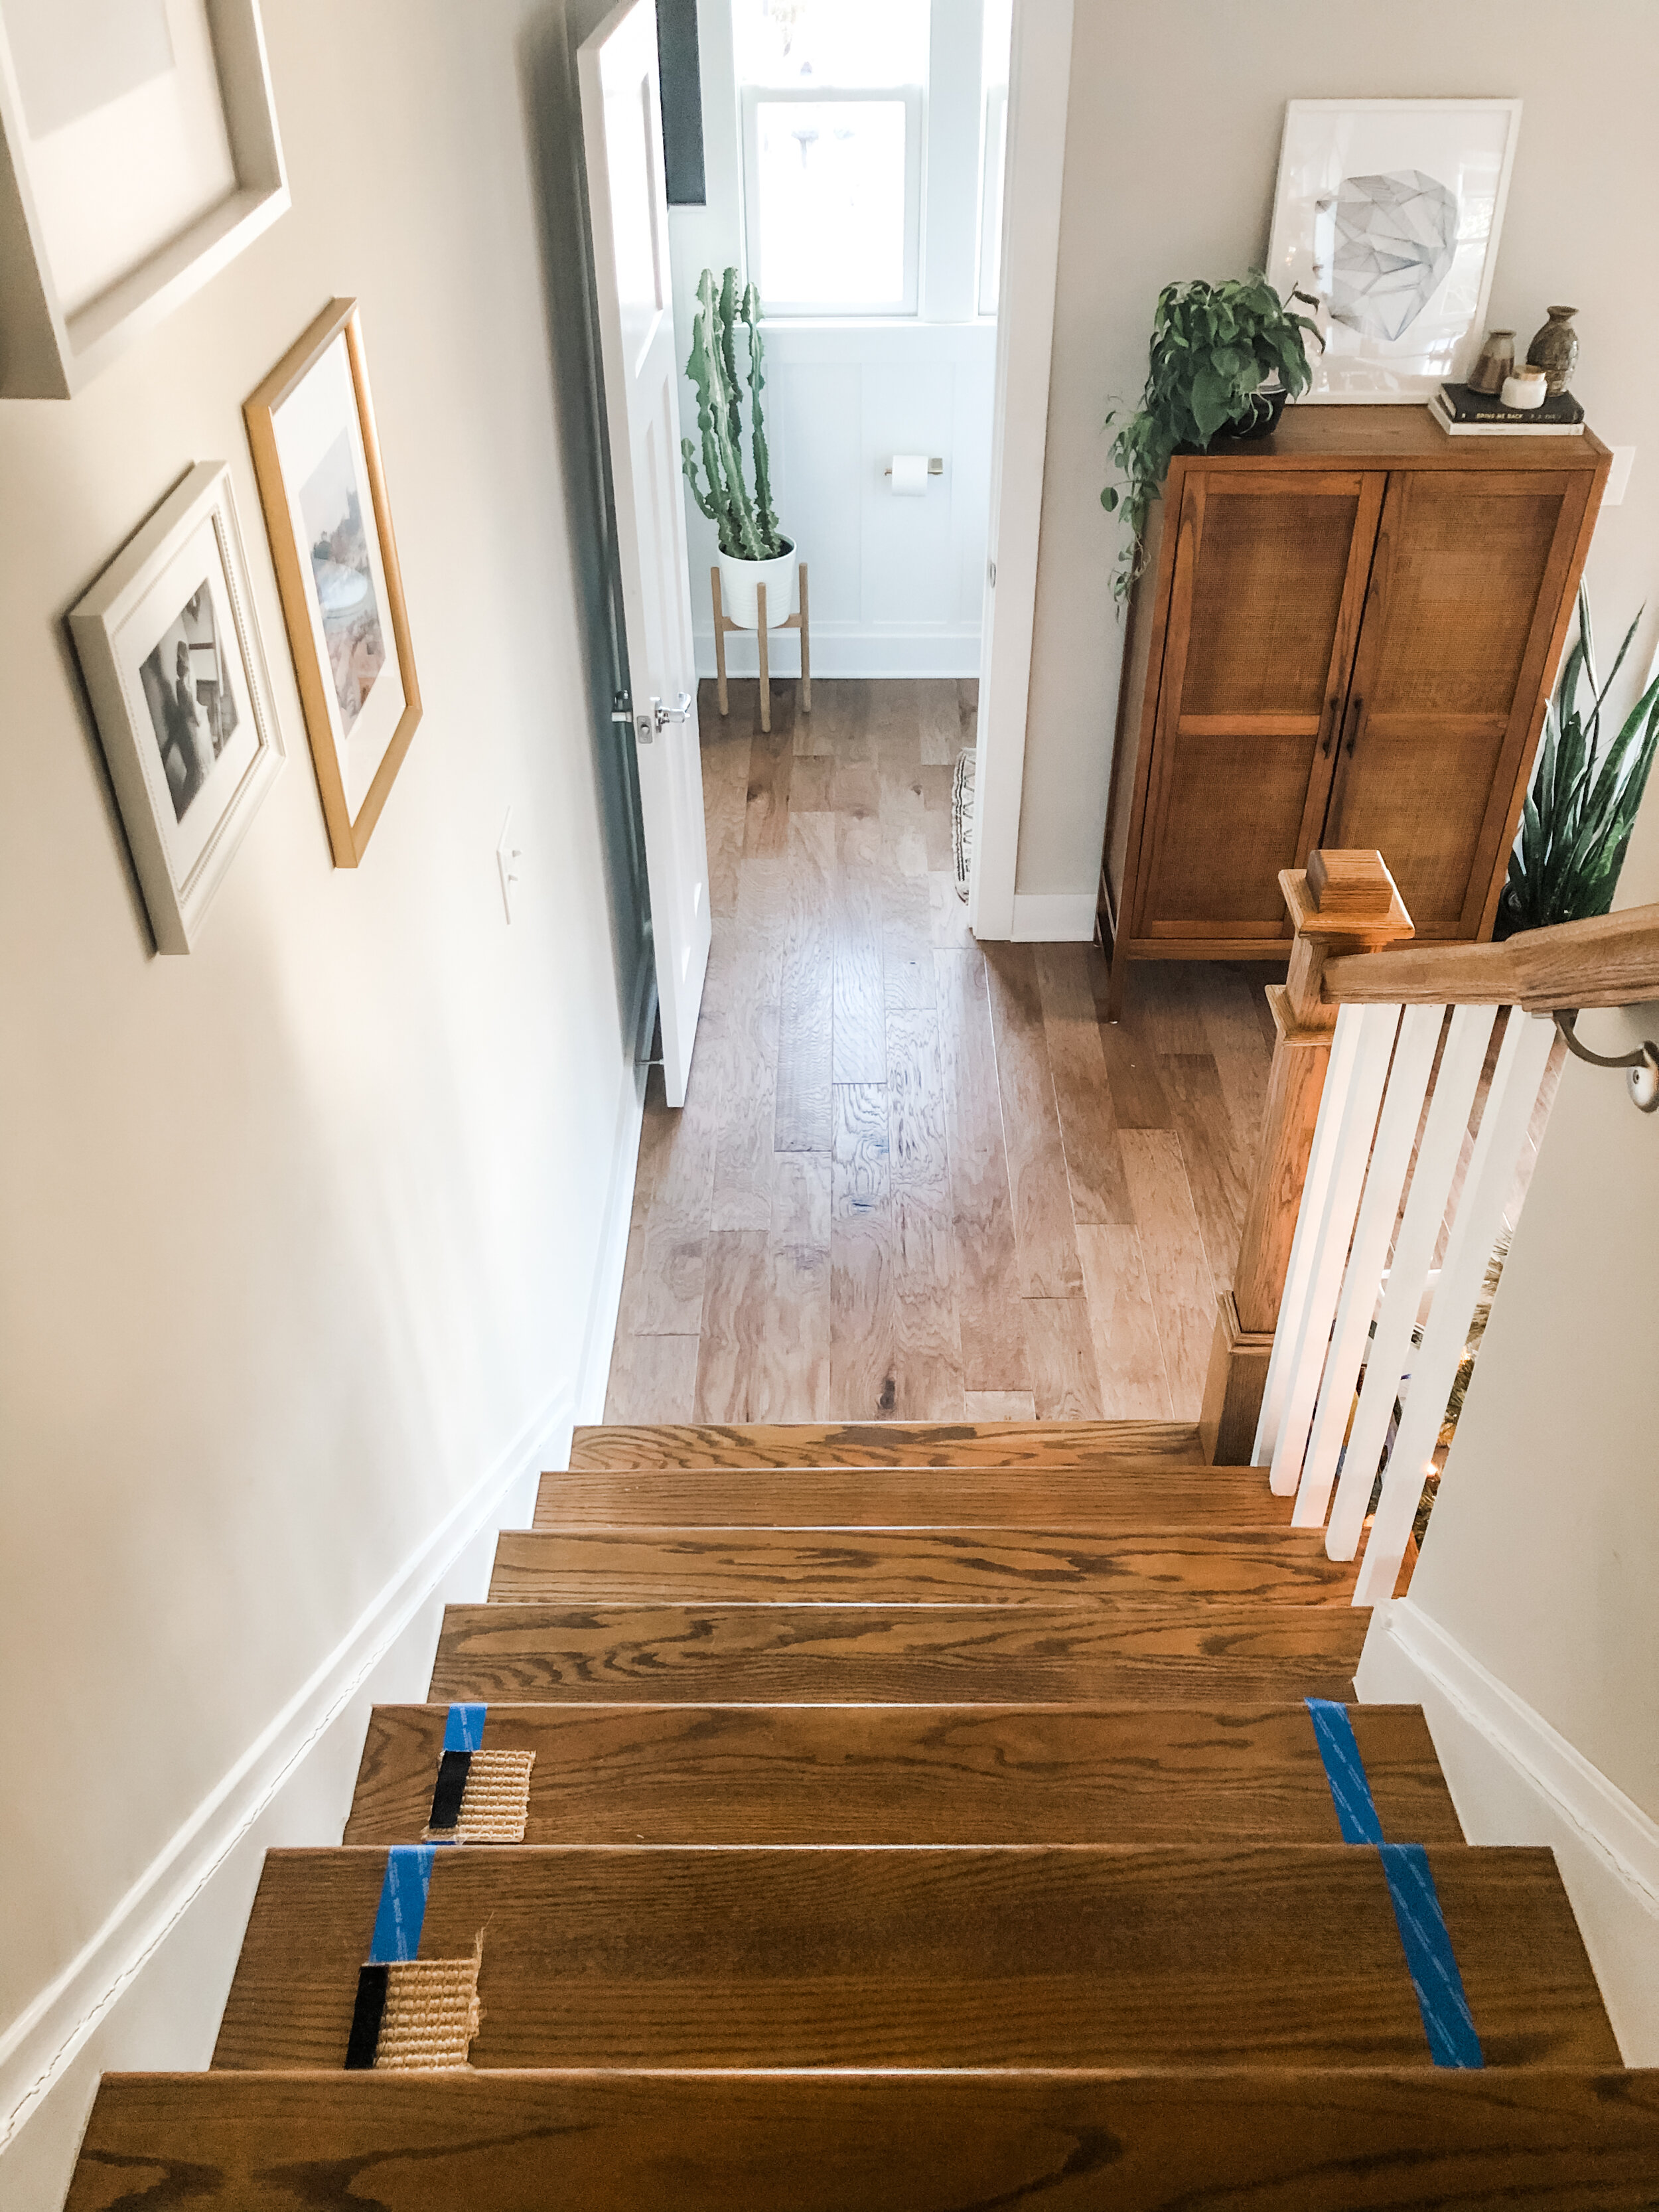
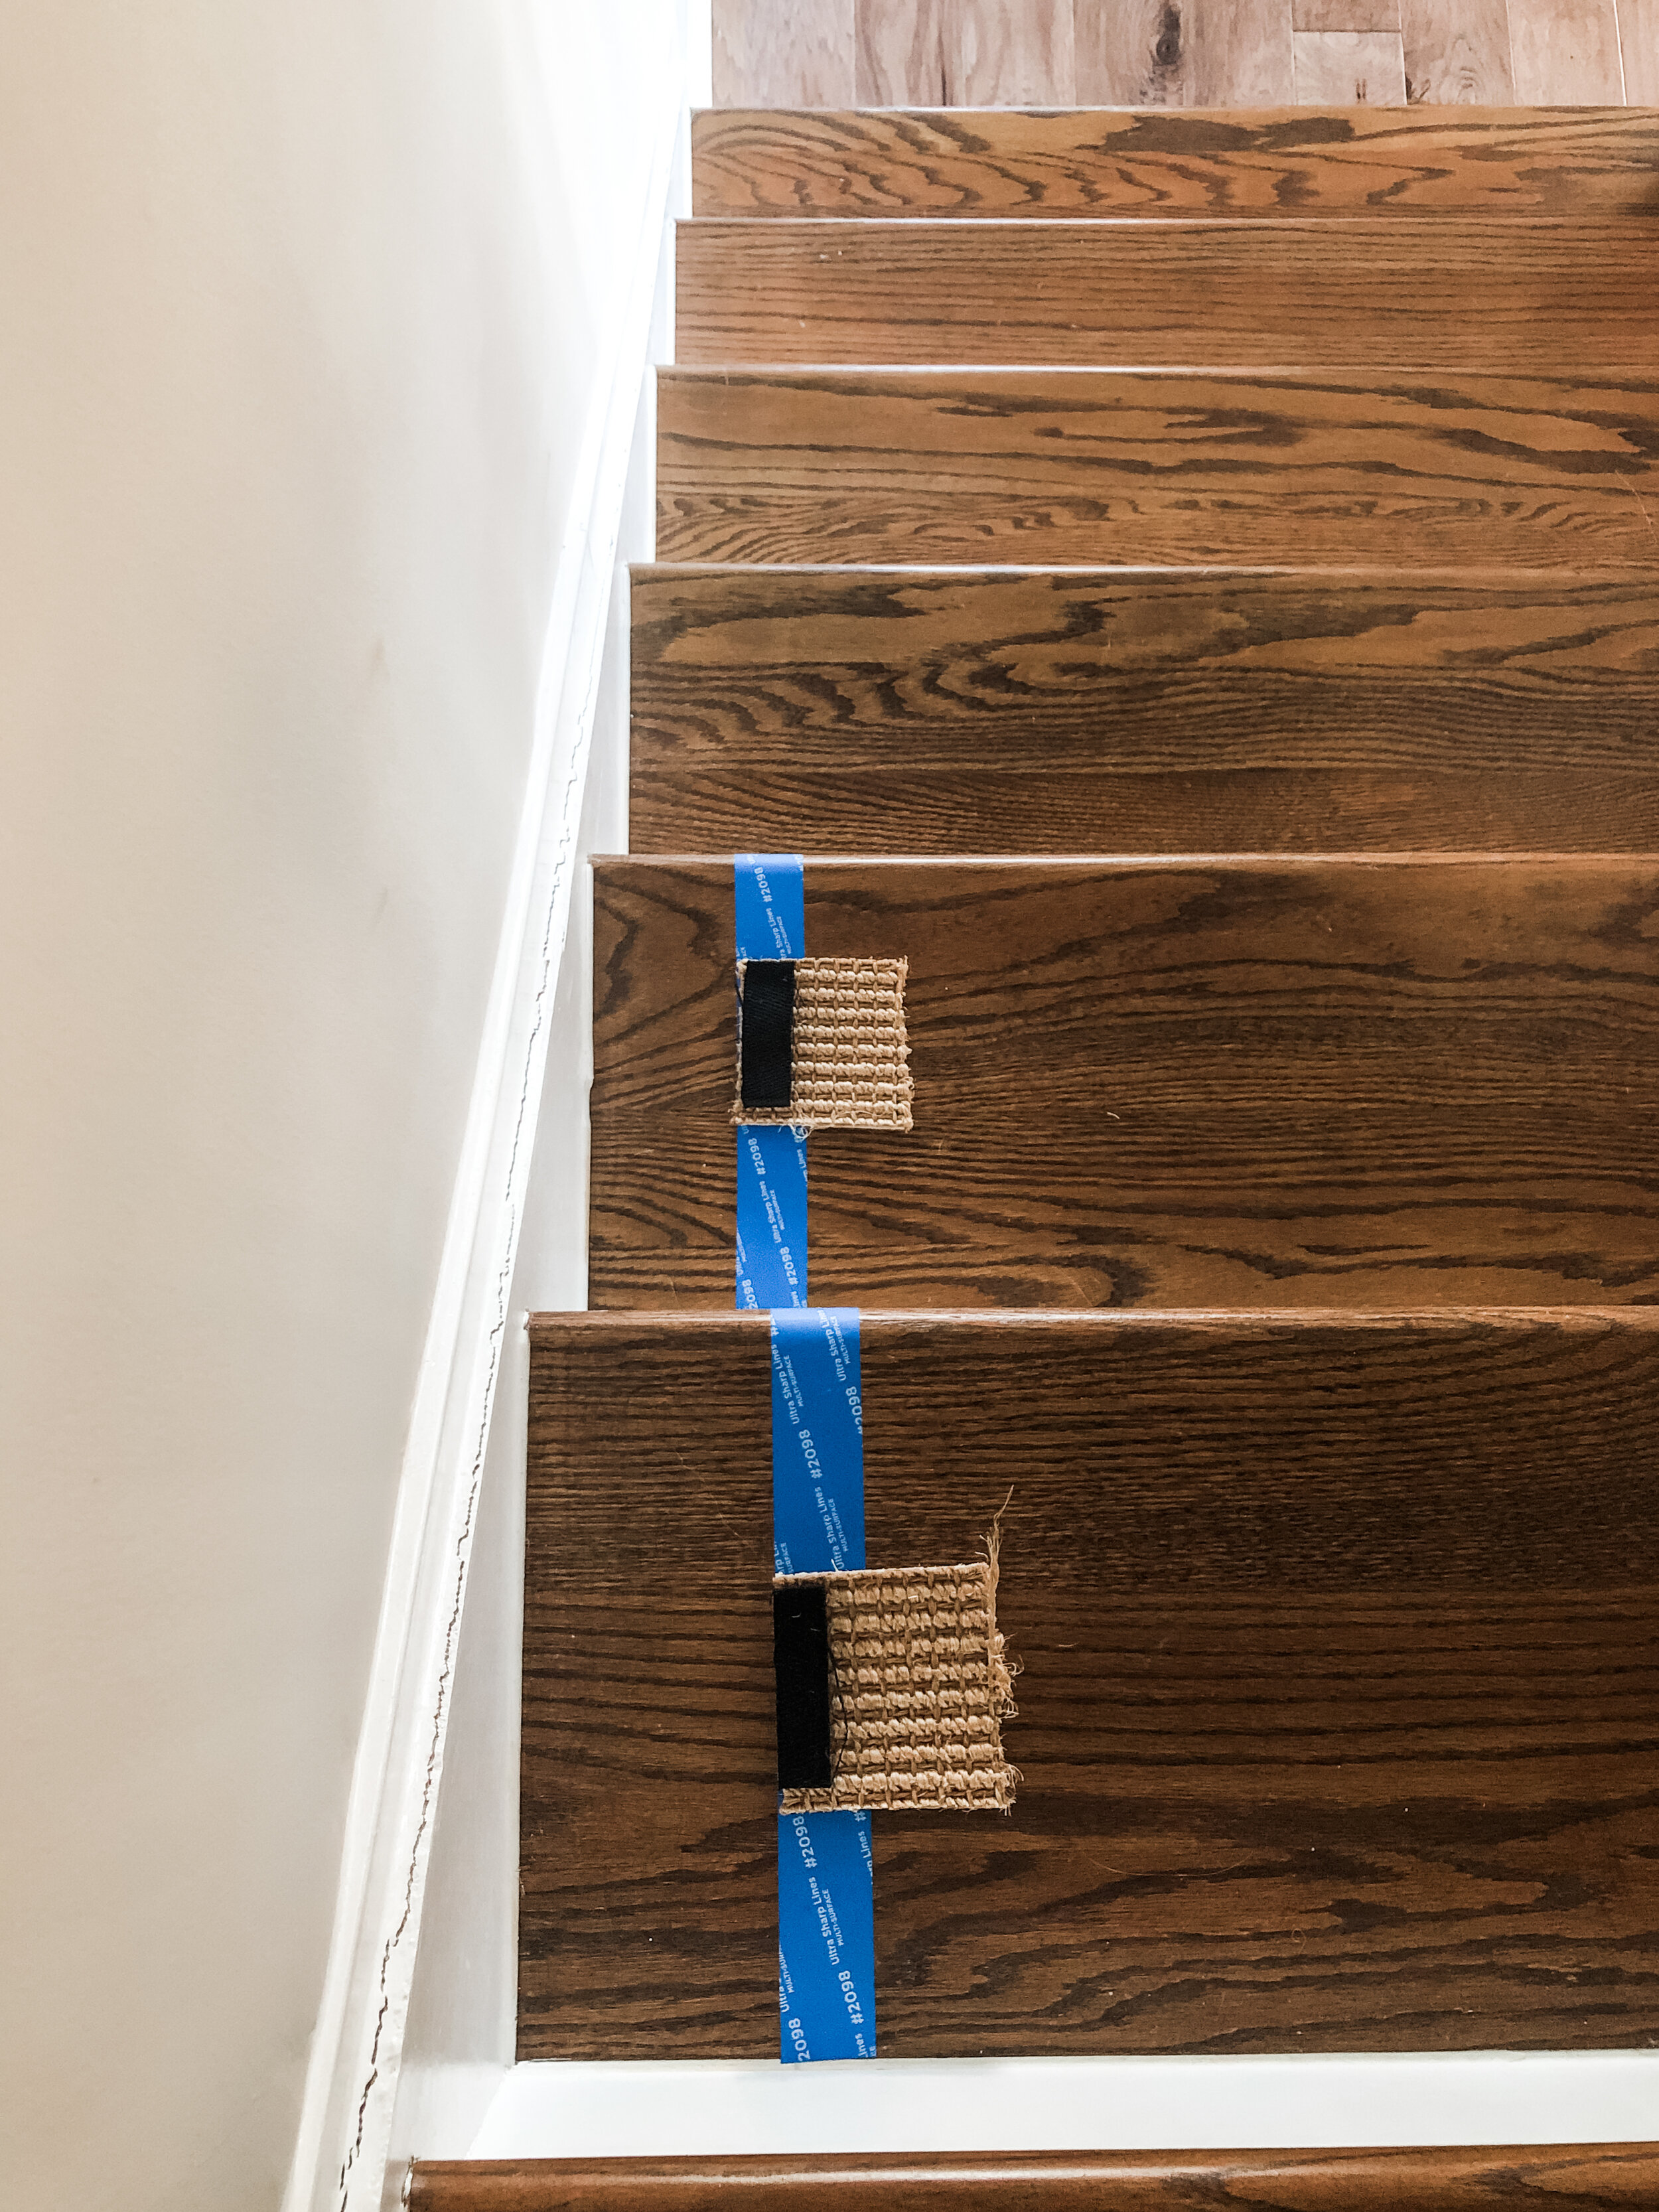
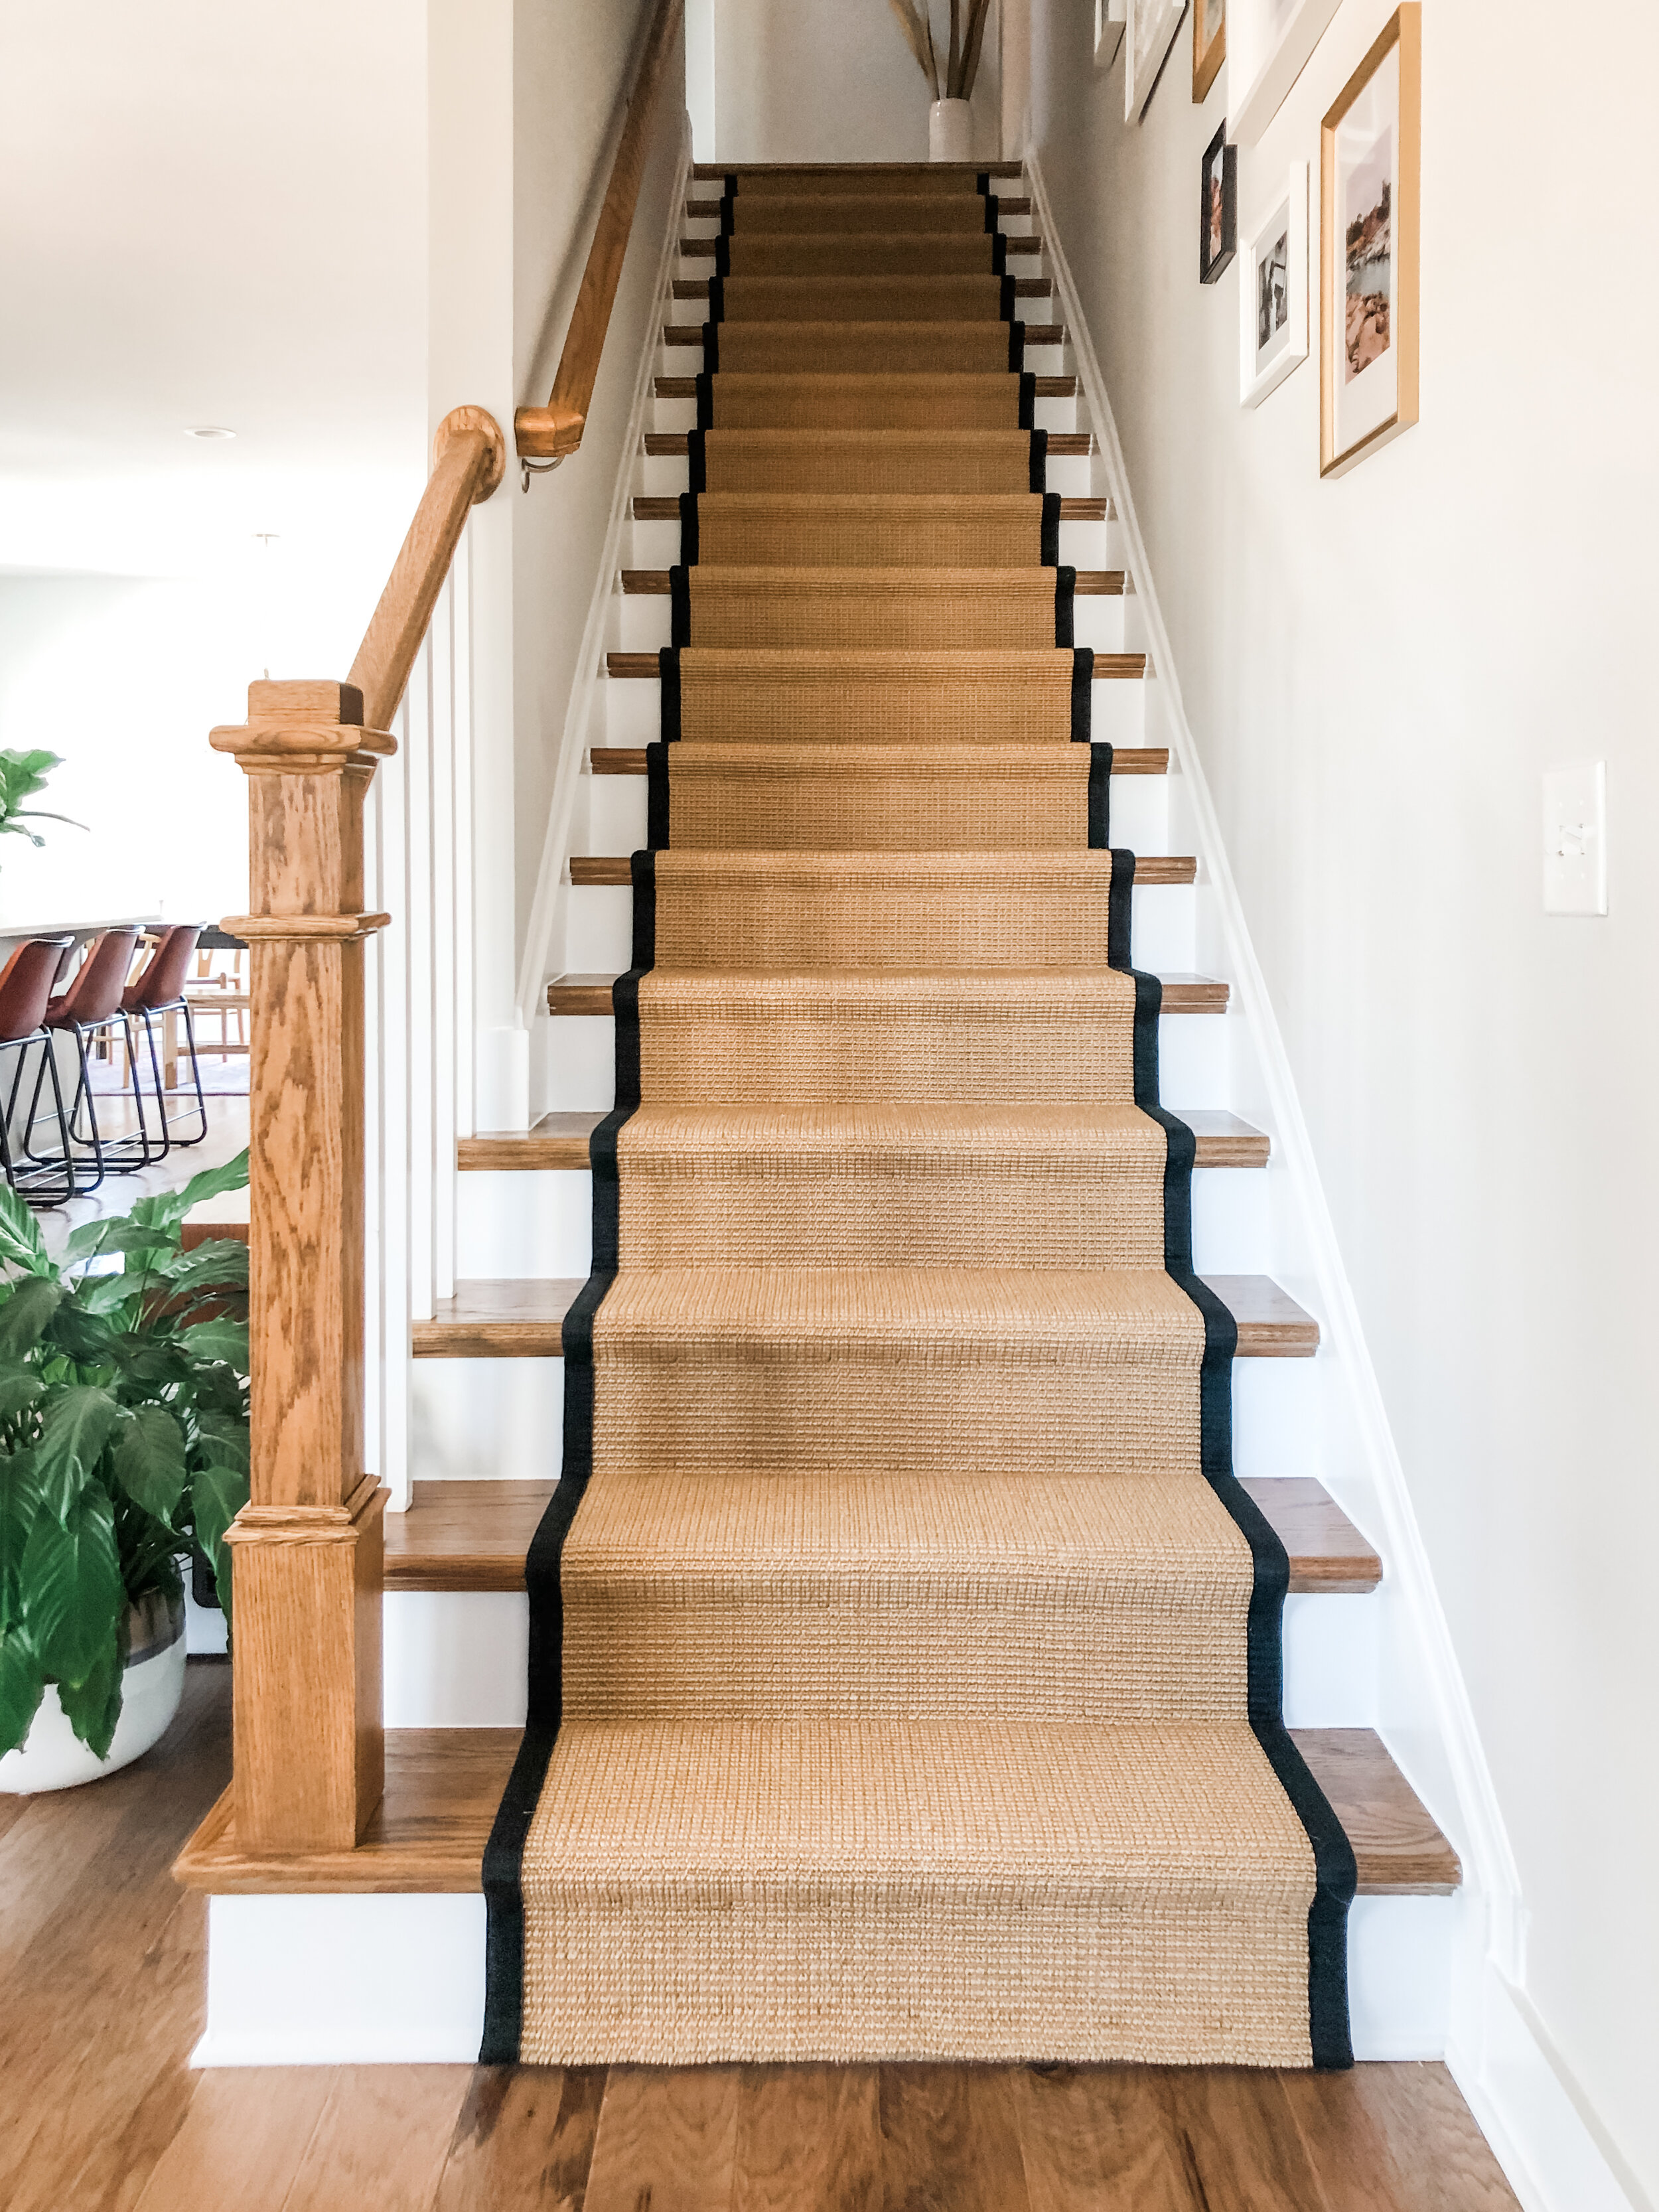
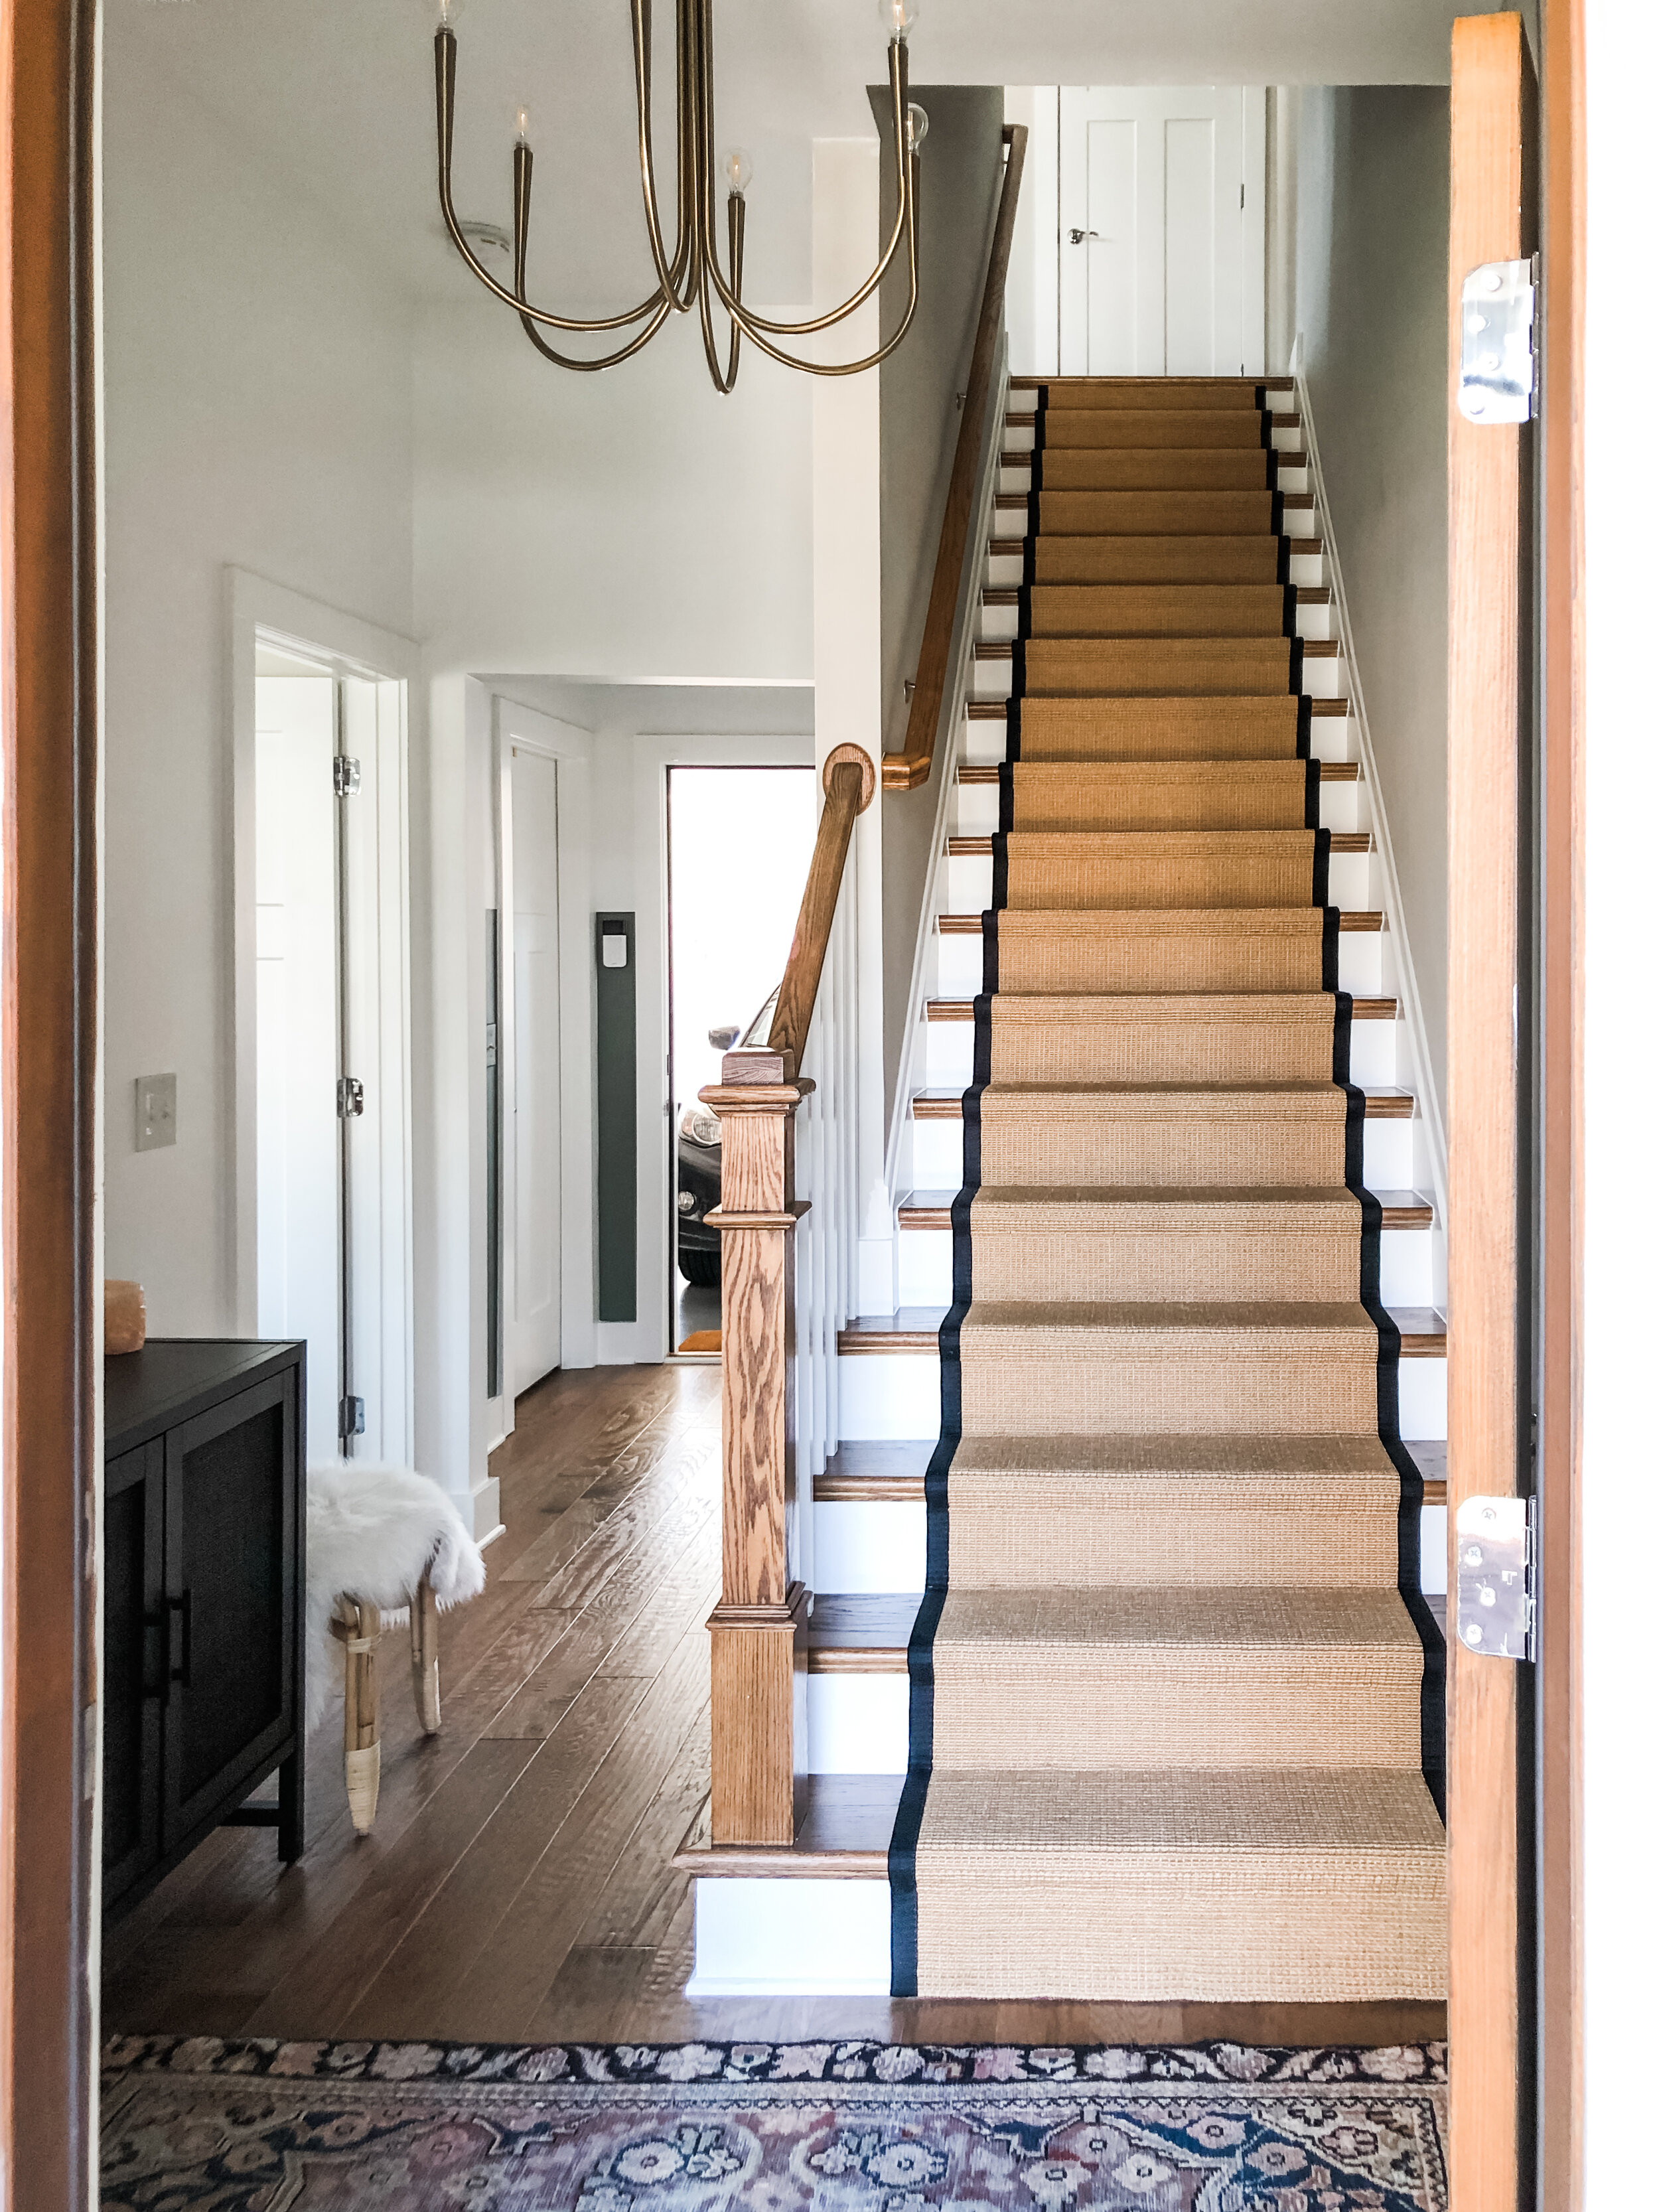
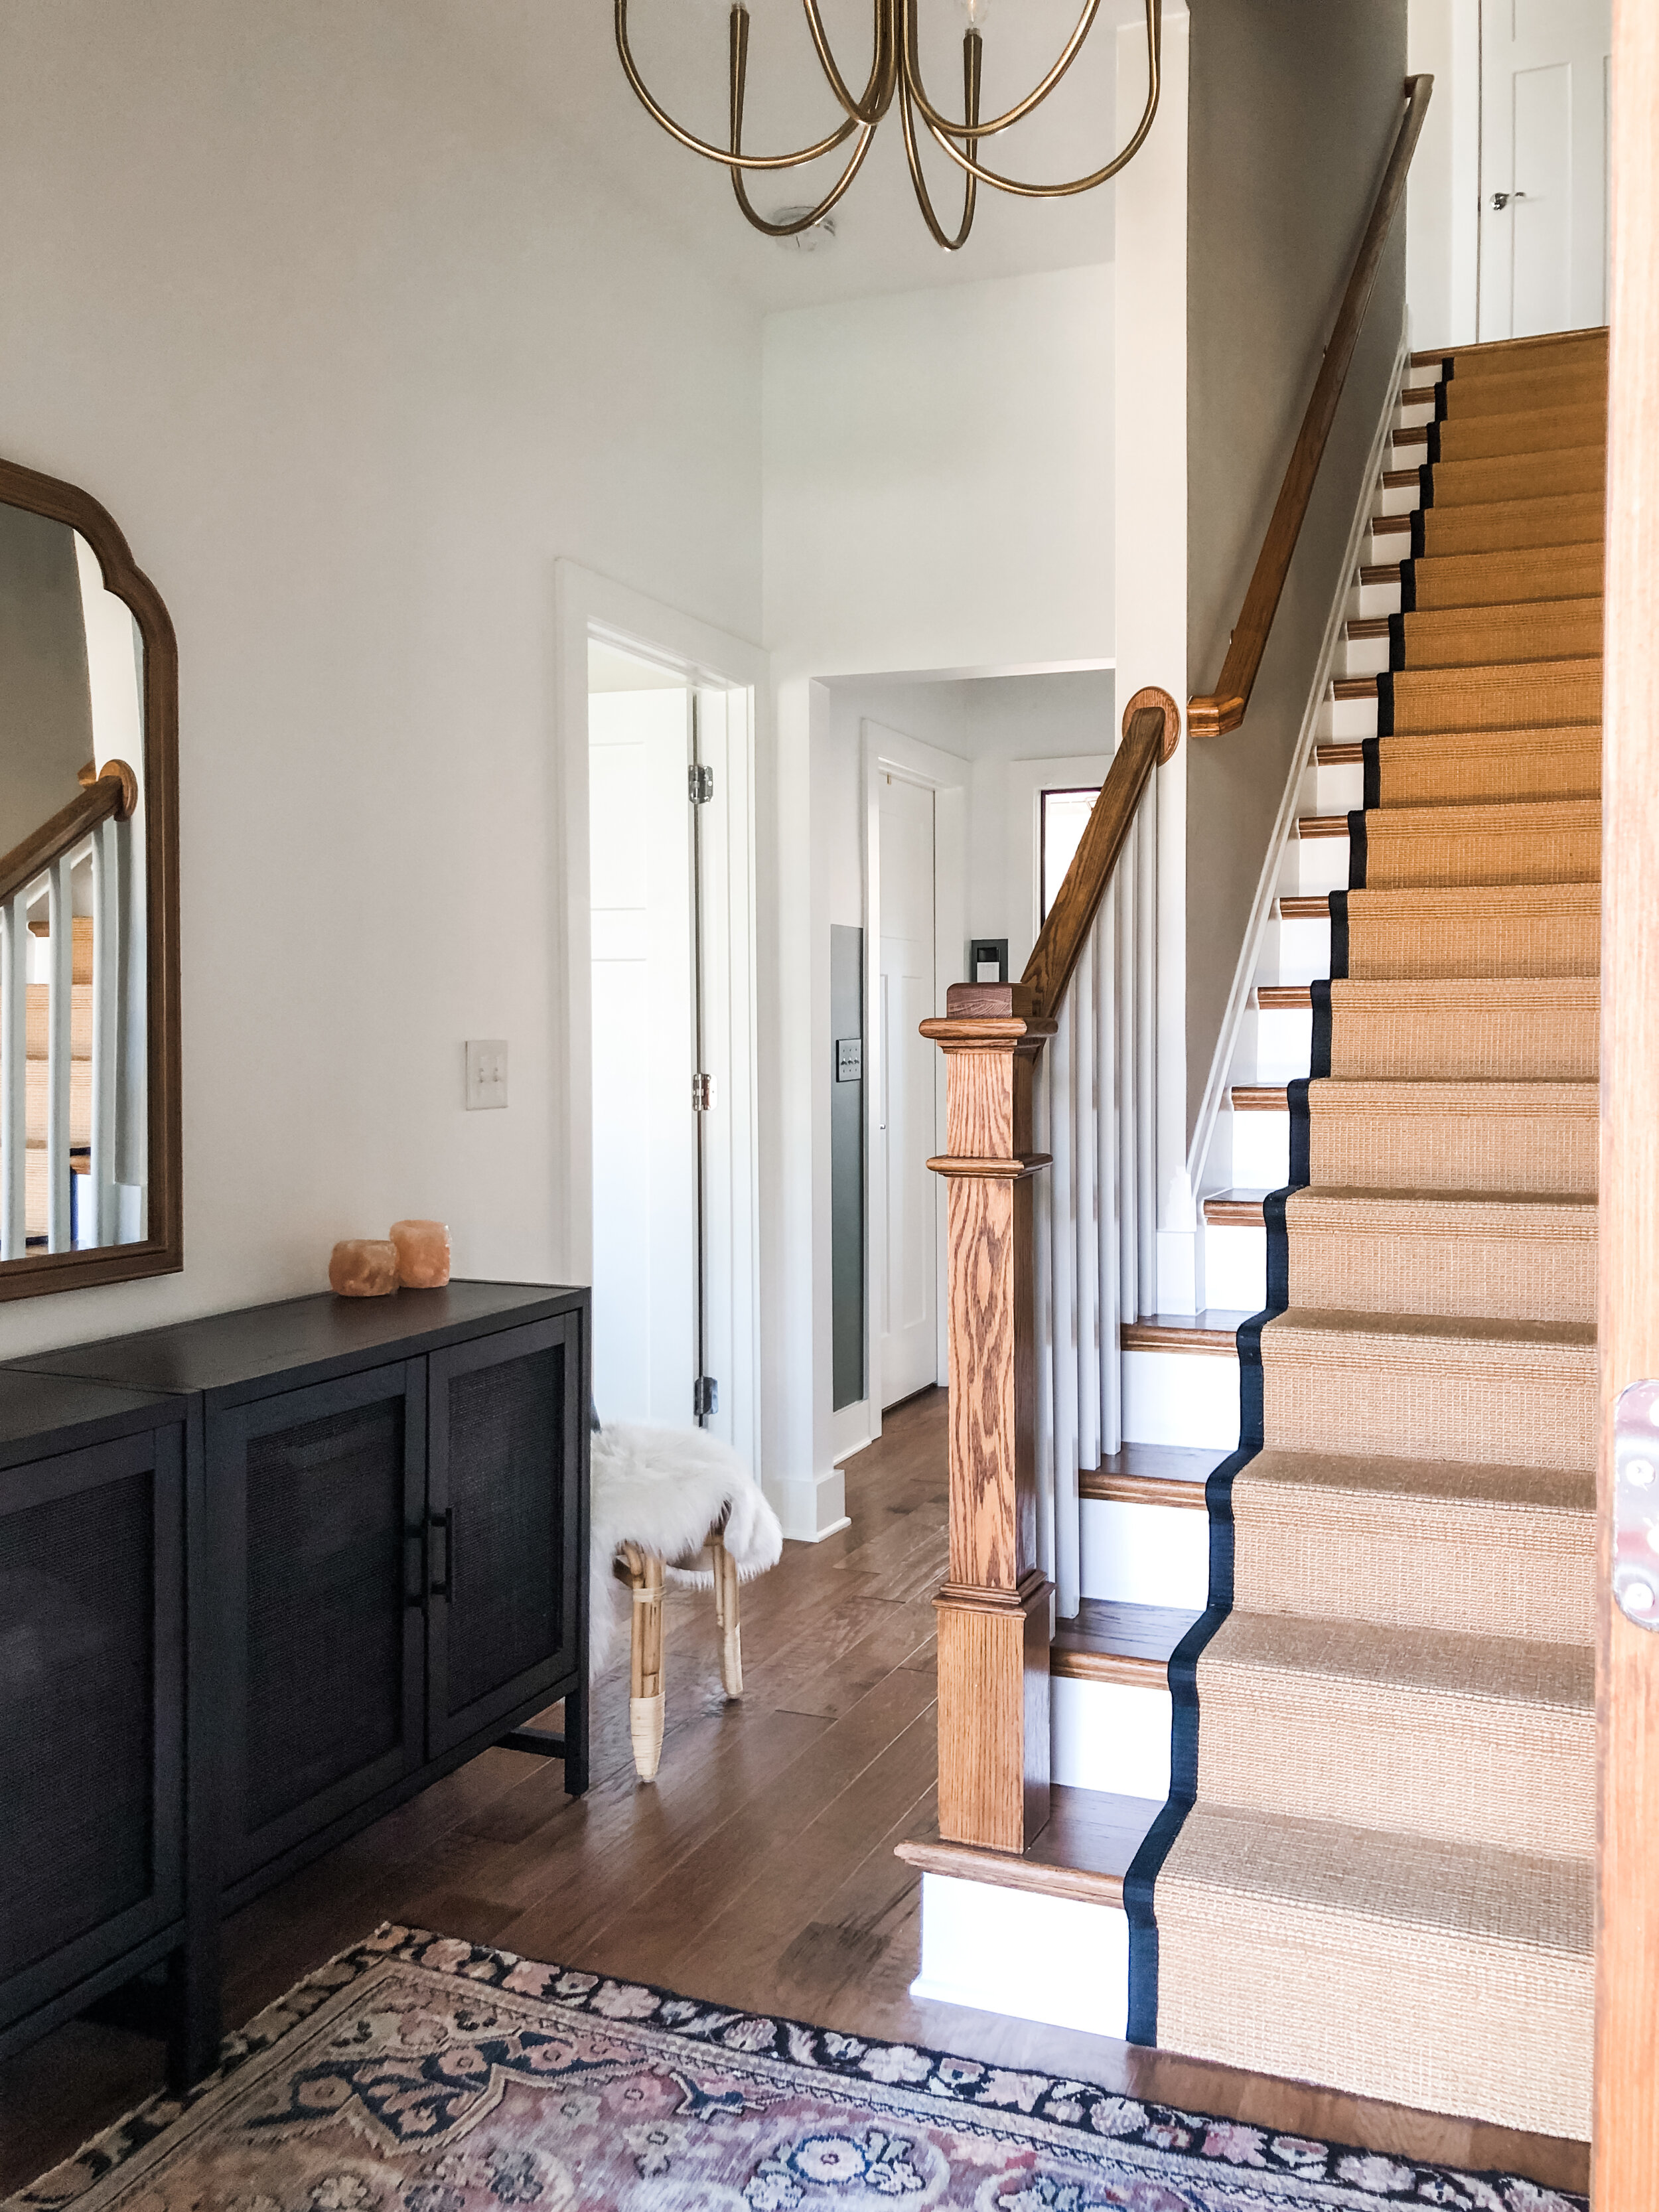
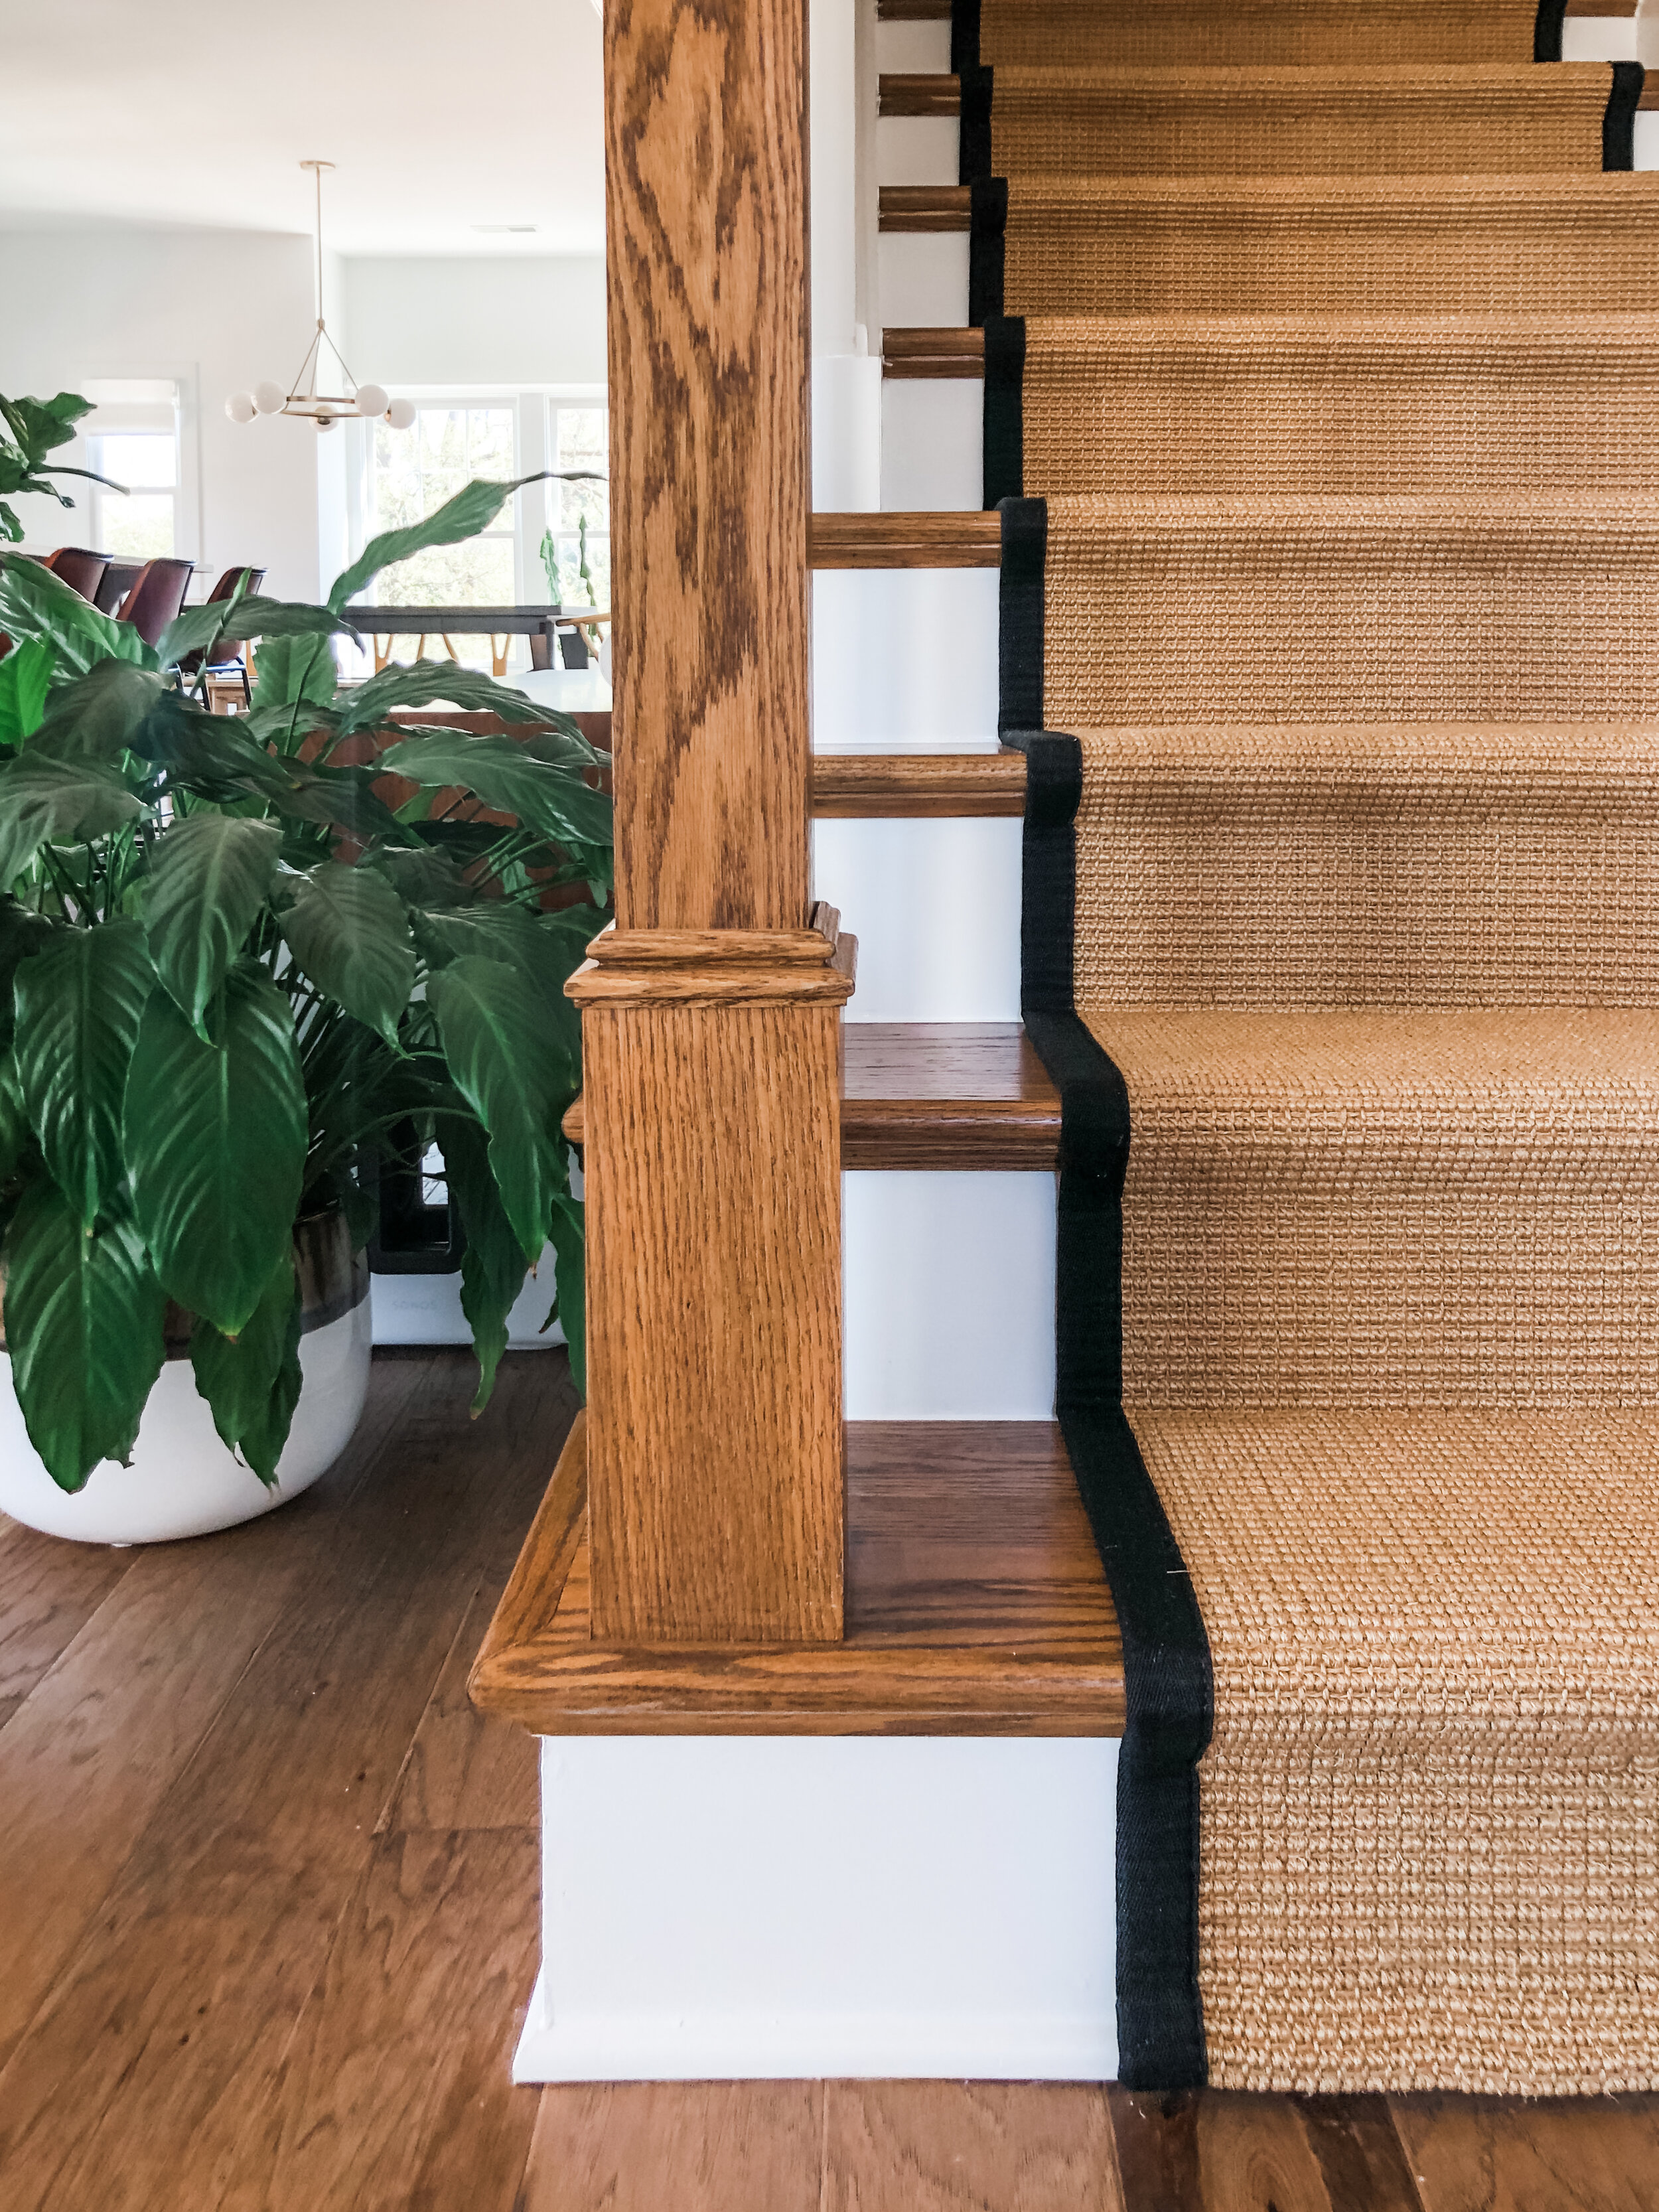
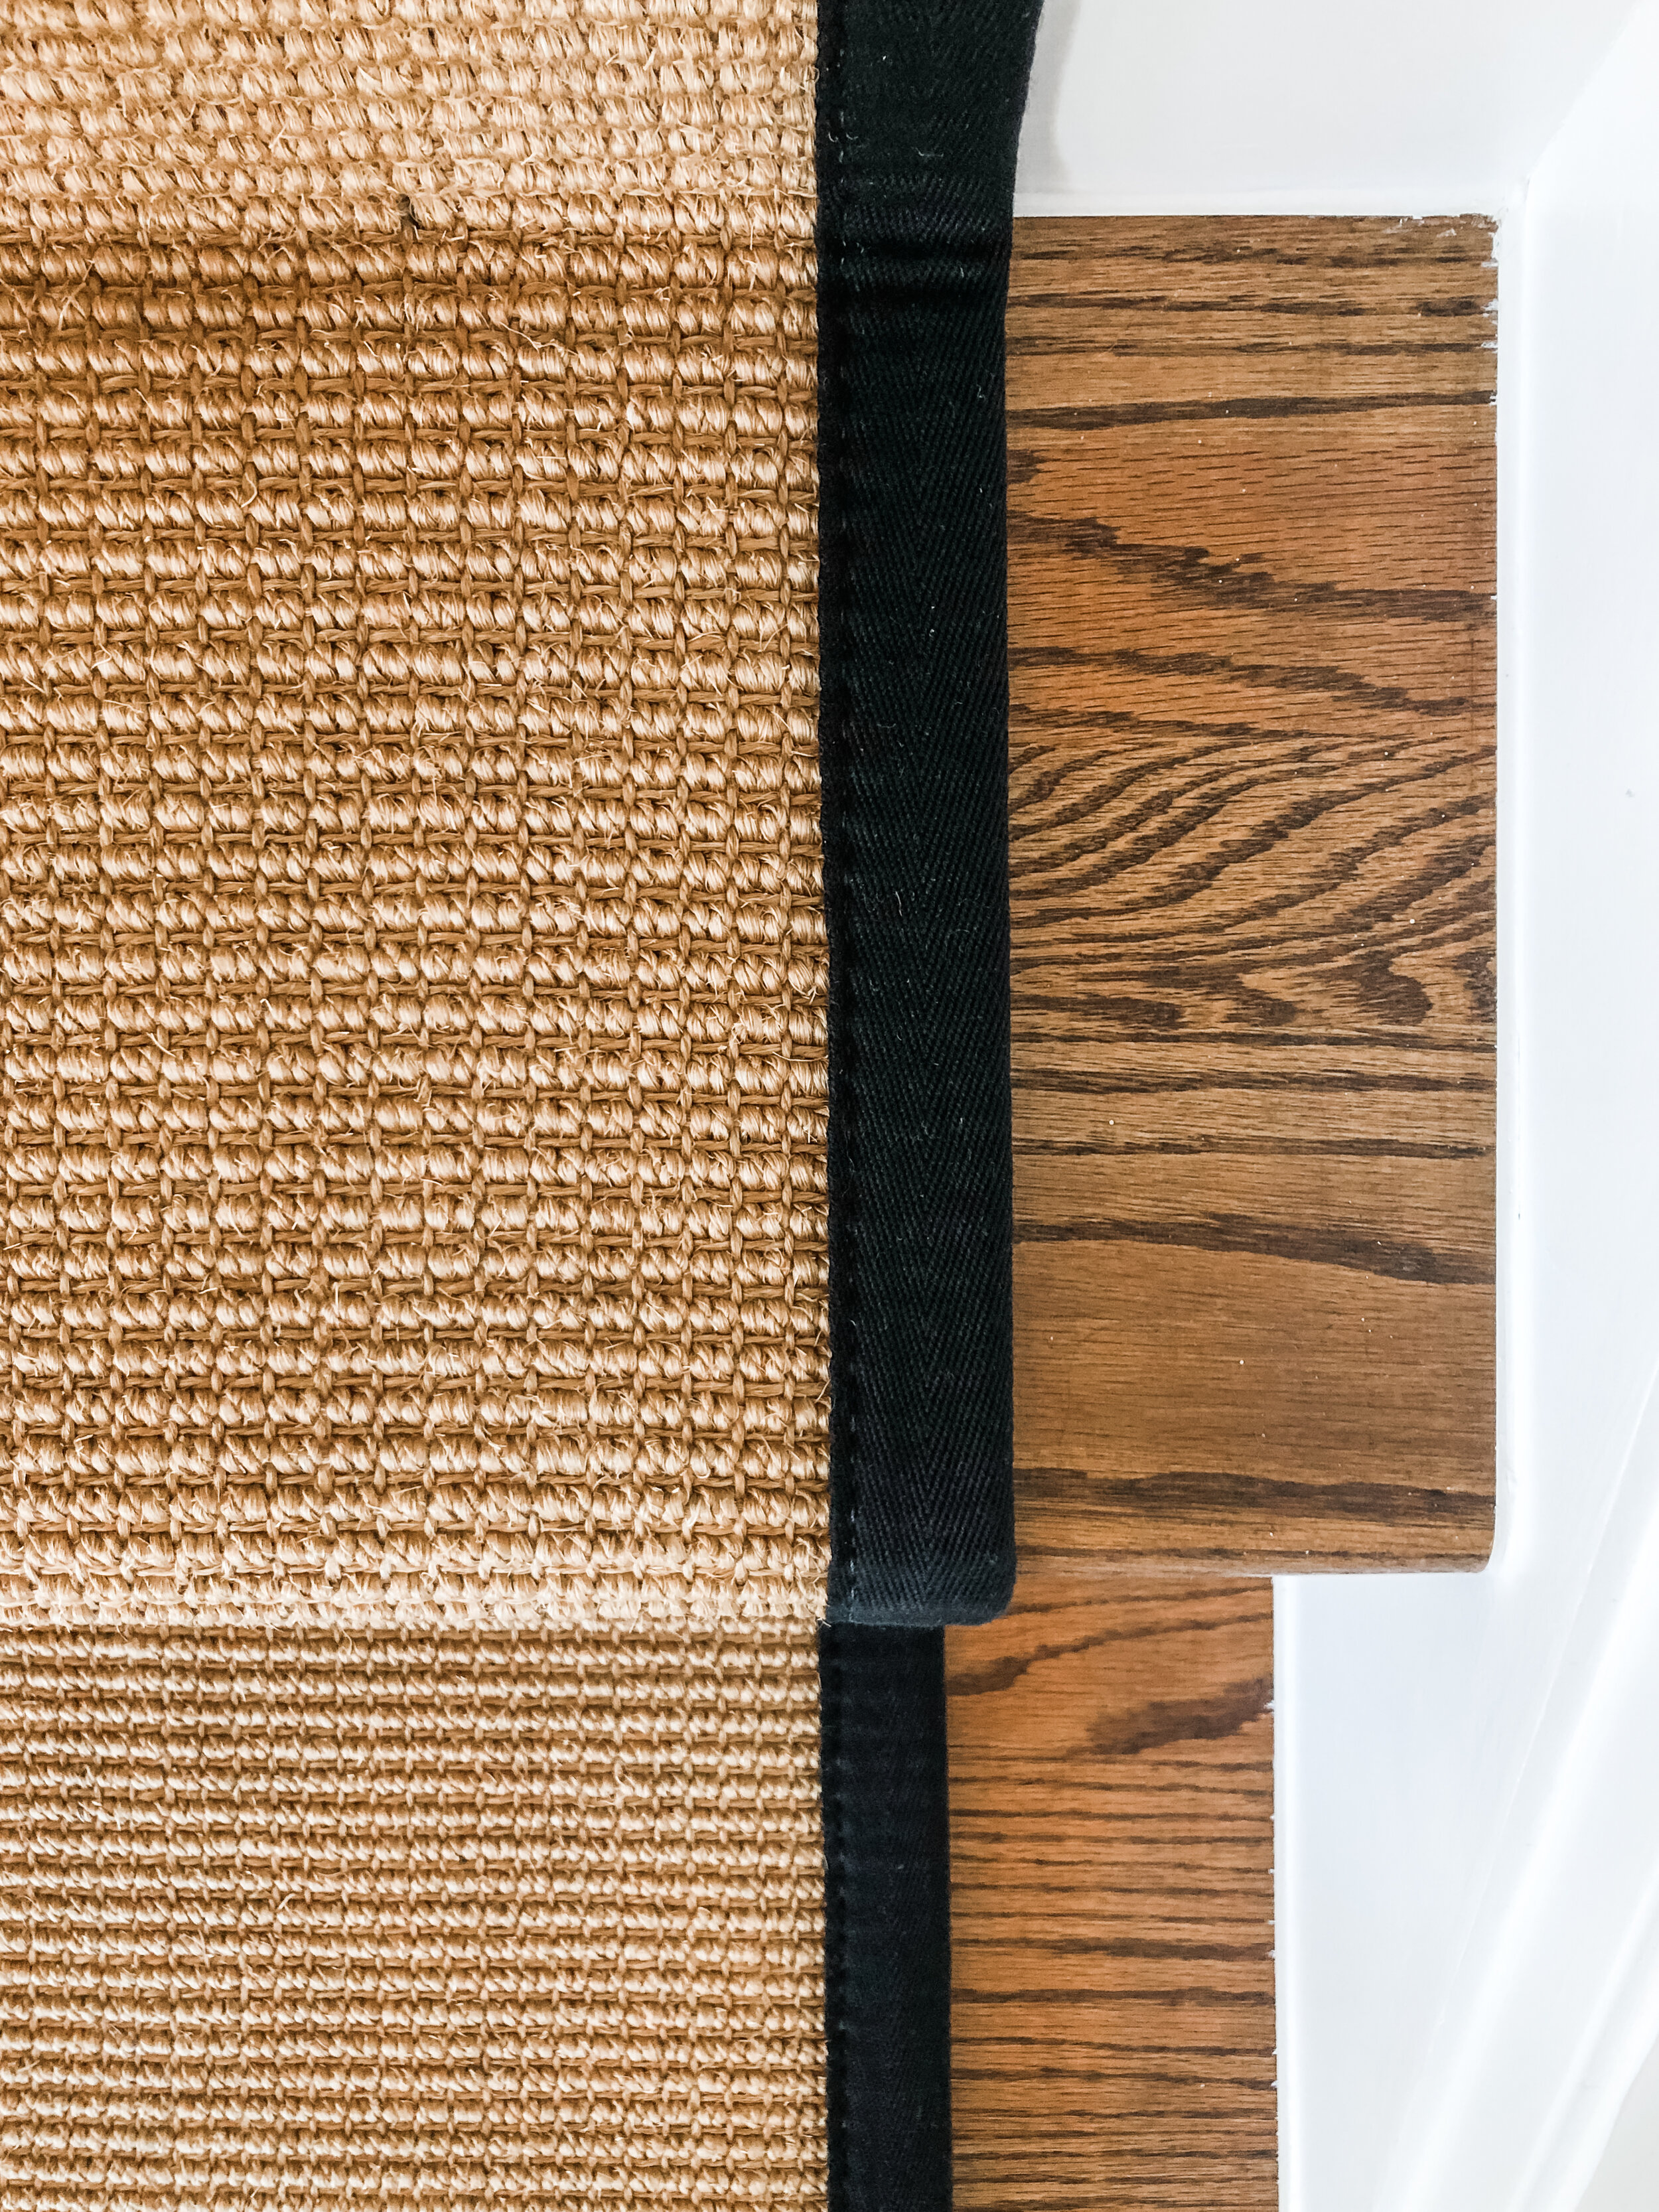
After getting samples from Sisal Rugs and picking our favorite, we followed their guide to measuring for stair runners. We used a string to measure down the riser, across the stair and under the lip to determine the length per stair. We took the string length and multiplied it by the number of stairs. Our first-floor staircase has 17 steps and the second staircase has 16 steps. Sisal Rug’s directions recommend adding six inches to the end, but we added two feet to the overall length to both runners, just for peace of mind. After taping off some suggested widths, we decided on the runners being 32 inches wide, leaving four inches of the exposed stair on either side.
“Full disclosure: this was the hardest project we’ve ever taken on ourselves and we would not do it again… But we are super happy with the results!”
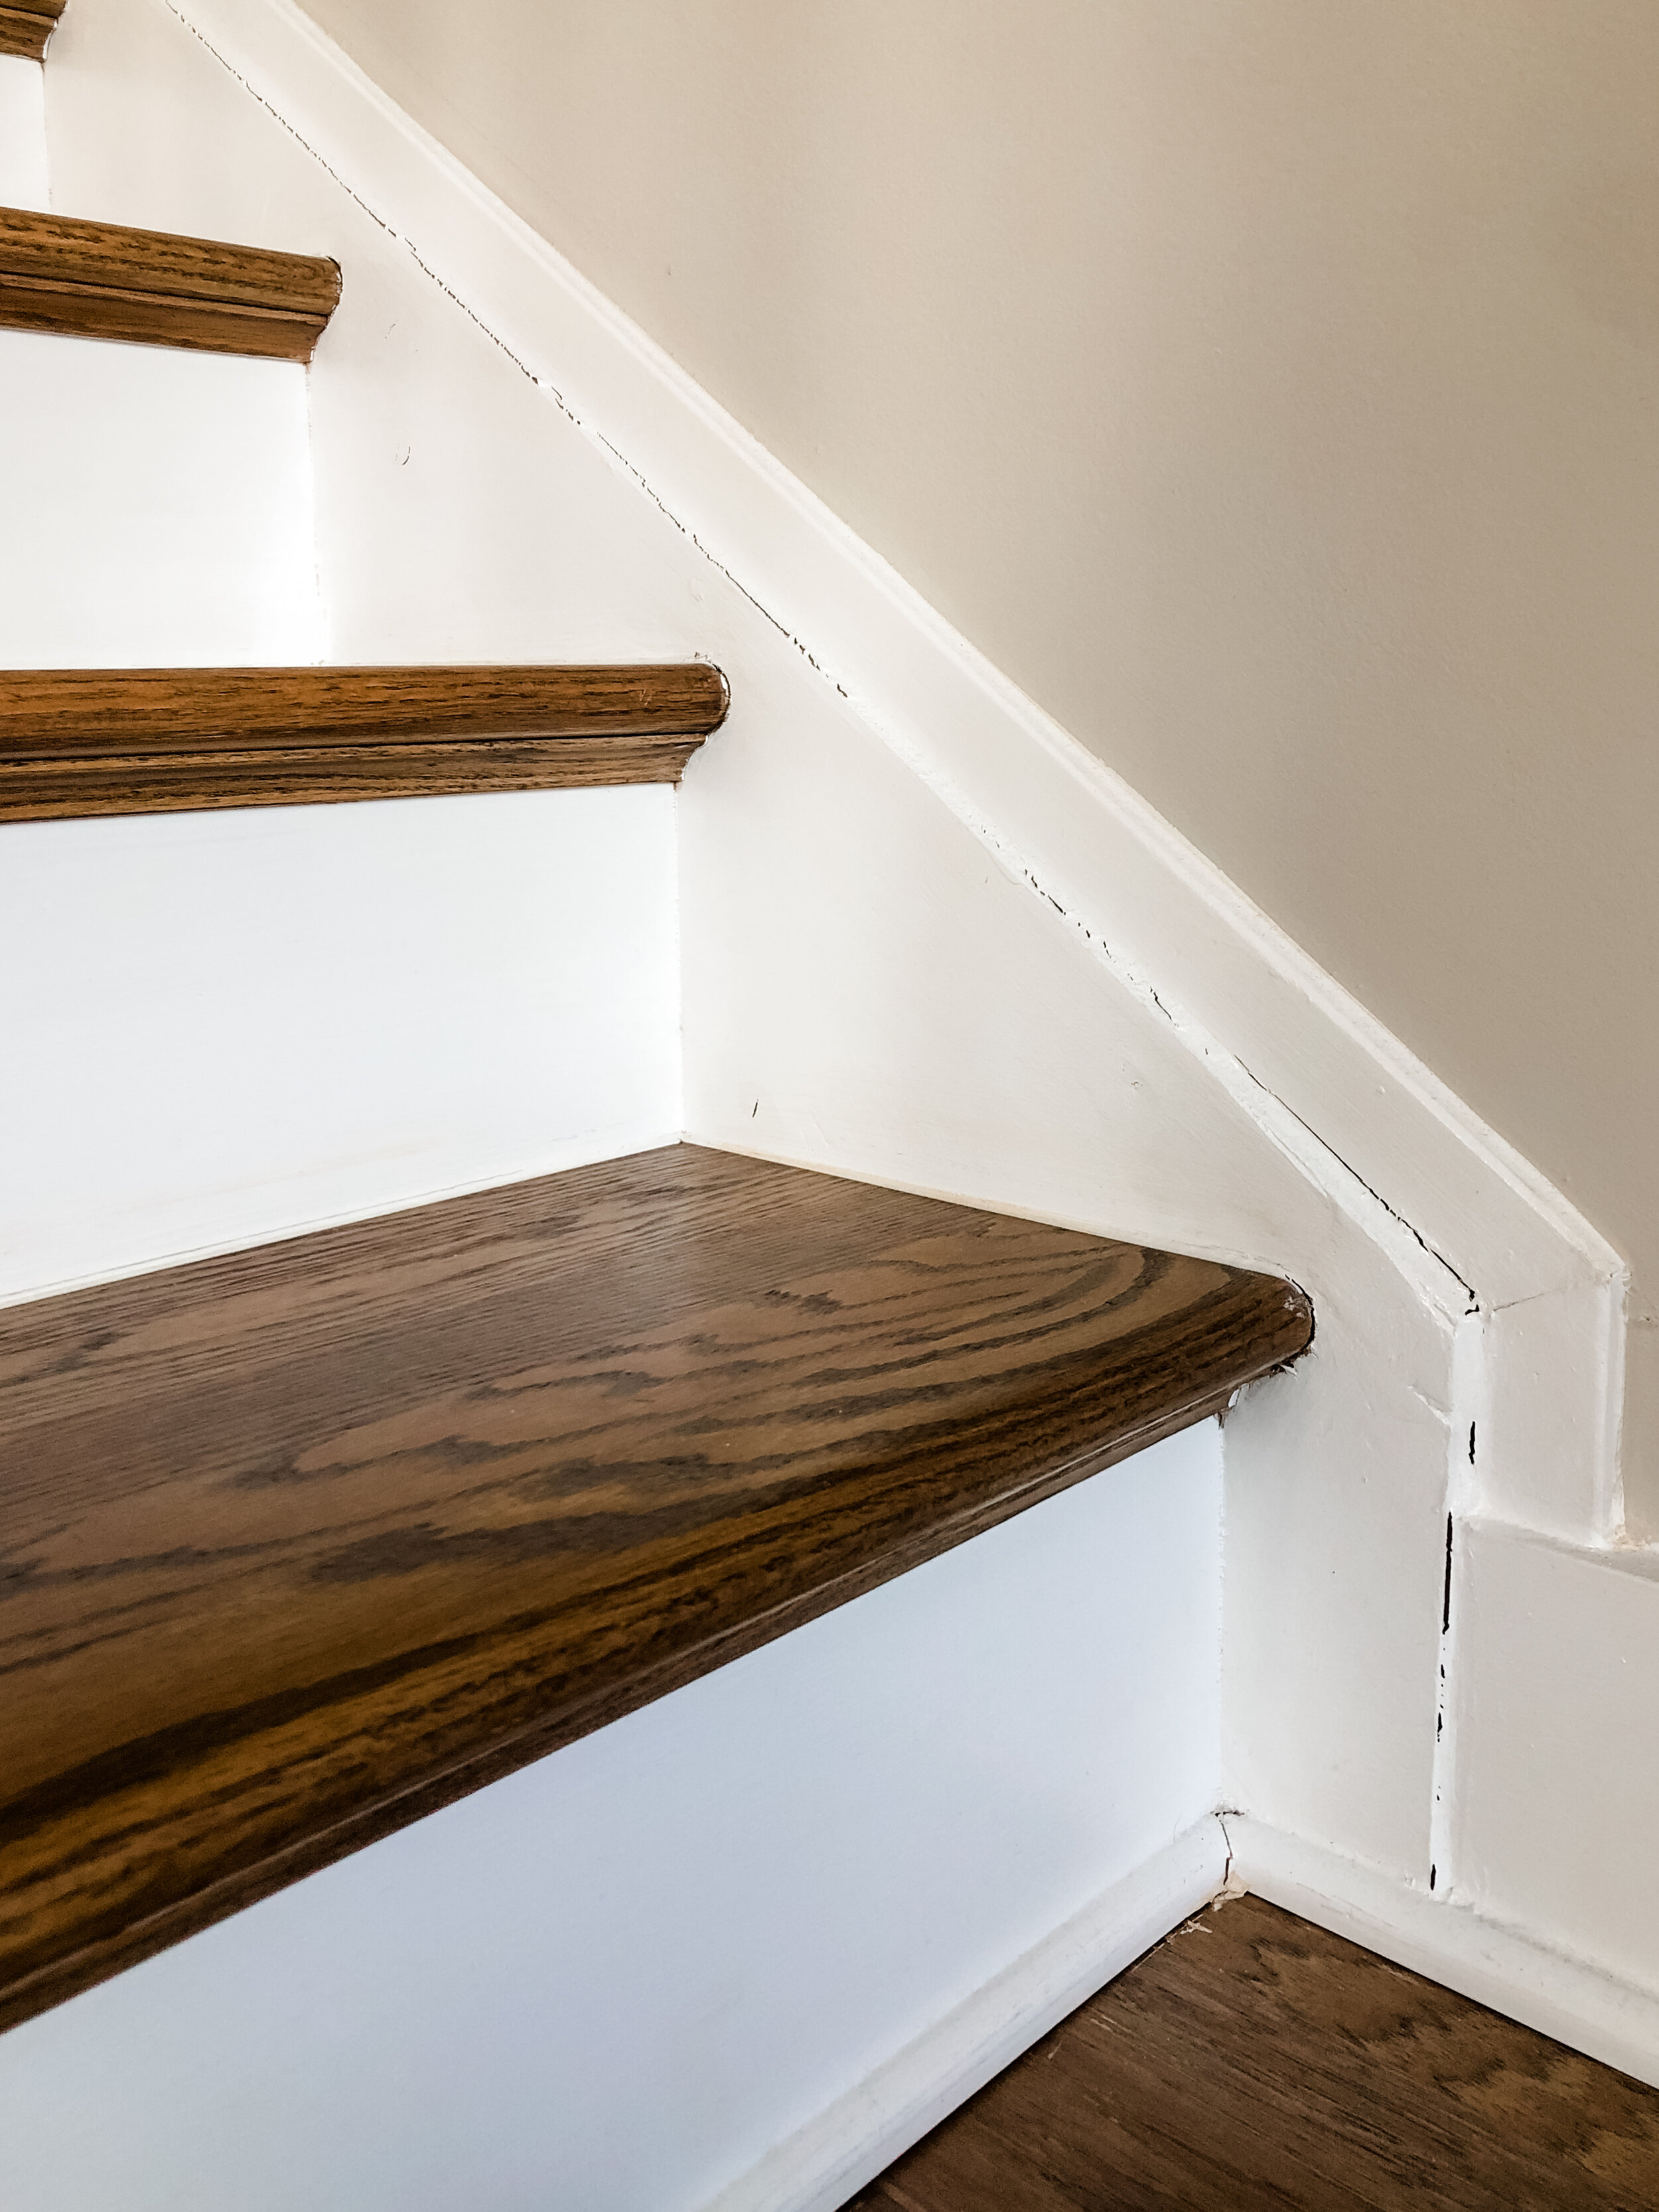
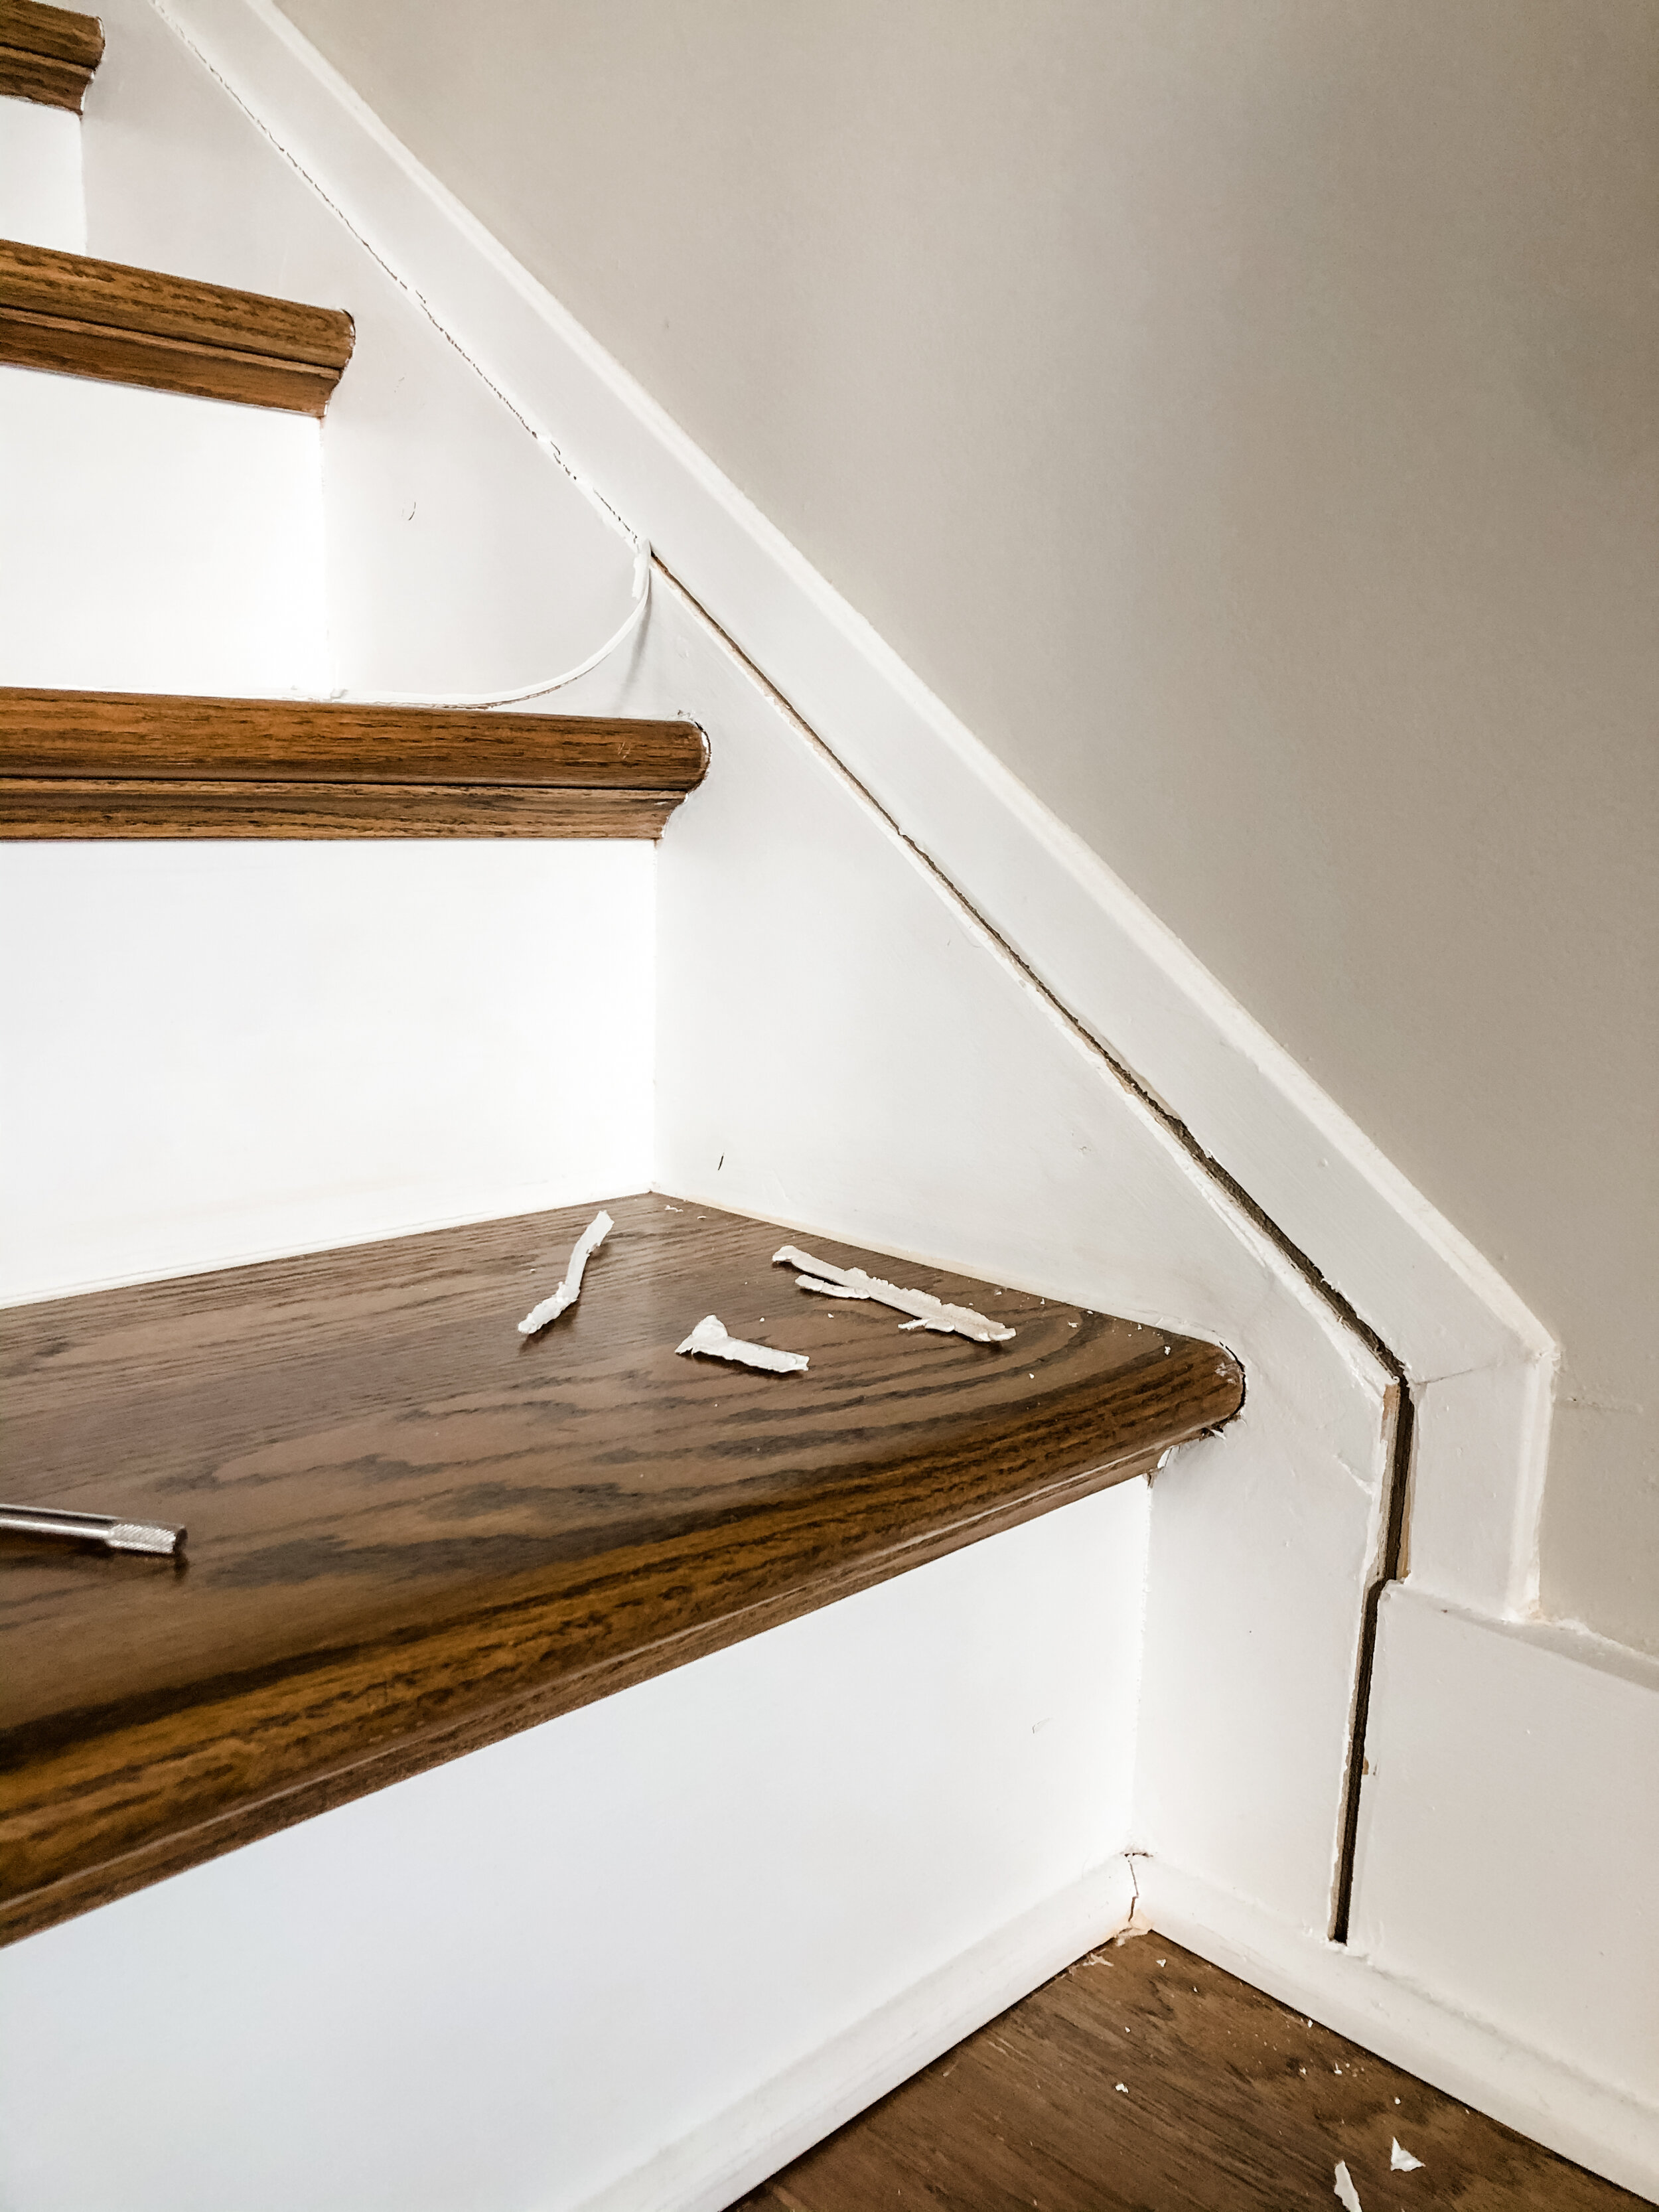
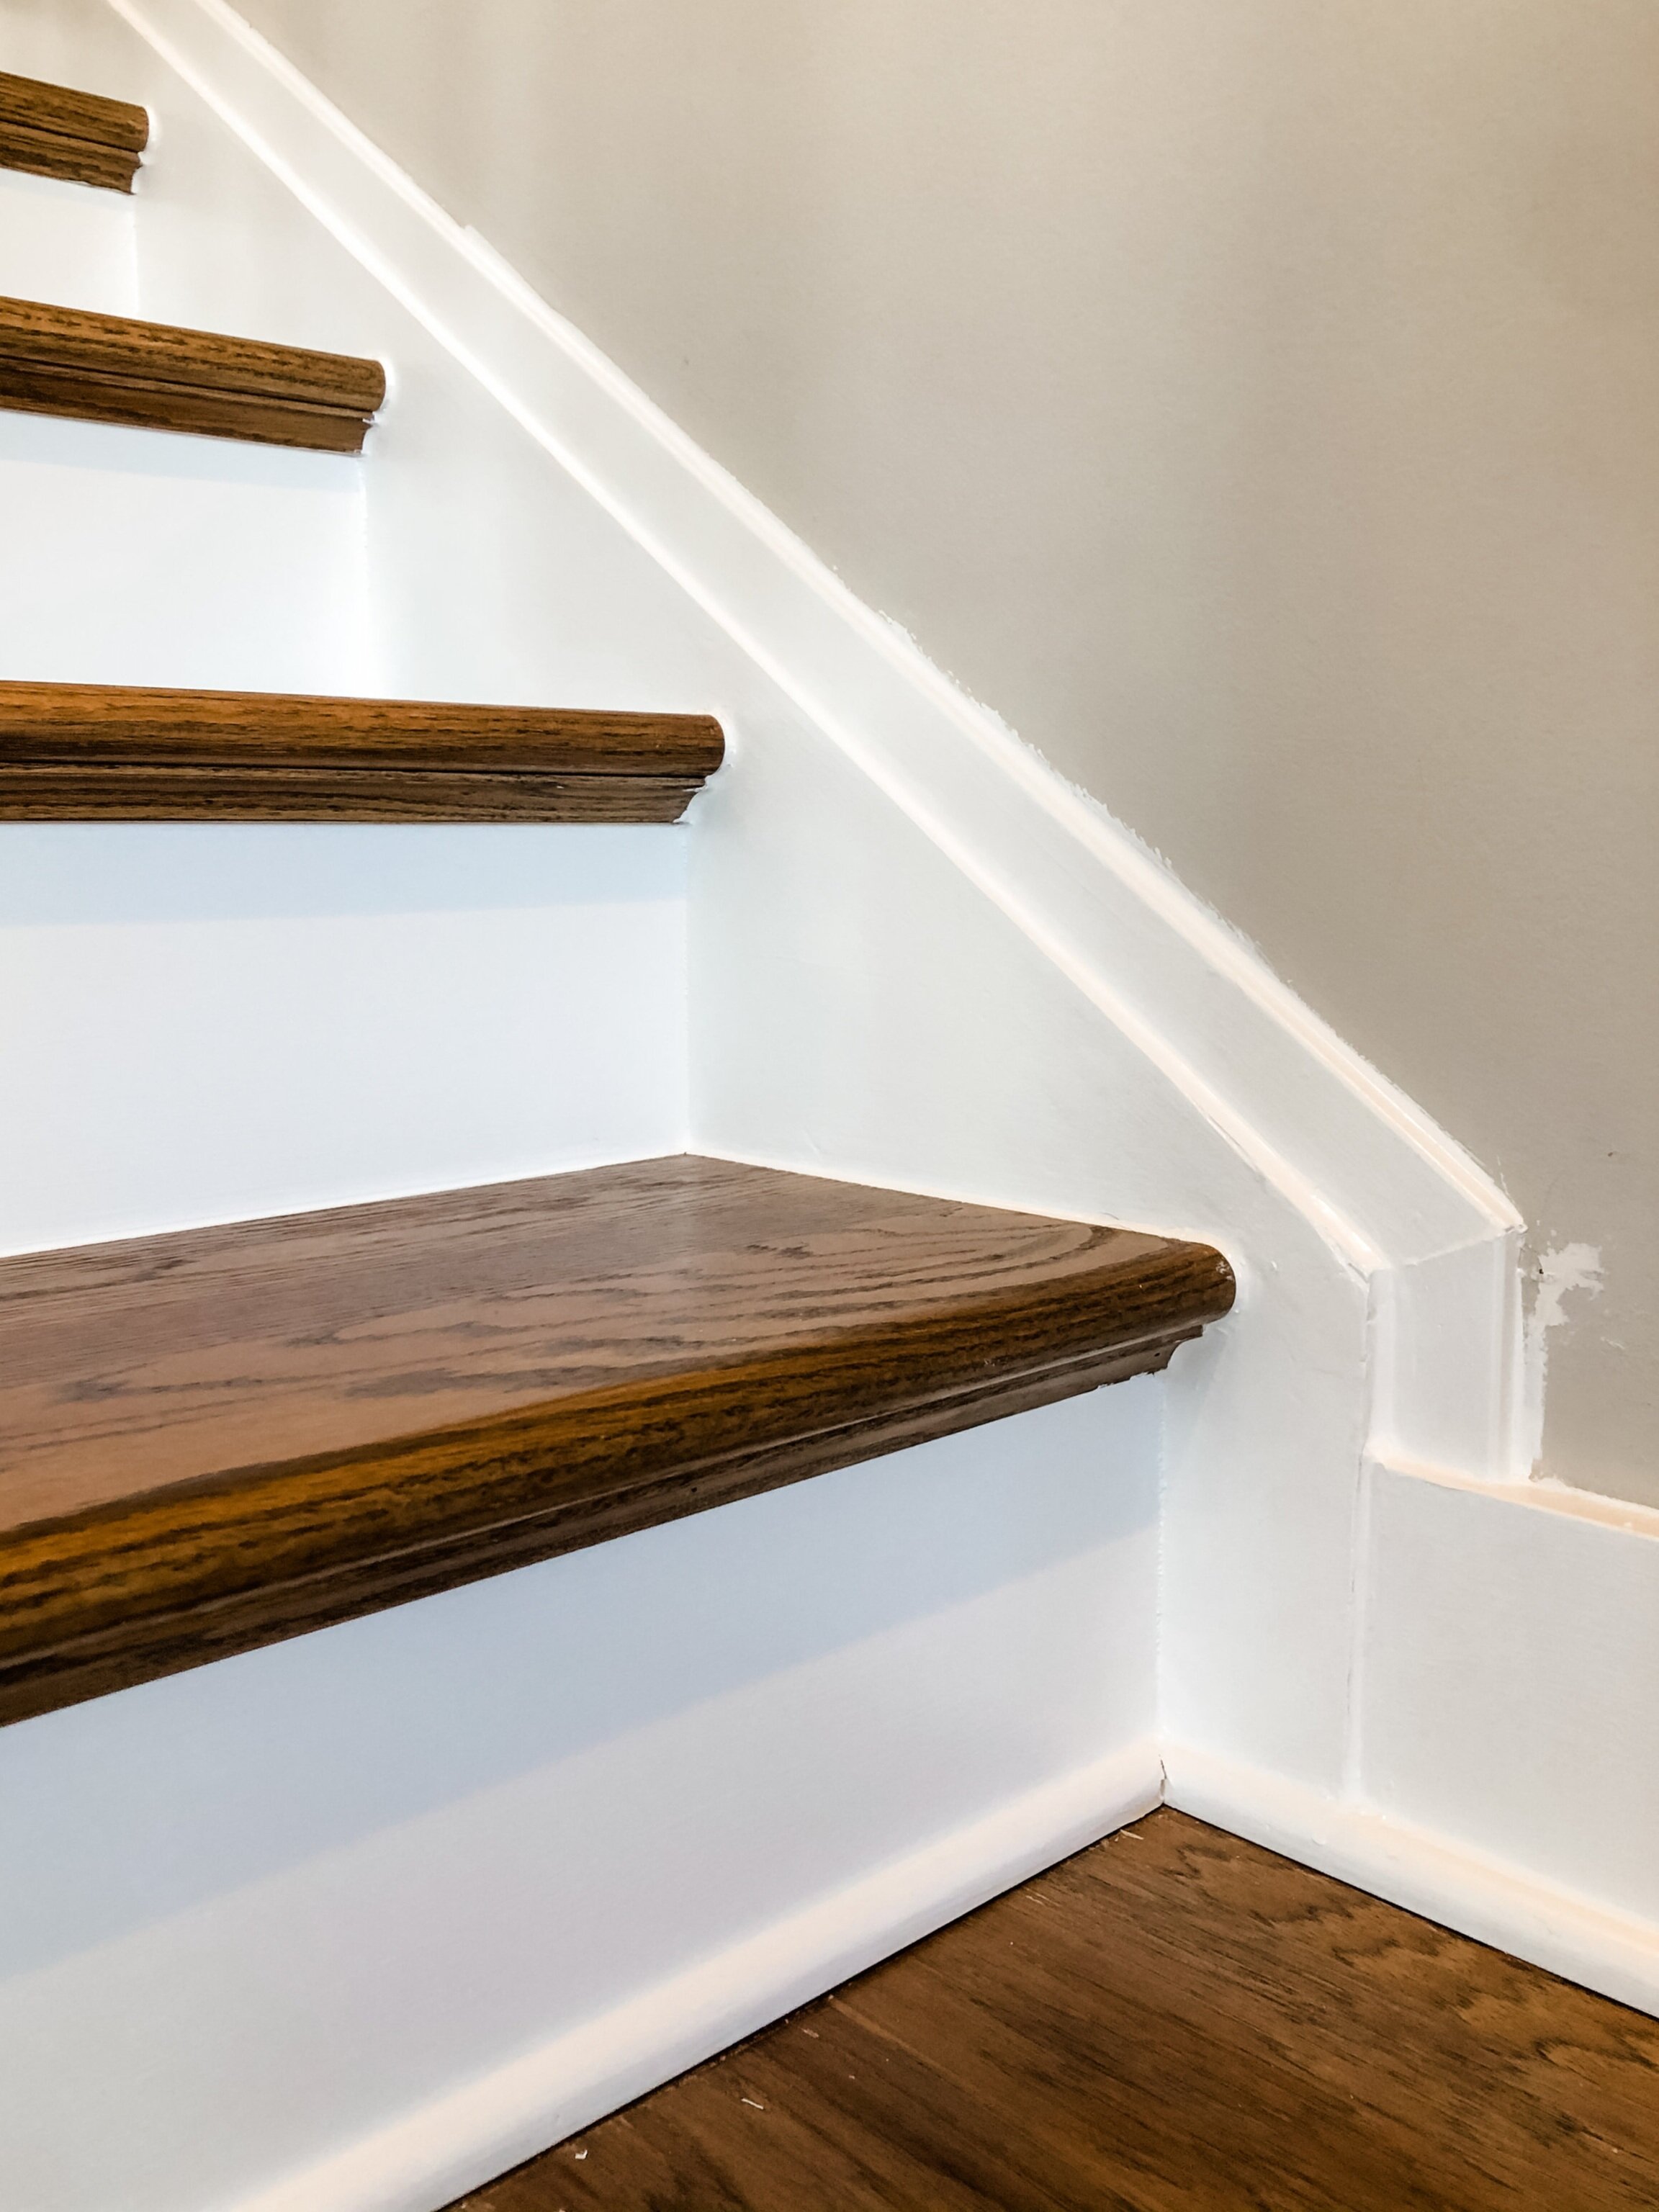
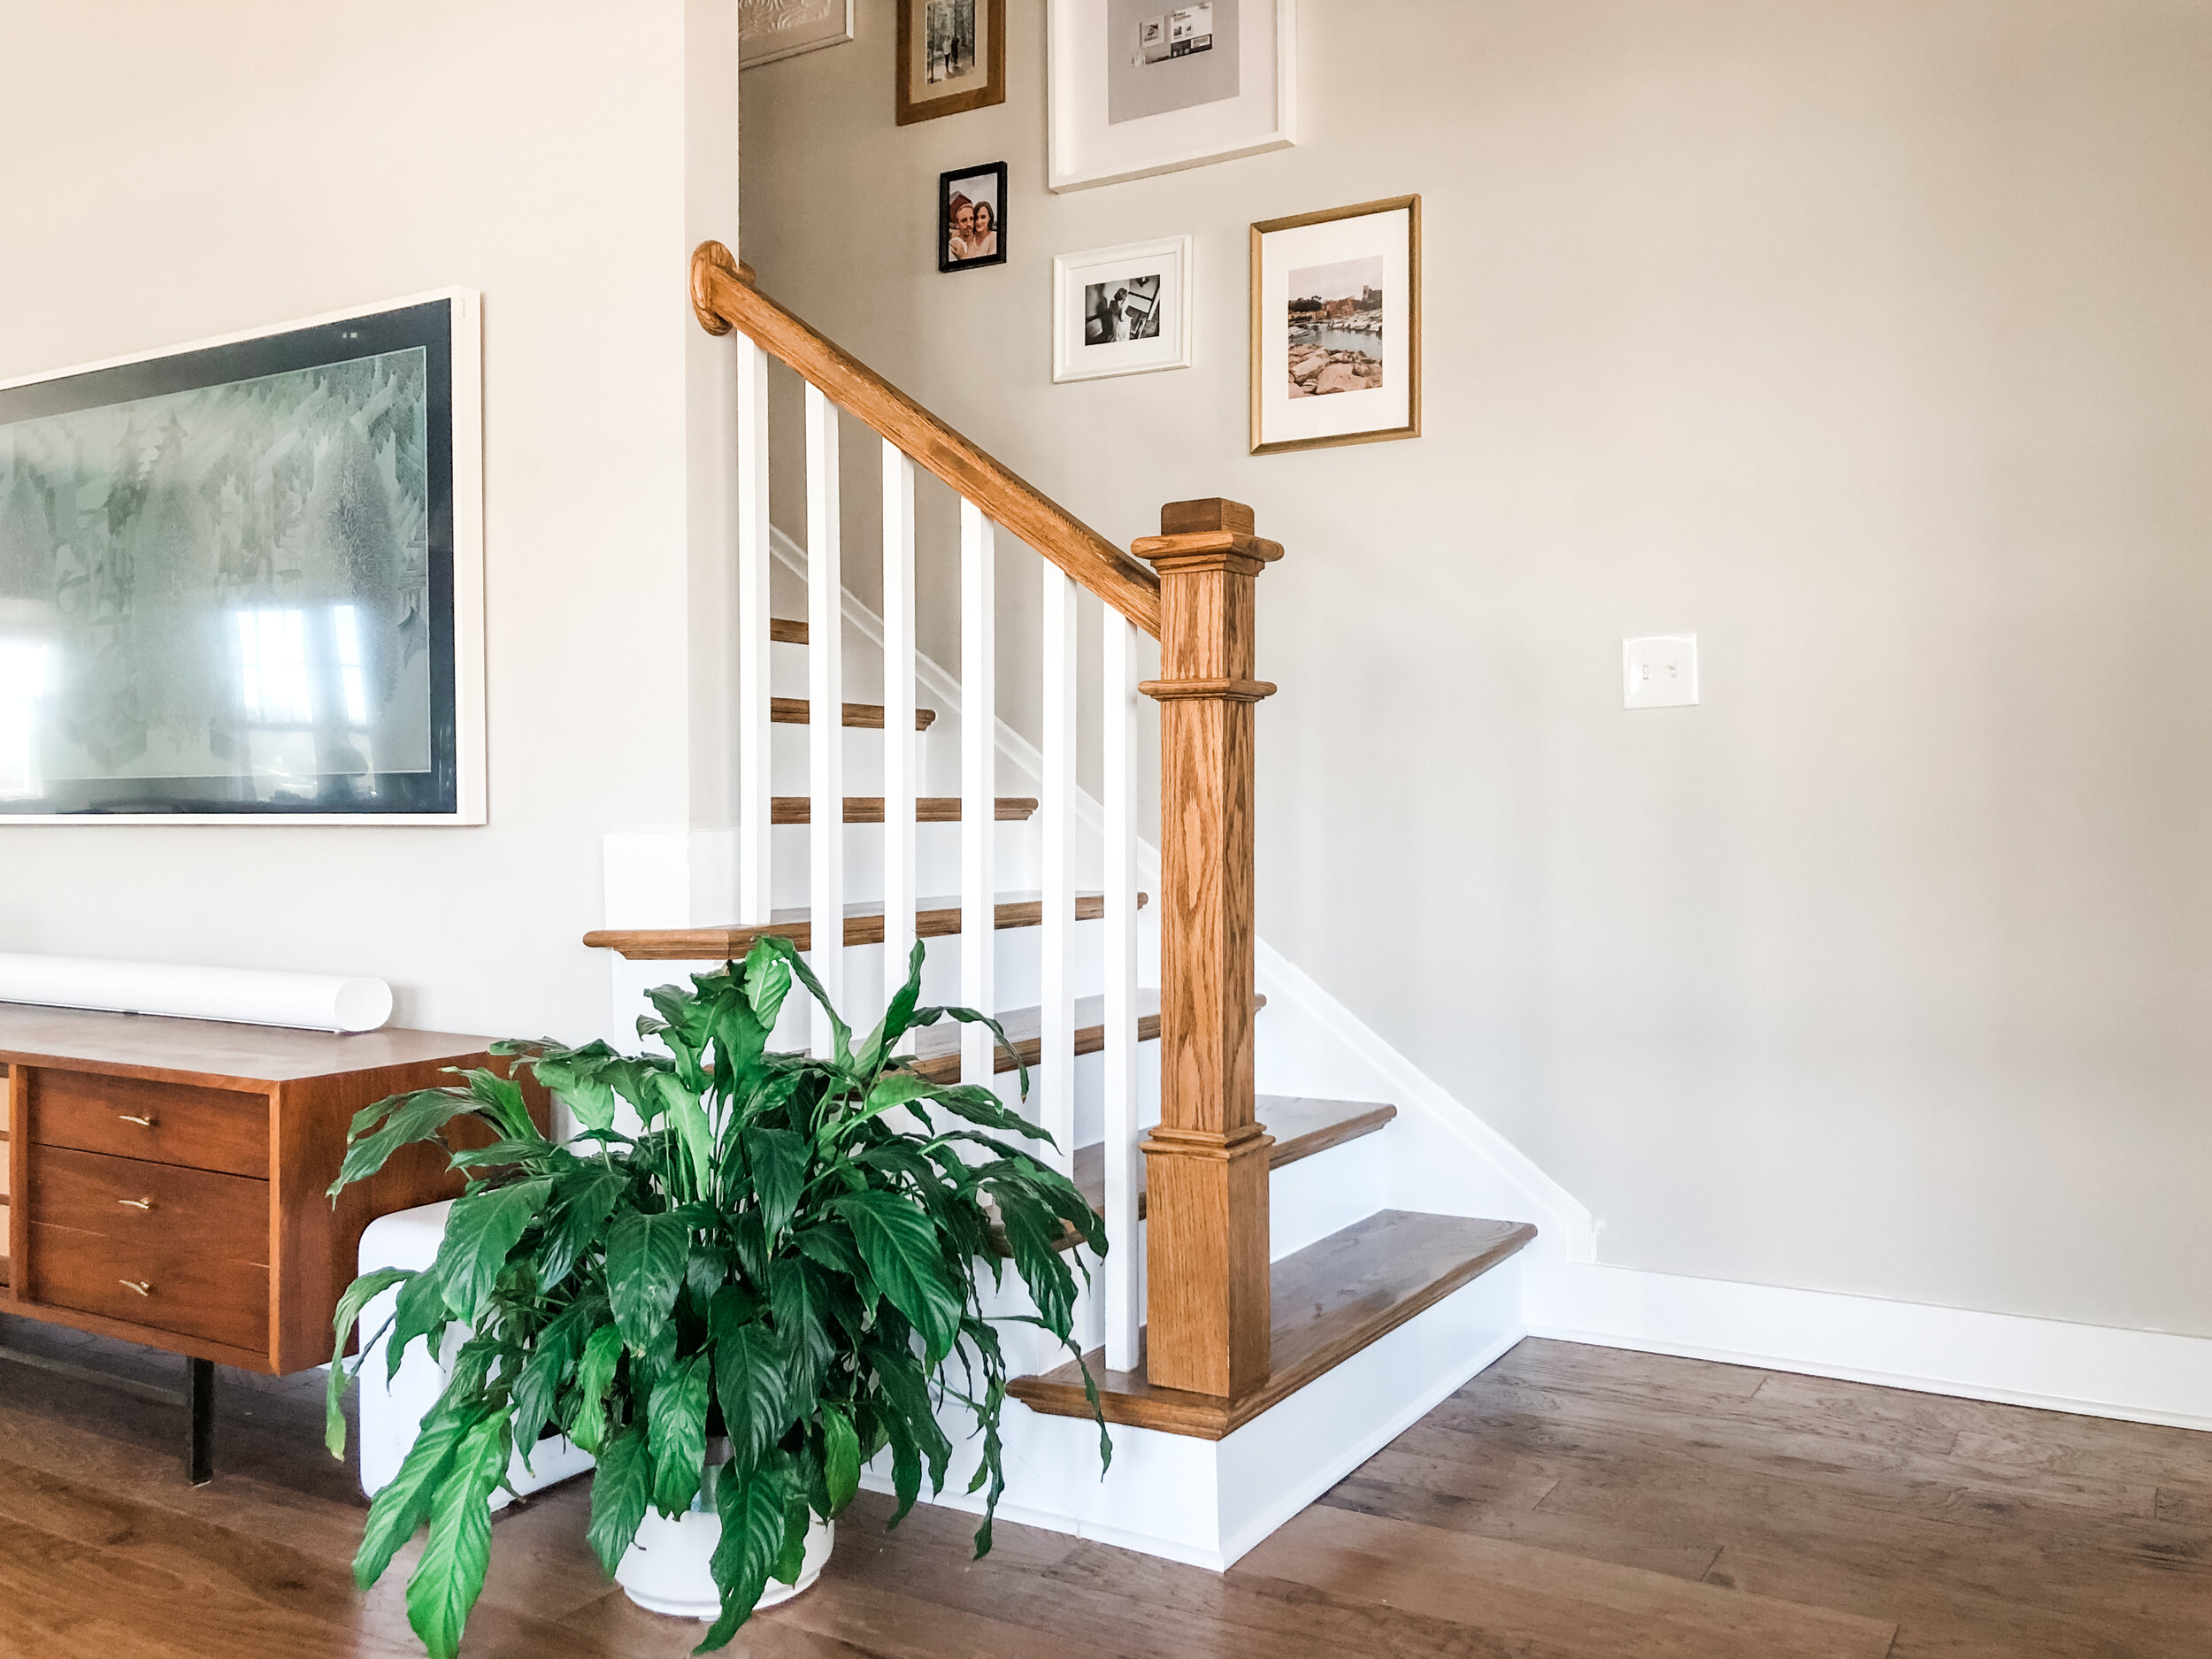
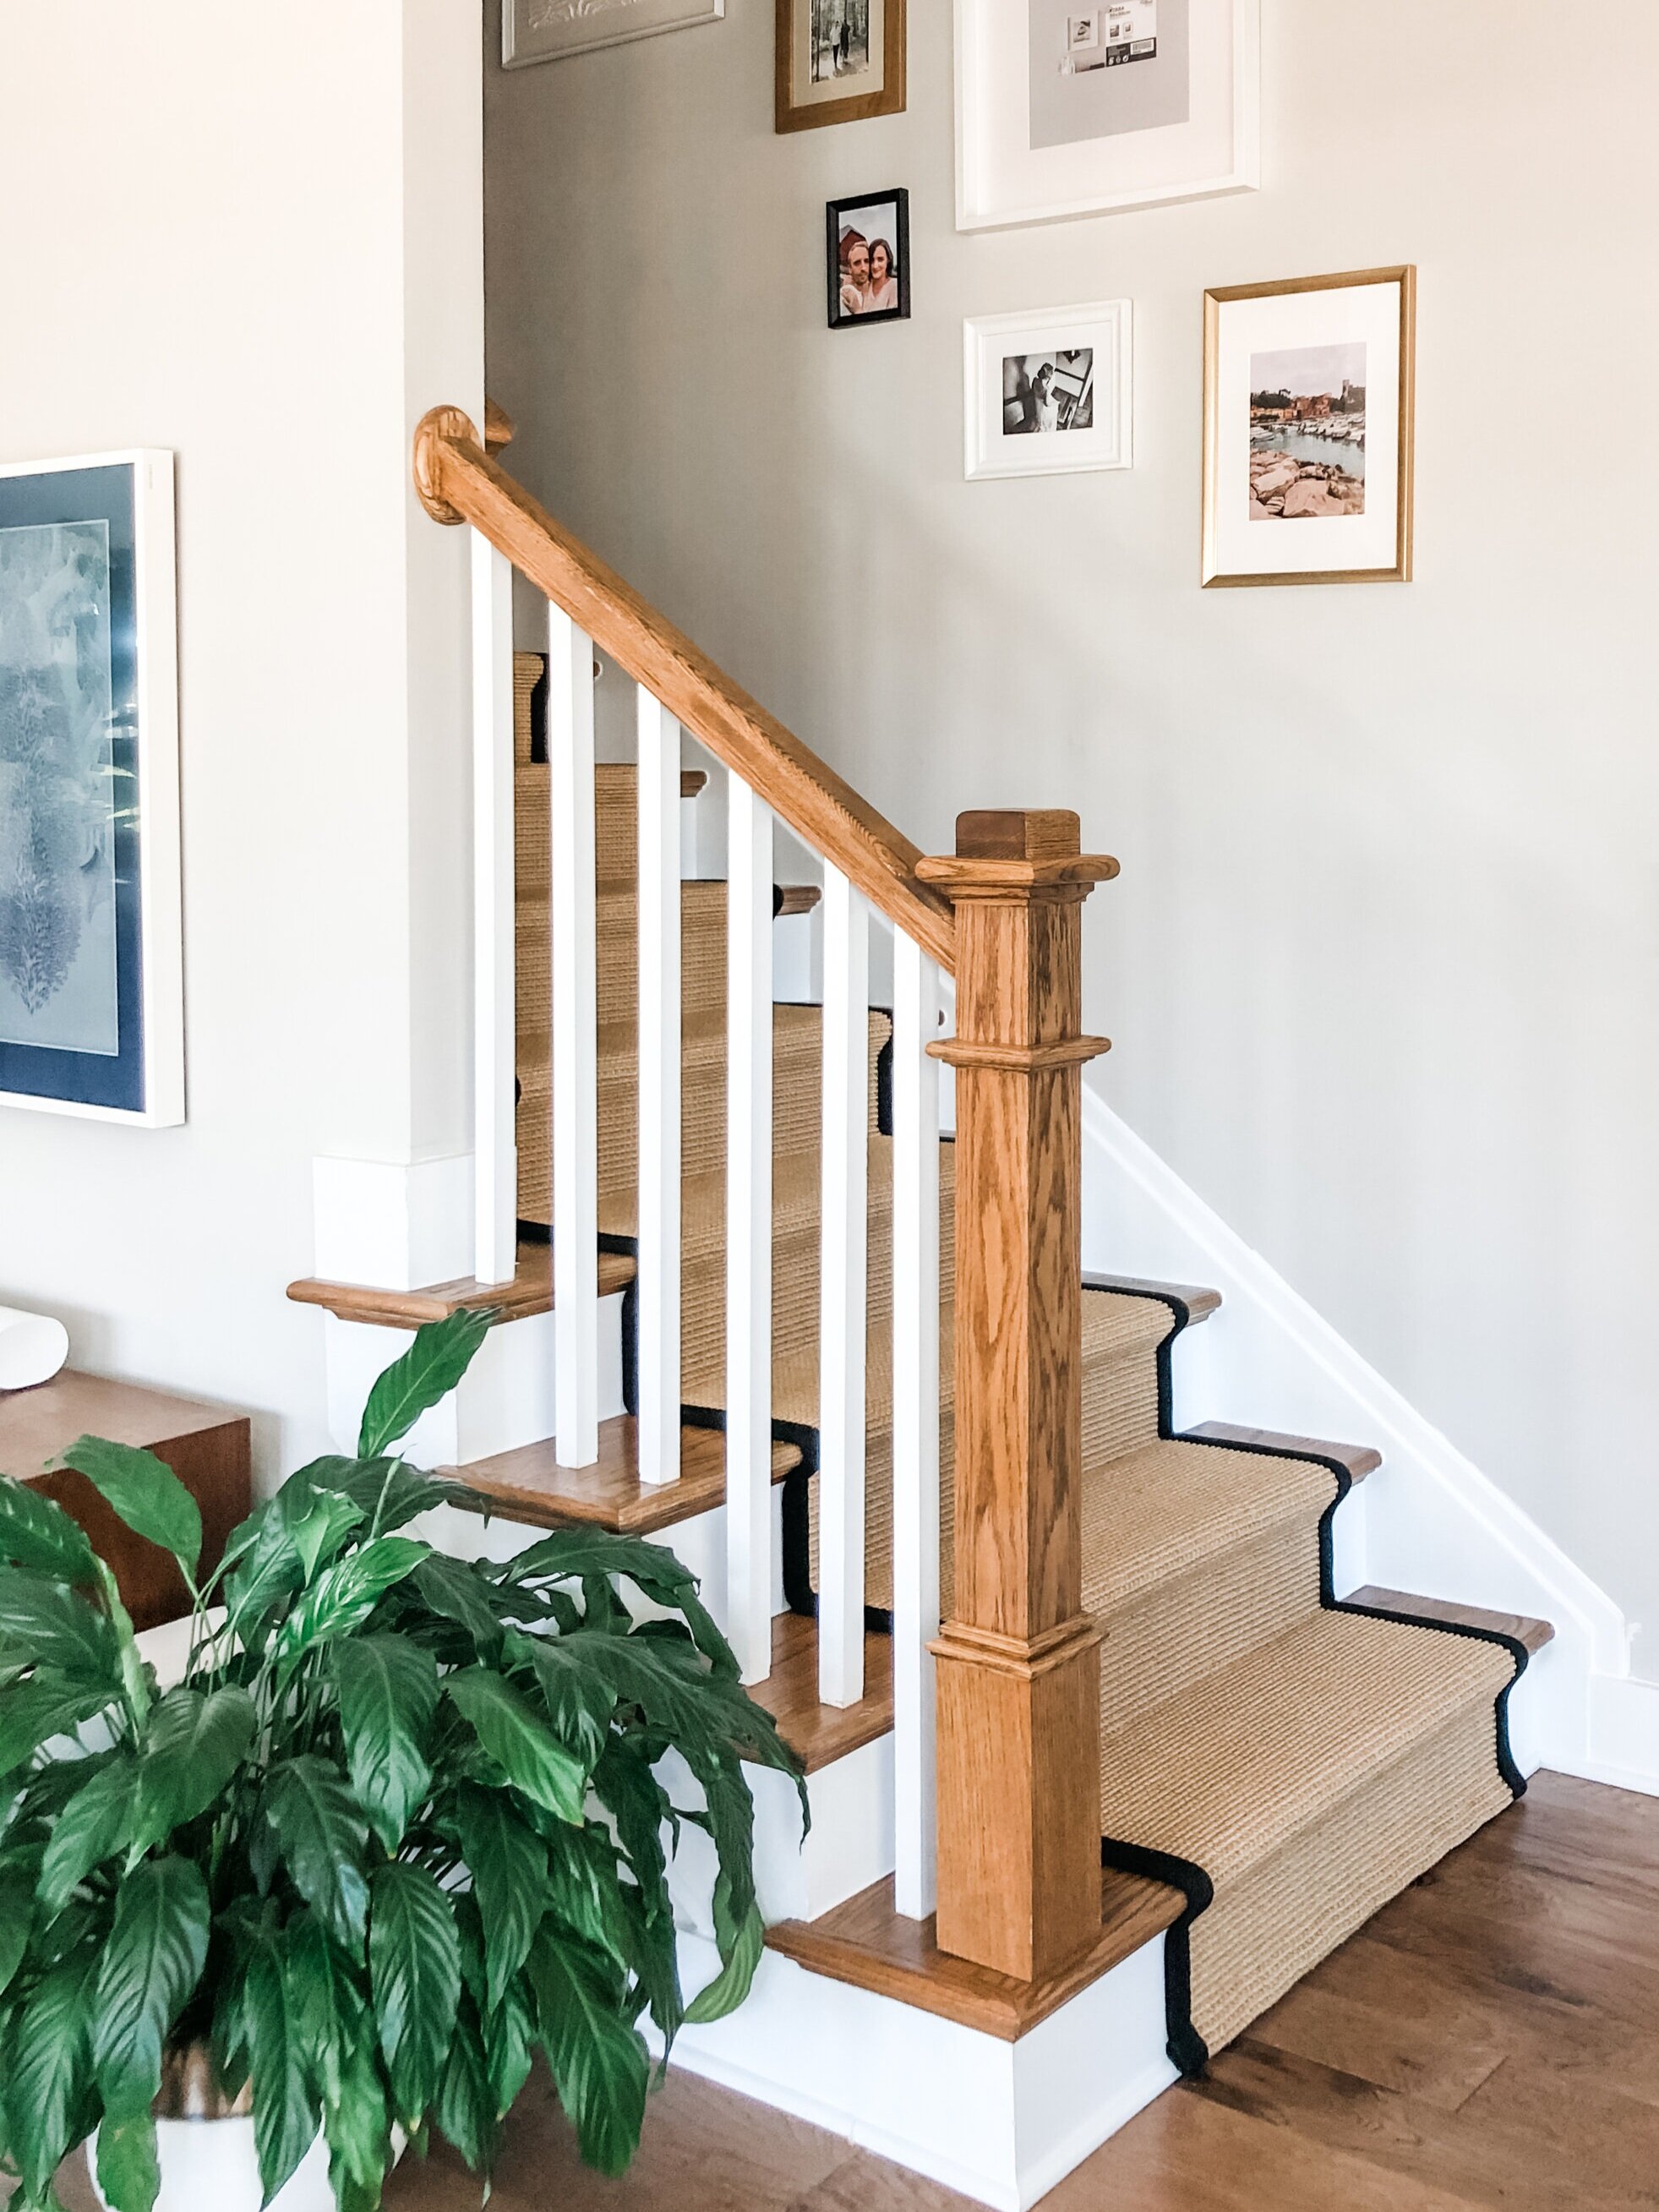
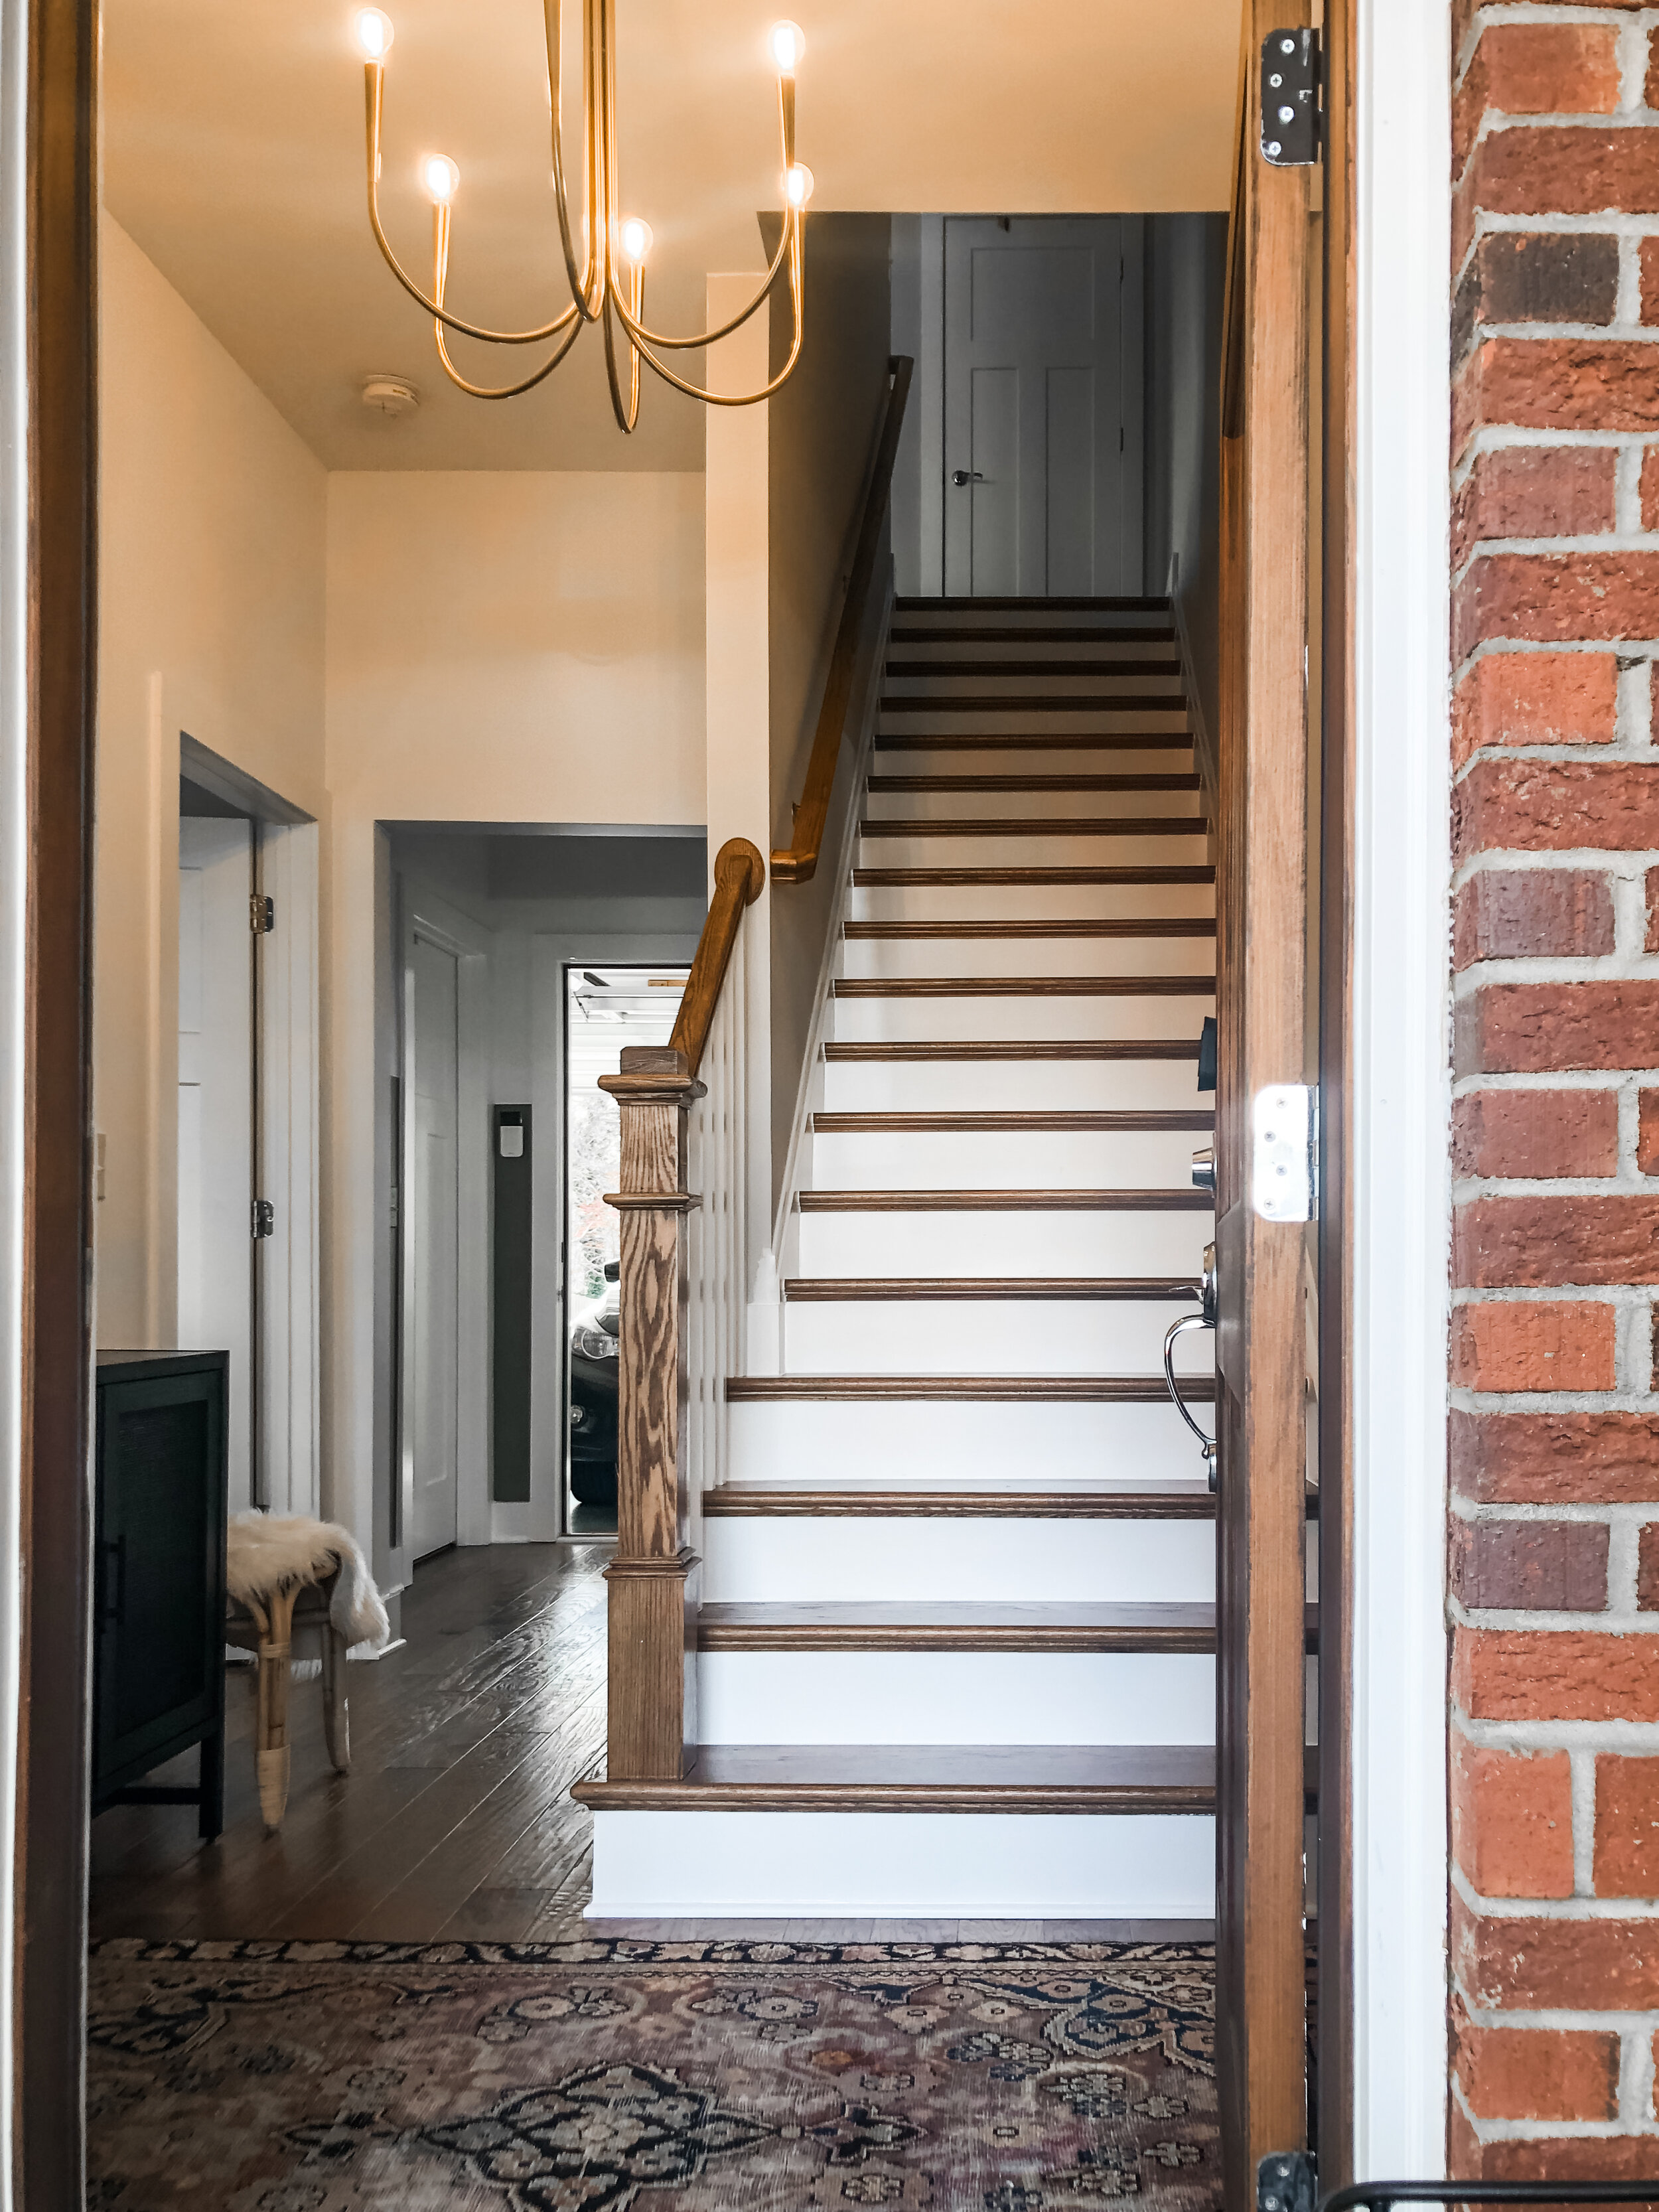
Once the runners we ordered, we got to work ripping out the old cracked caulk and filler material and repainting both sets of stairs. (The townhome is settling and unfortunately causing caulk throughout our home to crack. My OCD could not take it!) If you’re interested in the details of what we did, you can read all about it in the prep post. It took two full weekends and several nights to finish this process and we are so pleased with how it looks—well worth the time! The pictures below show the before and after of this task! Please don’t be concerned with the uneven paint along the wall… This wall will (fingers crossed) be painted very soon!
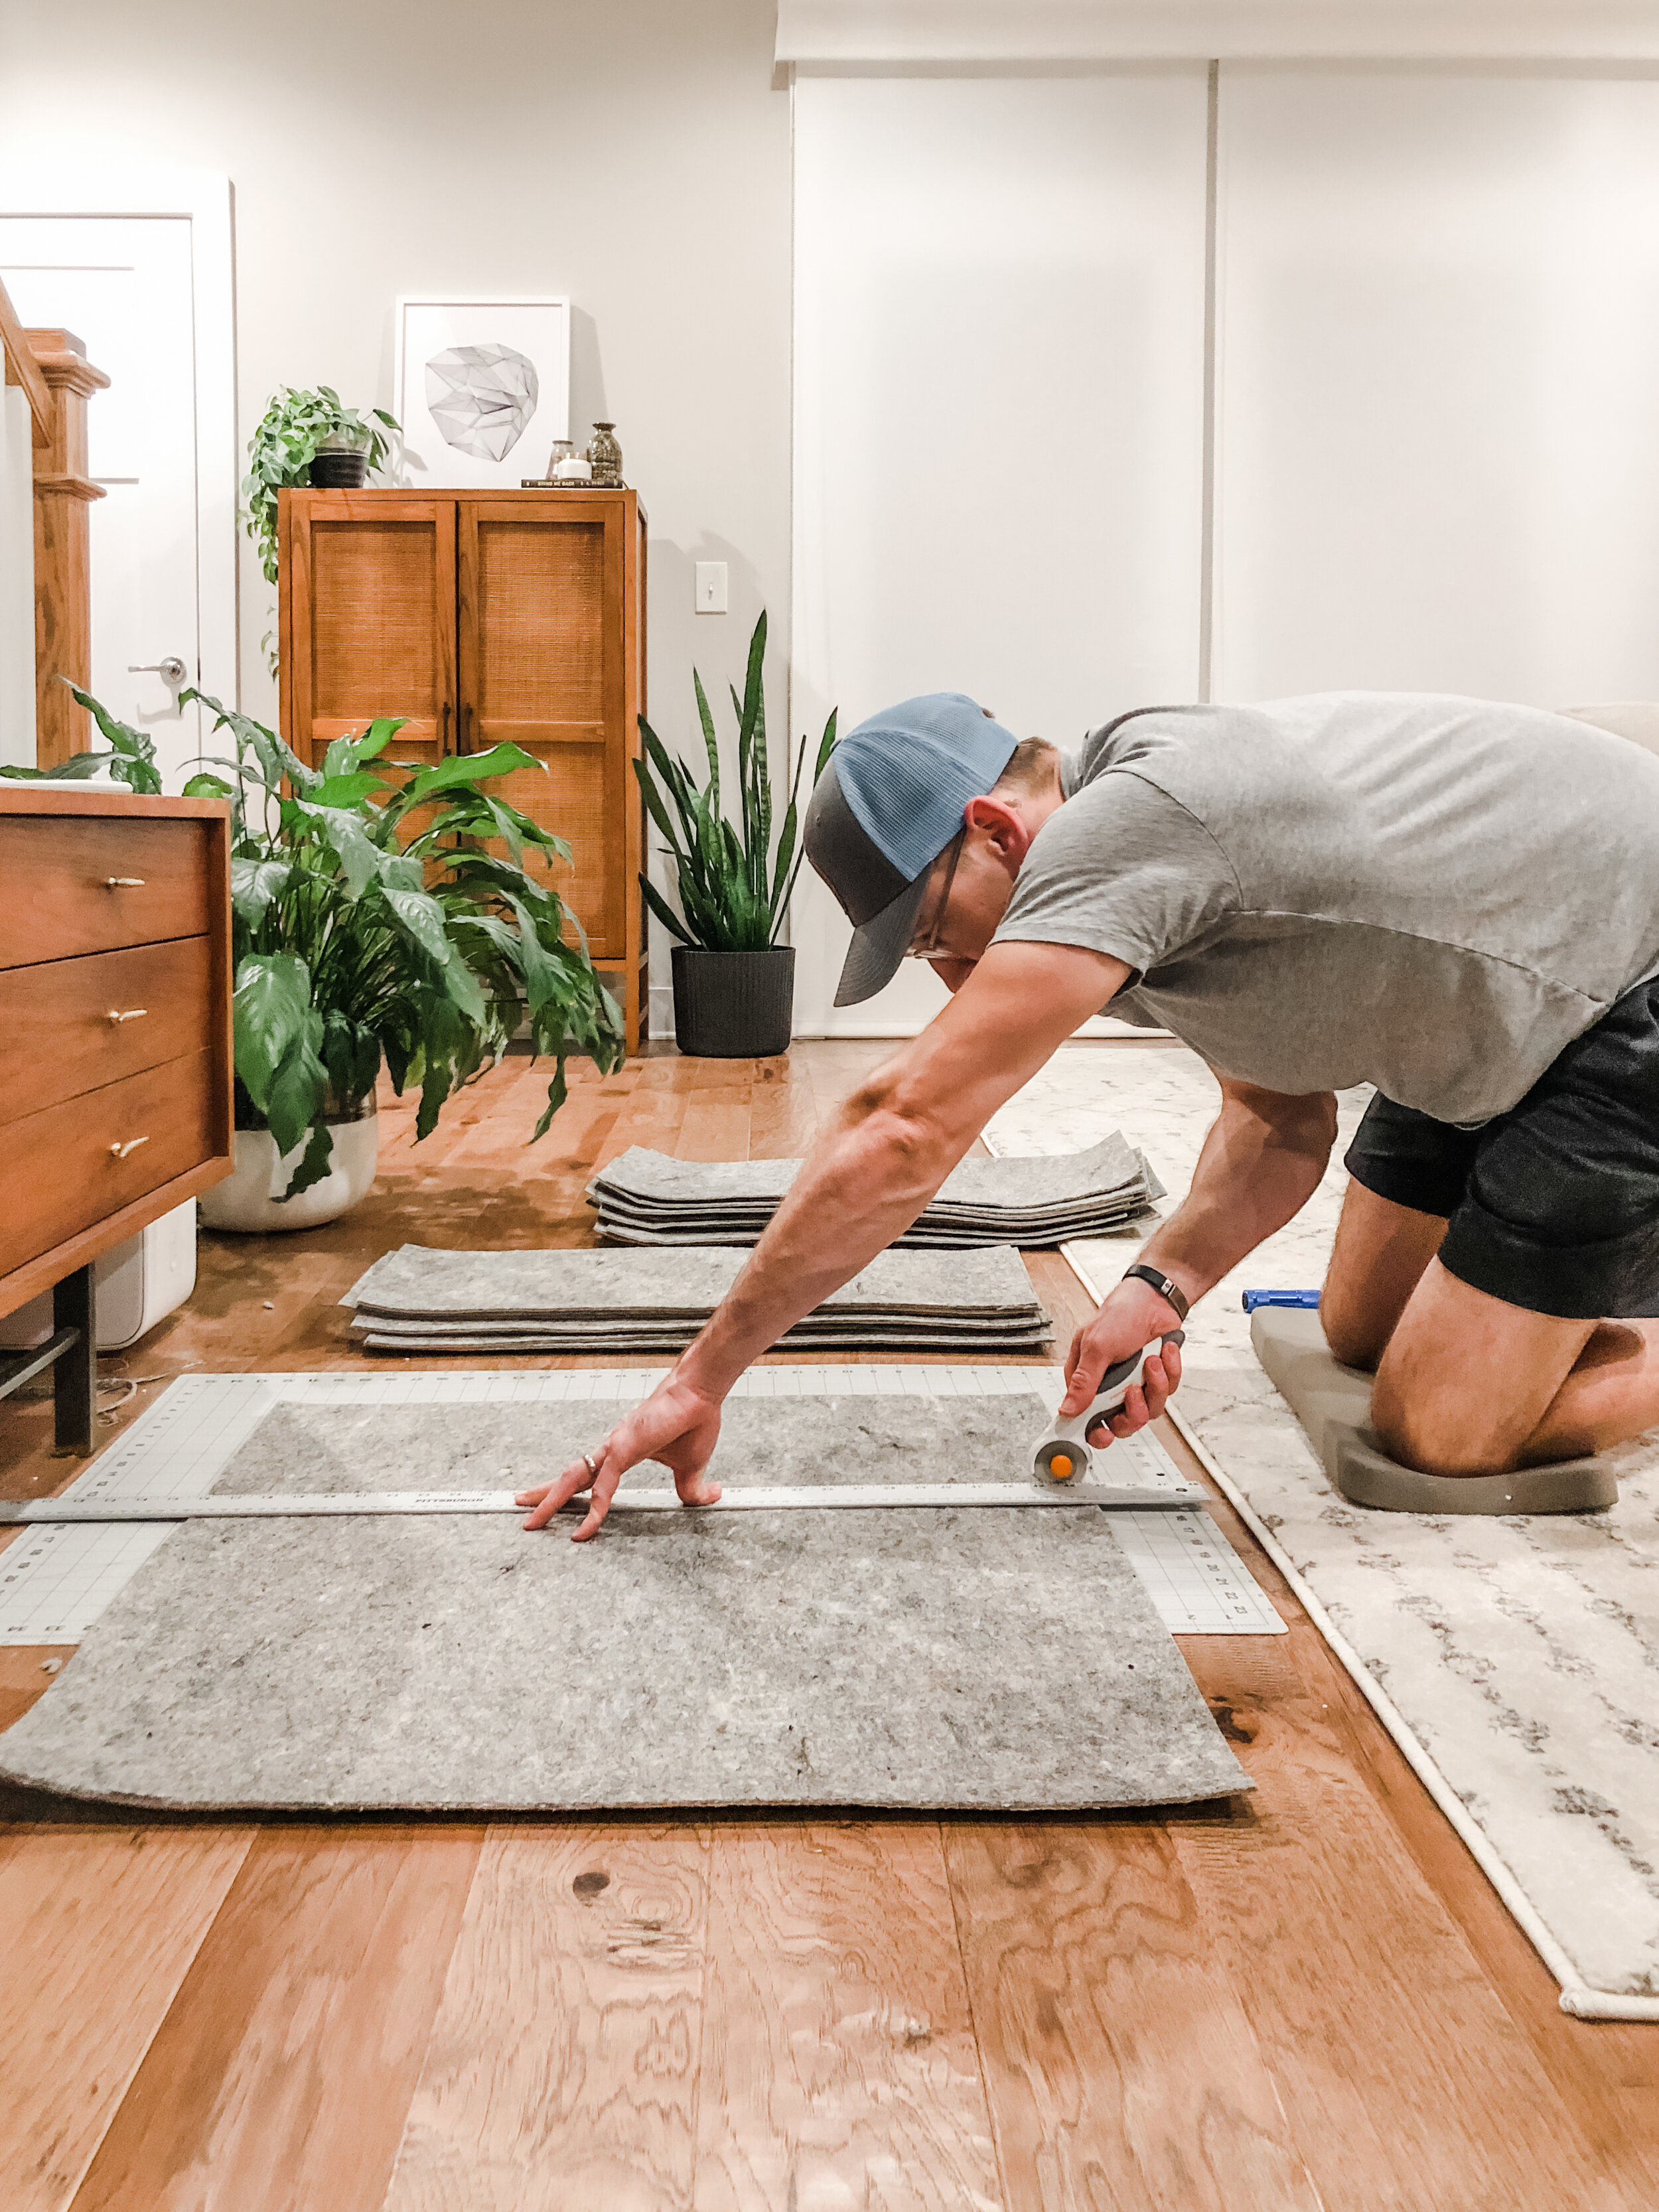
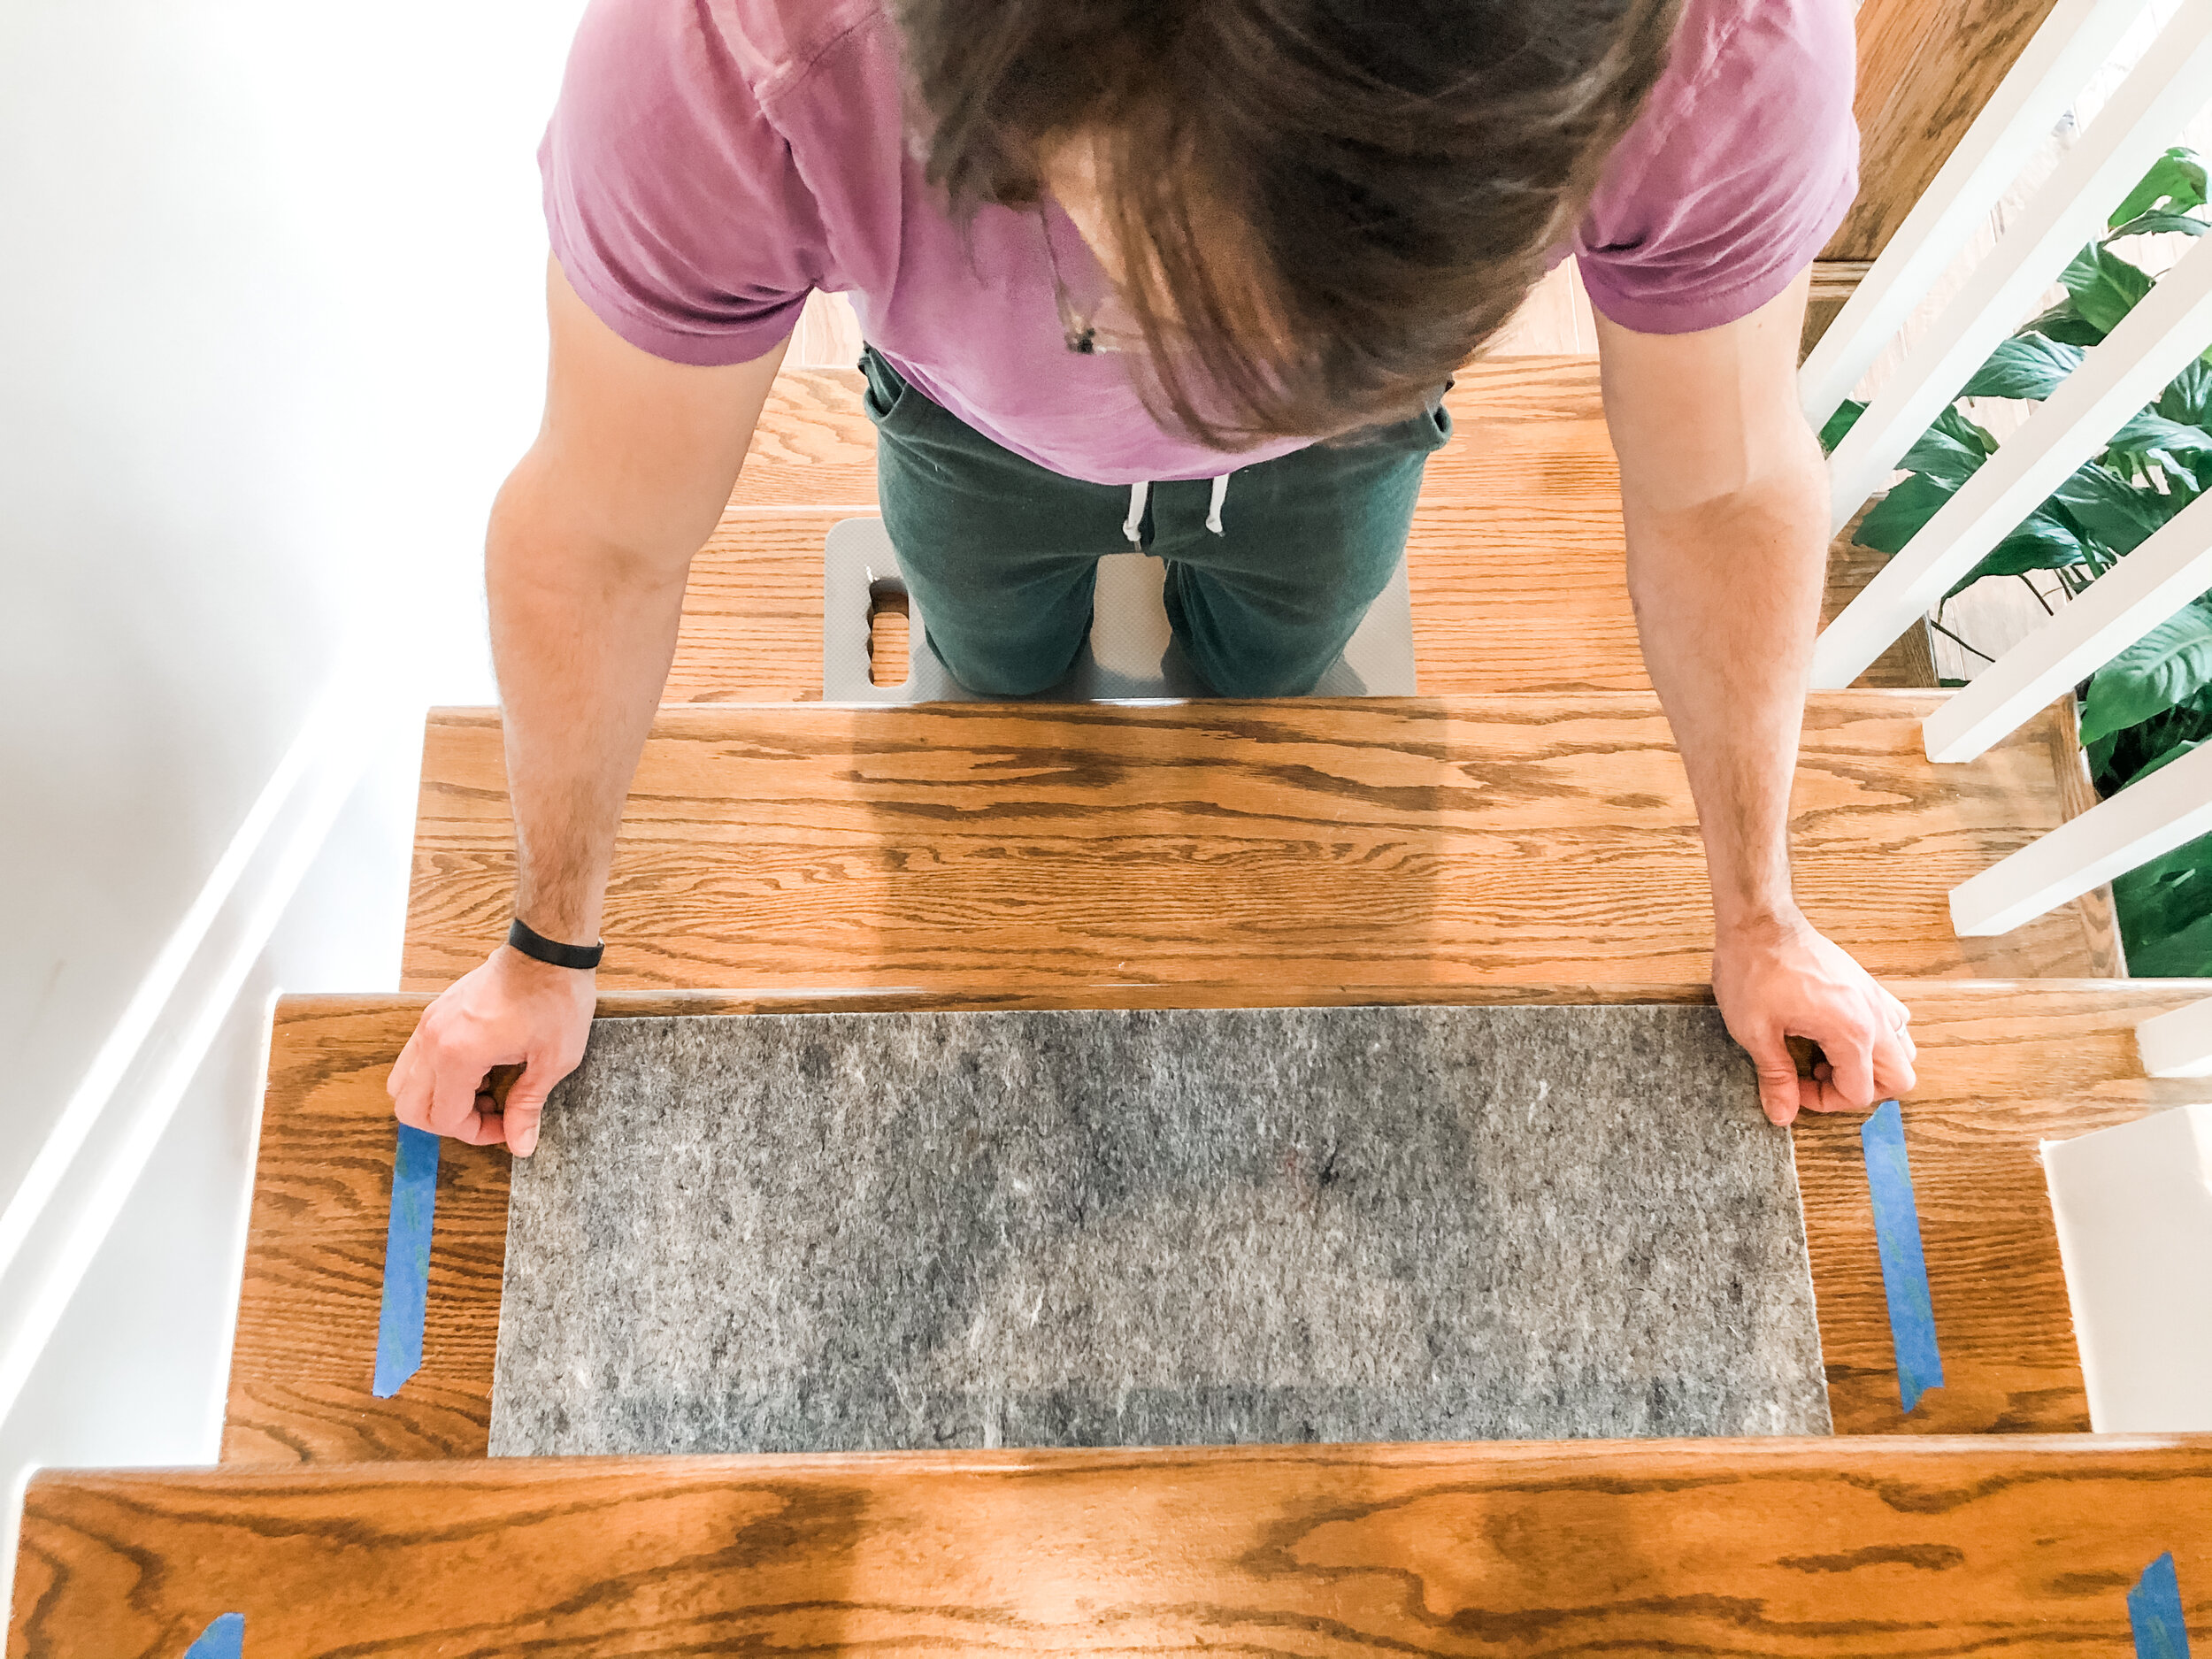
The runners needed some extra grip on each tread so we ordered an eighth inch thick 8 x 10 foot rug pad to cut down. Then we made our weekly trip to Lowes to pick up carpet tape and staples. Andrew tested staple placement on our swatch to determine the best way to hide the staples in the natural fibers.
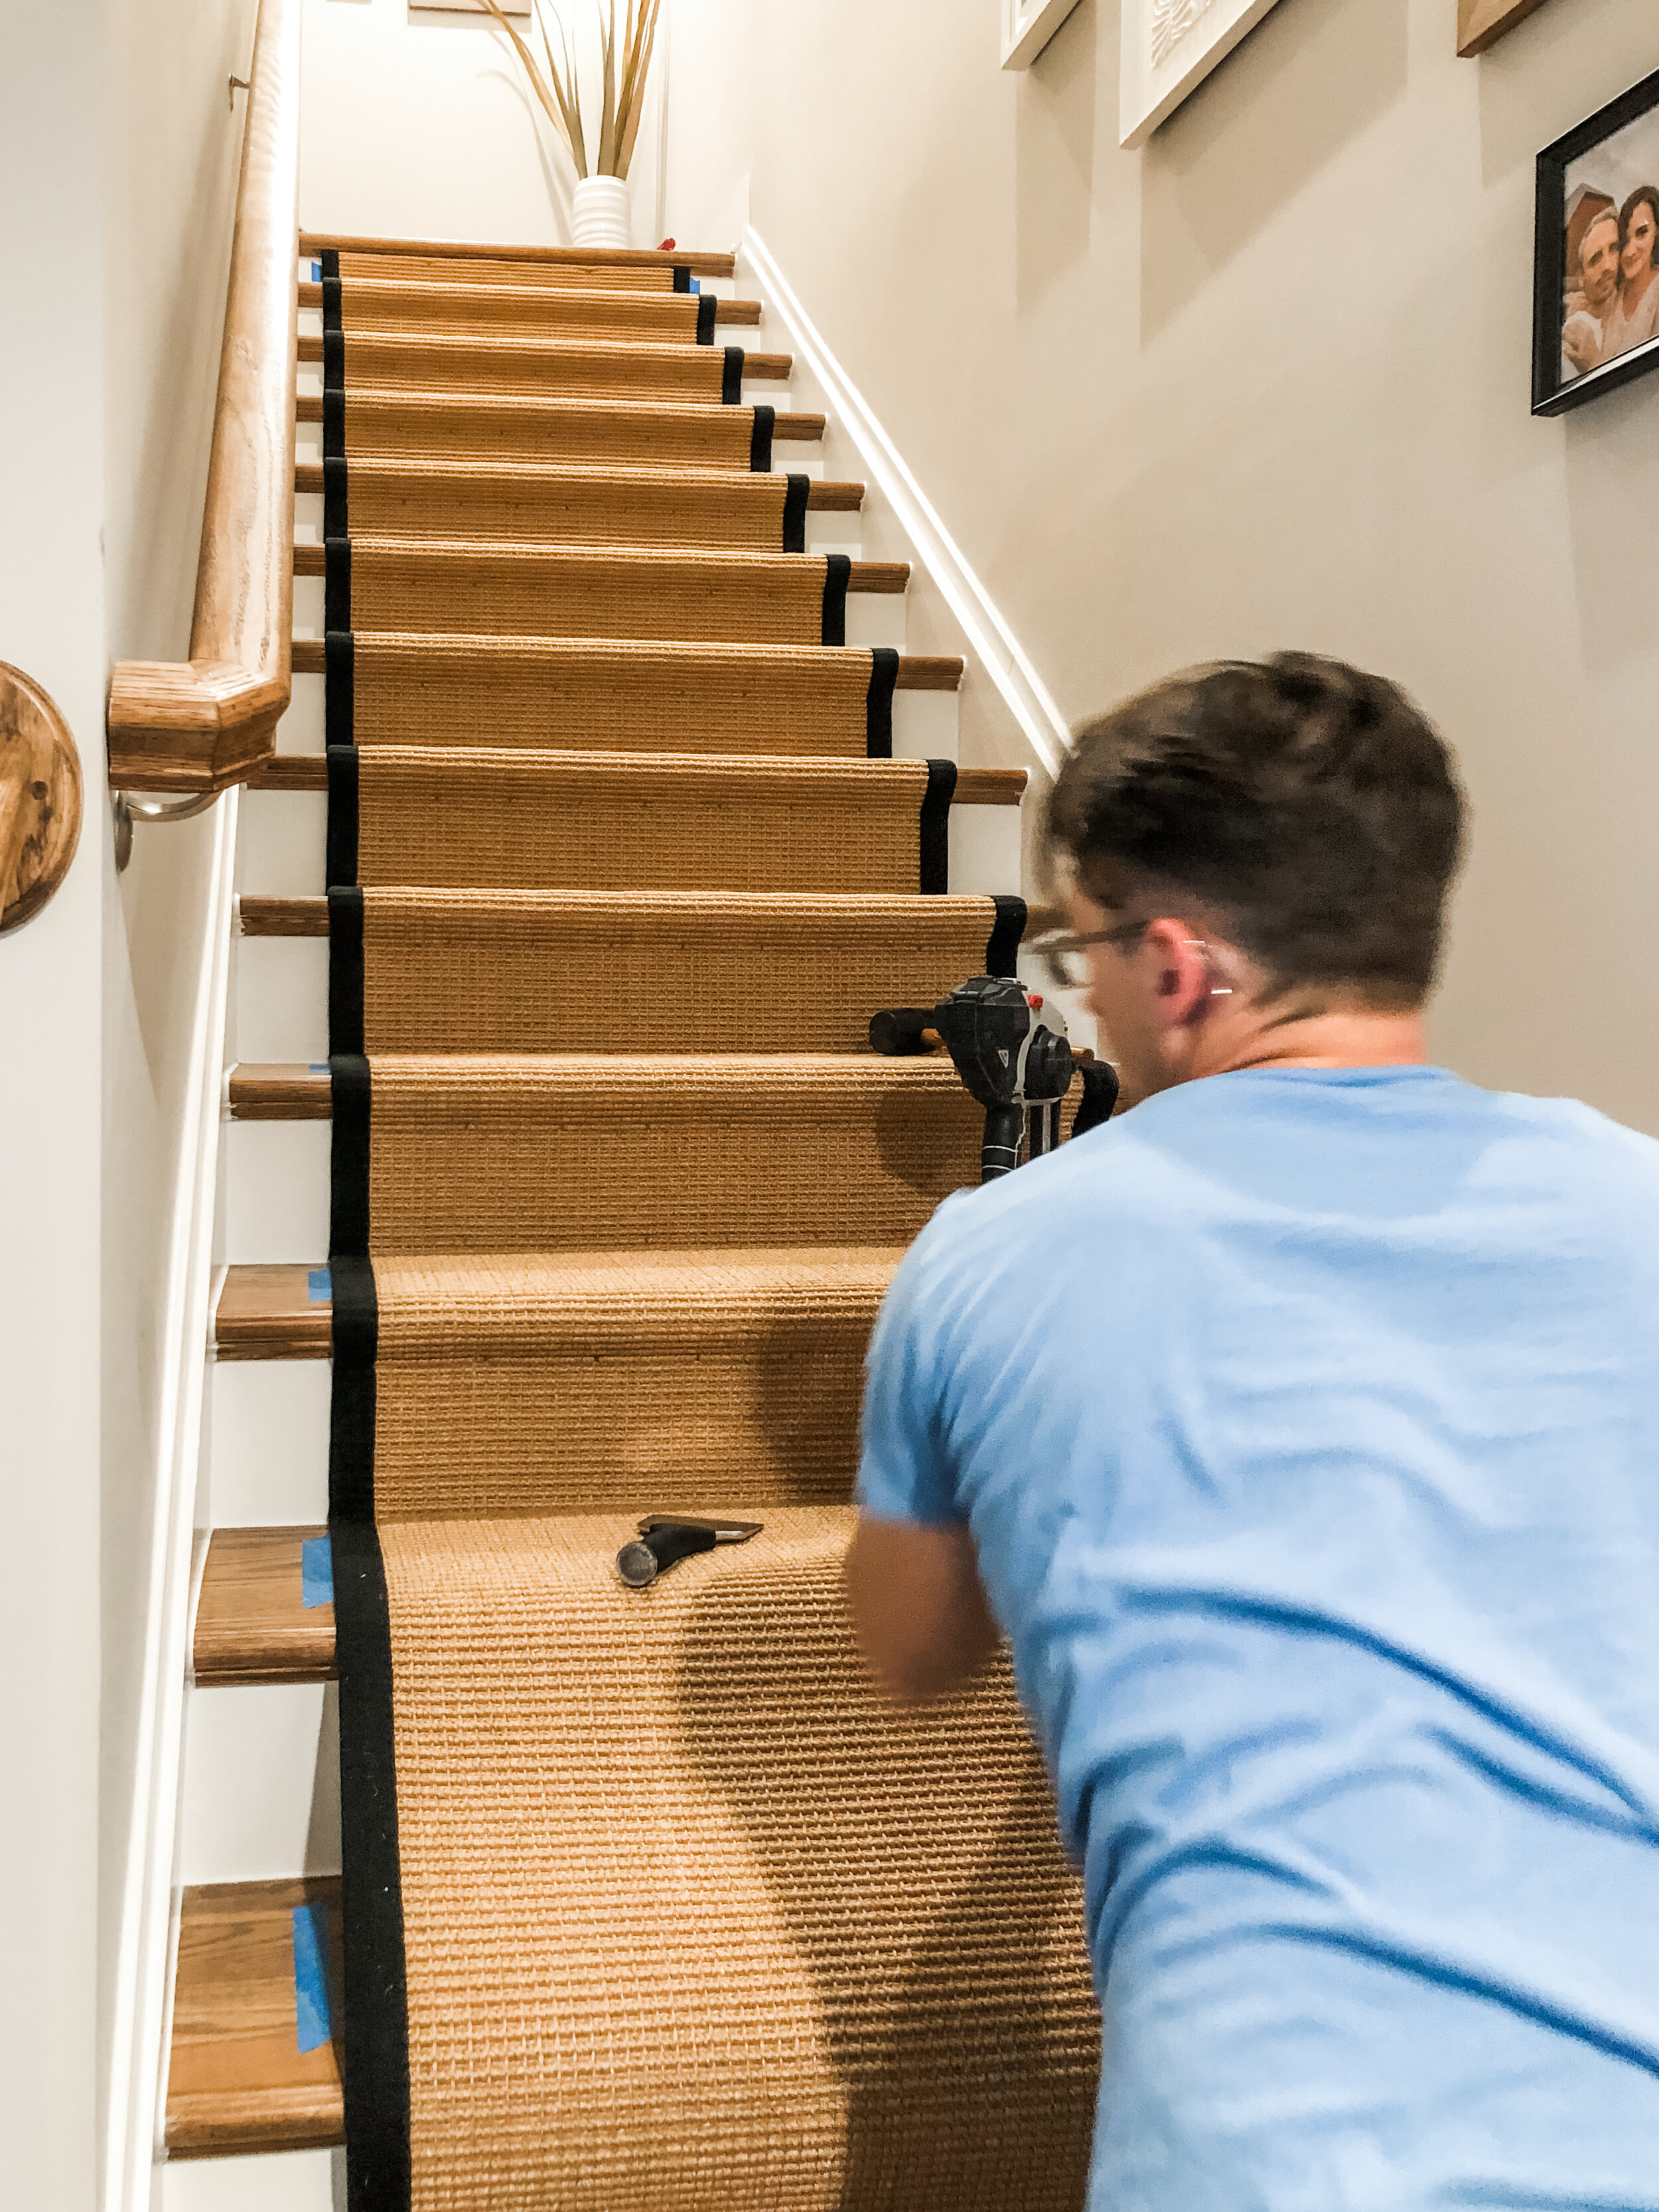
Full disclosure: this was the hardest project we’ve ever taken on ourselves and we would not do it again… But we are super pleased with the results! It was three full days on our hands and knees, on top of each other and it was physically taxing. The constant adjusting, pulling on the material and holding it in place destroyed our hands, knees and feet. We also both needed so many snack breaks to refuel! Andrew and I created a code system and moved much quicker on the second staircase. This was definitely a two-person job.
Prep Work
We dusted and mopped the steps—using this wood floor cleaner that smells amazing
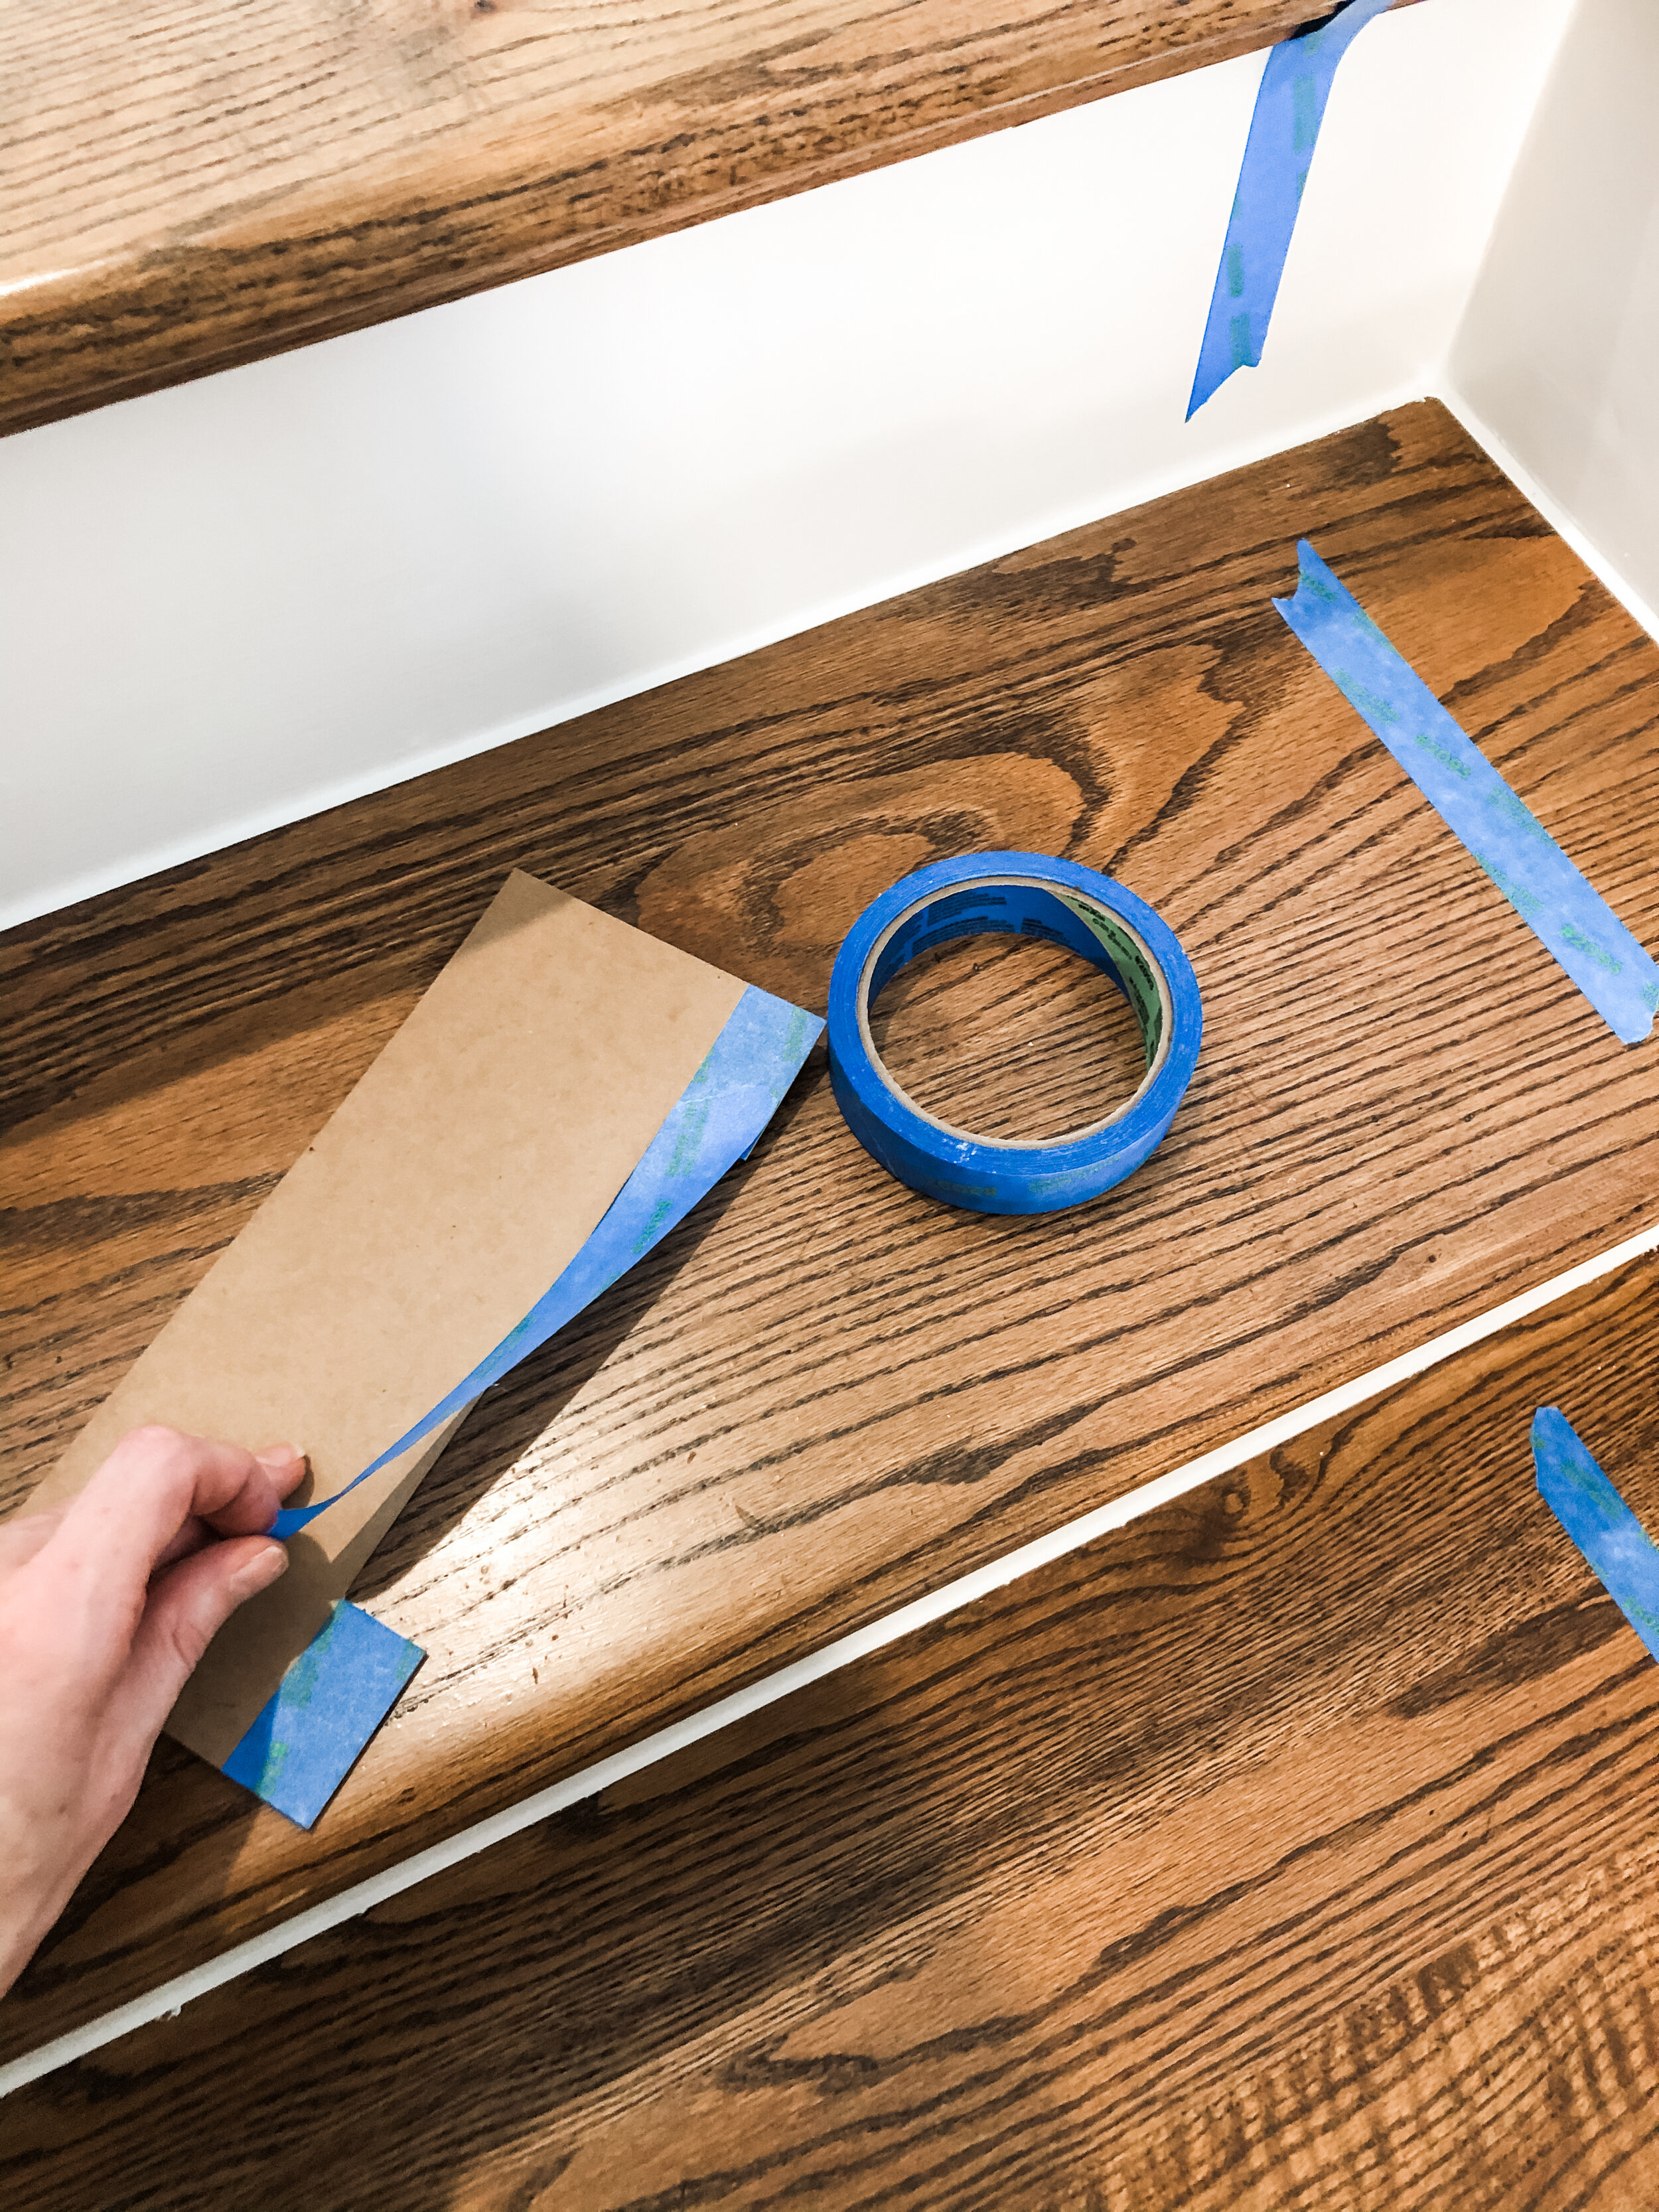
I created a template (using cardboard and blue tape) to help guide us and keep the rug centered down each flight of stairs
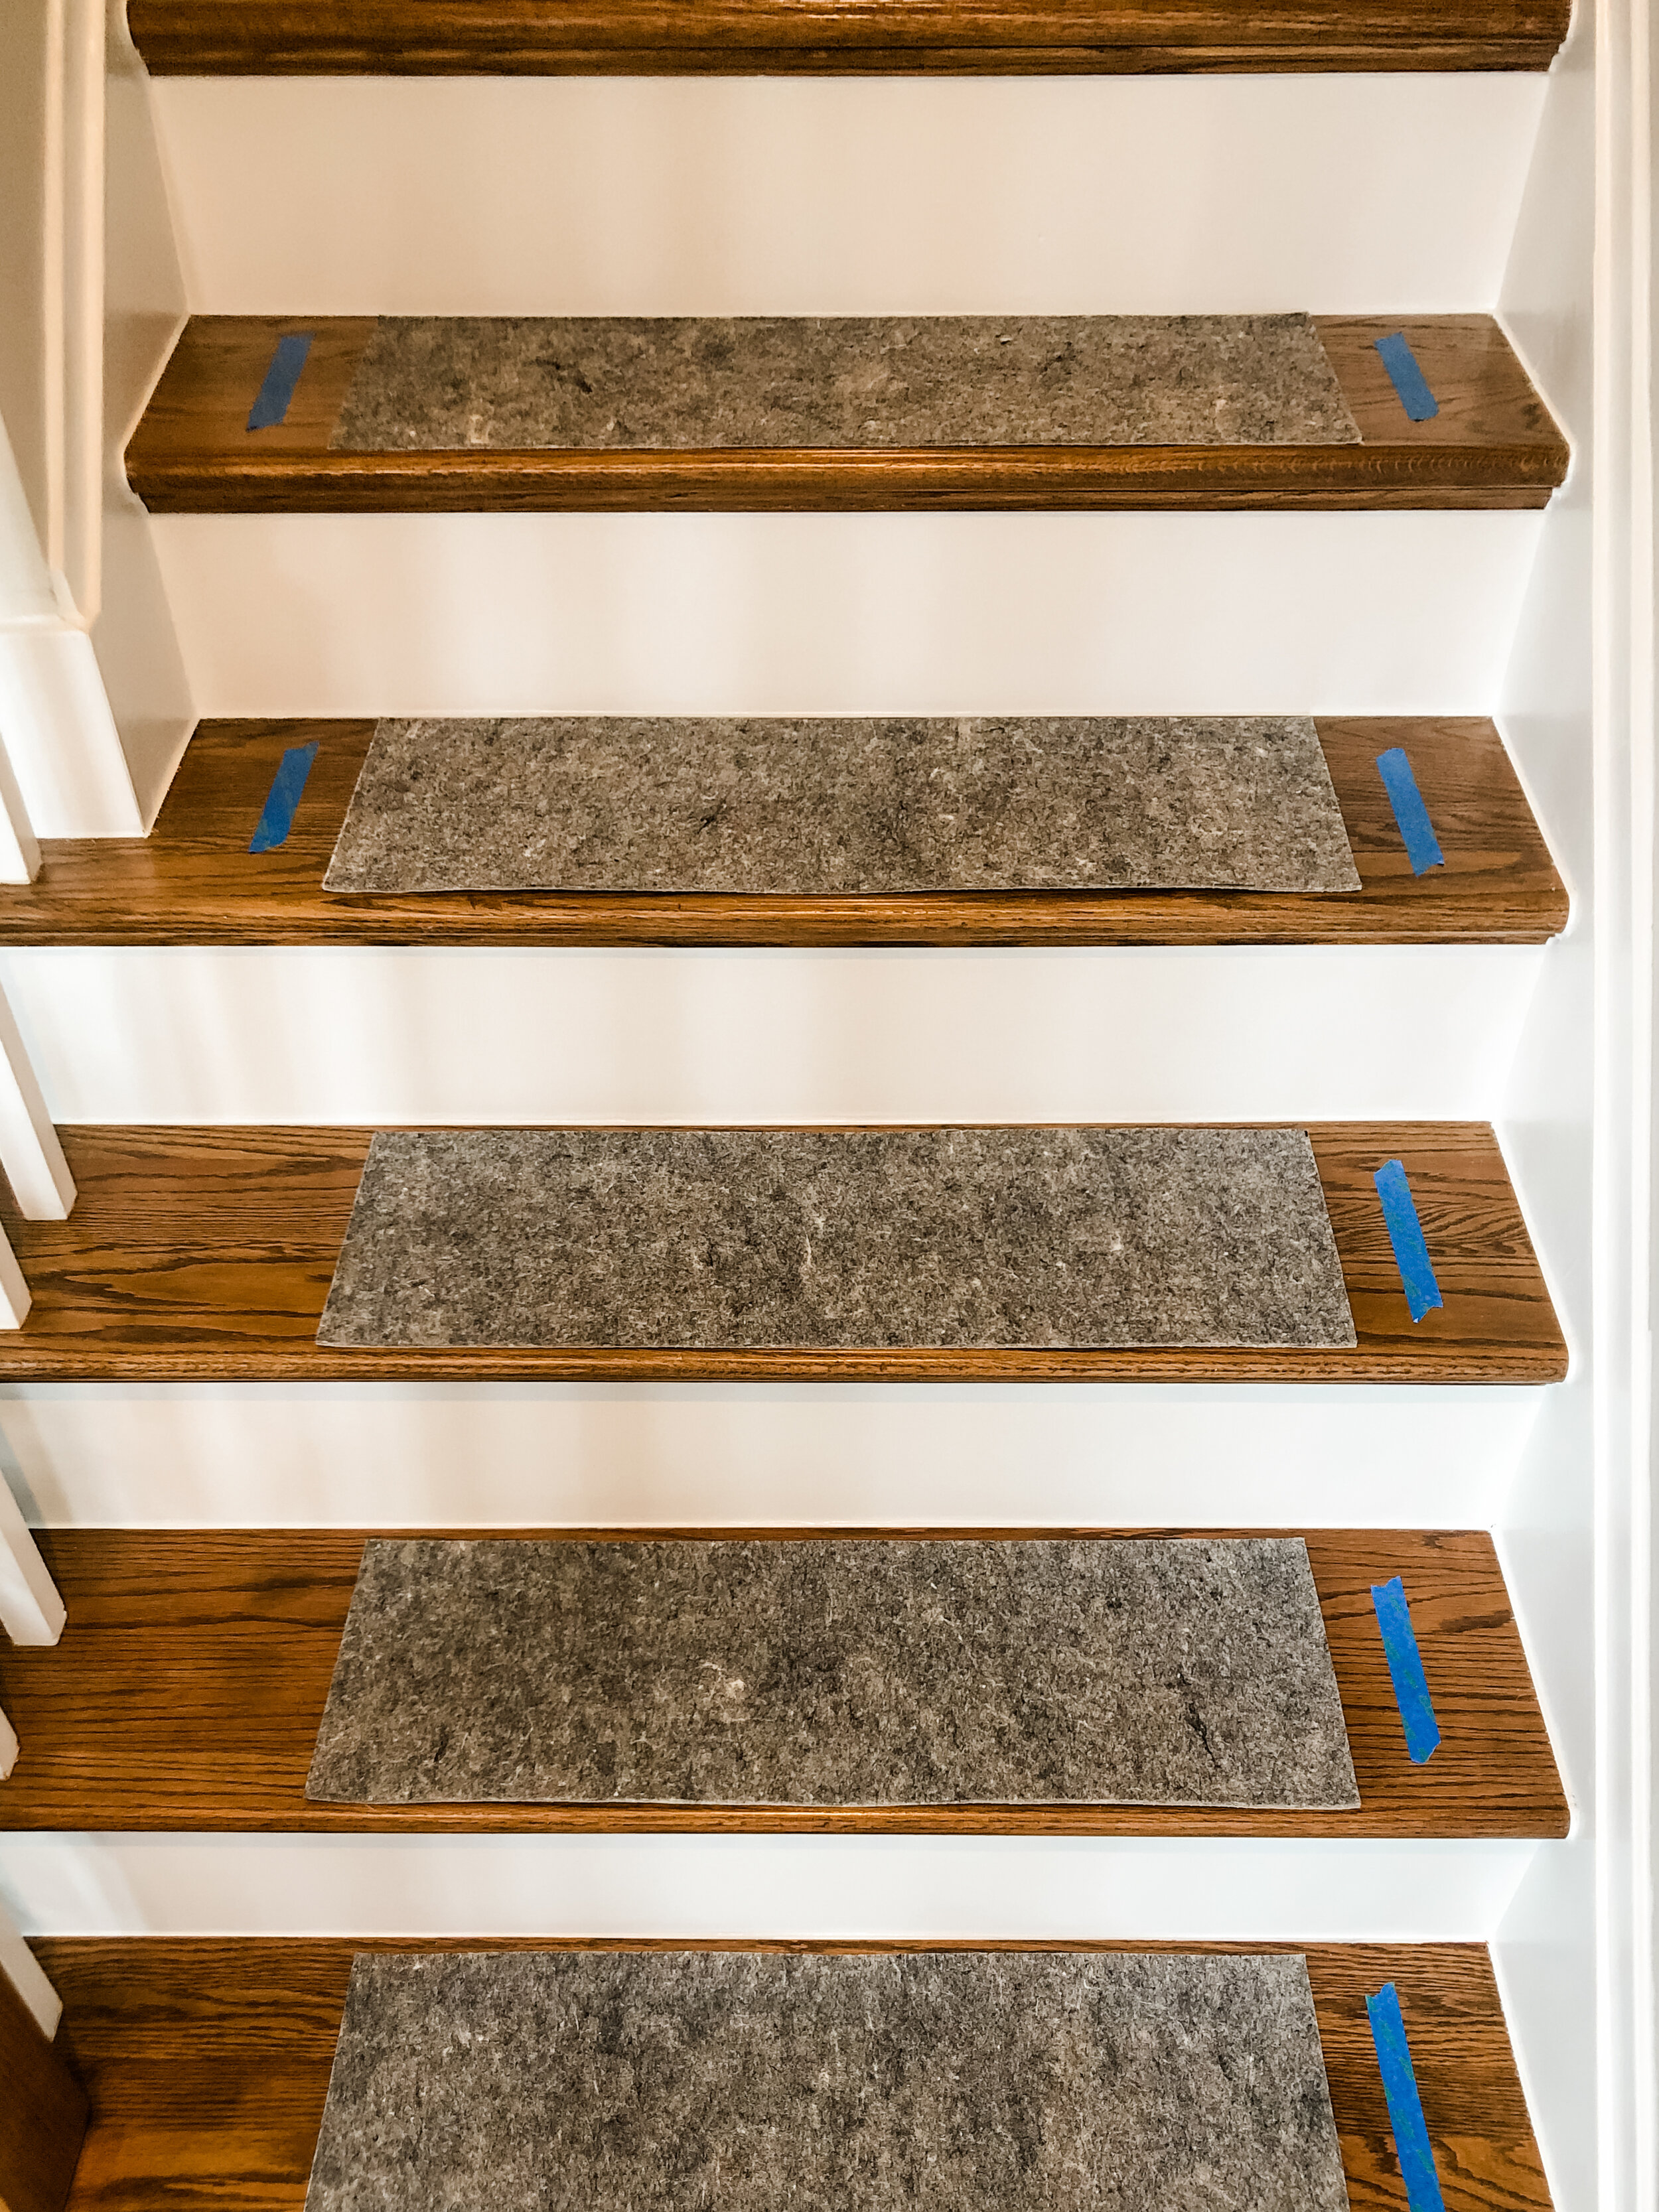
We used painters tape to mark four inches in from the wall on each step
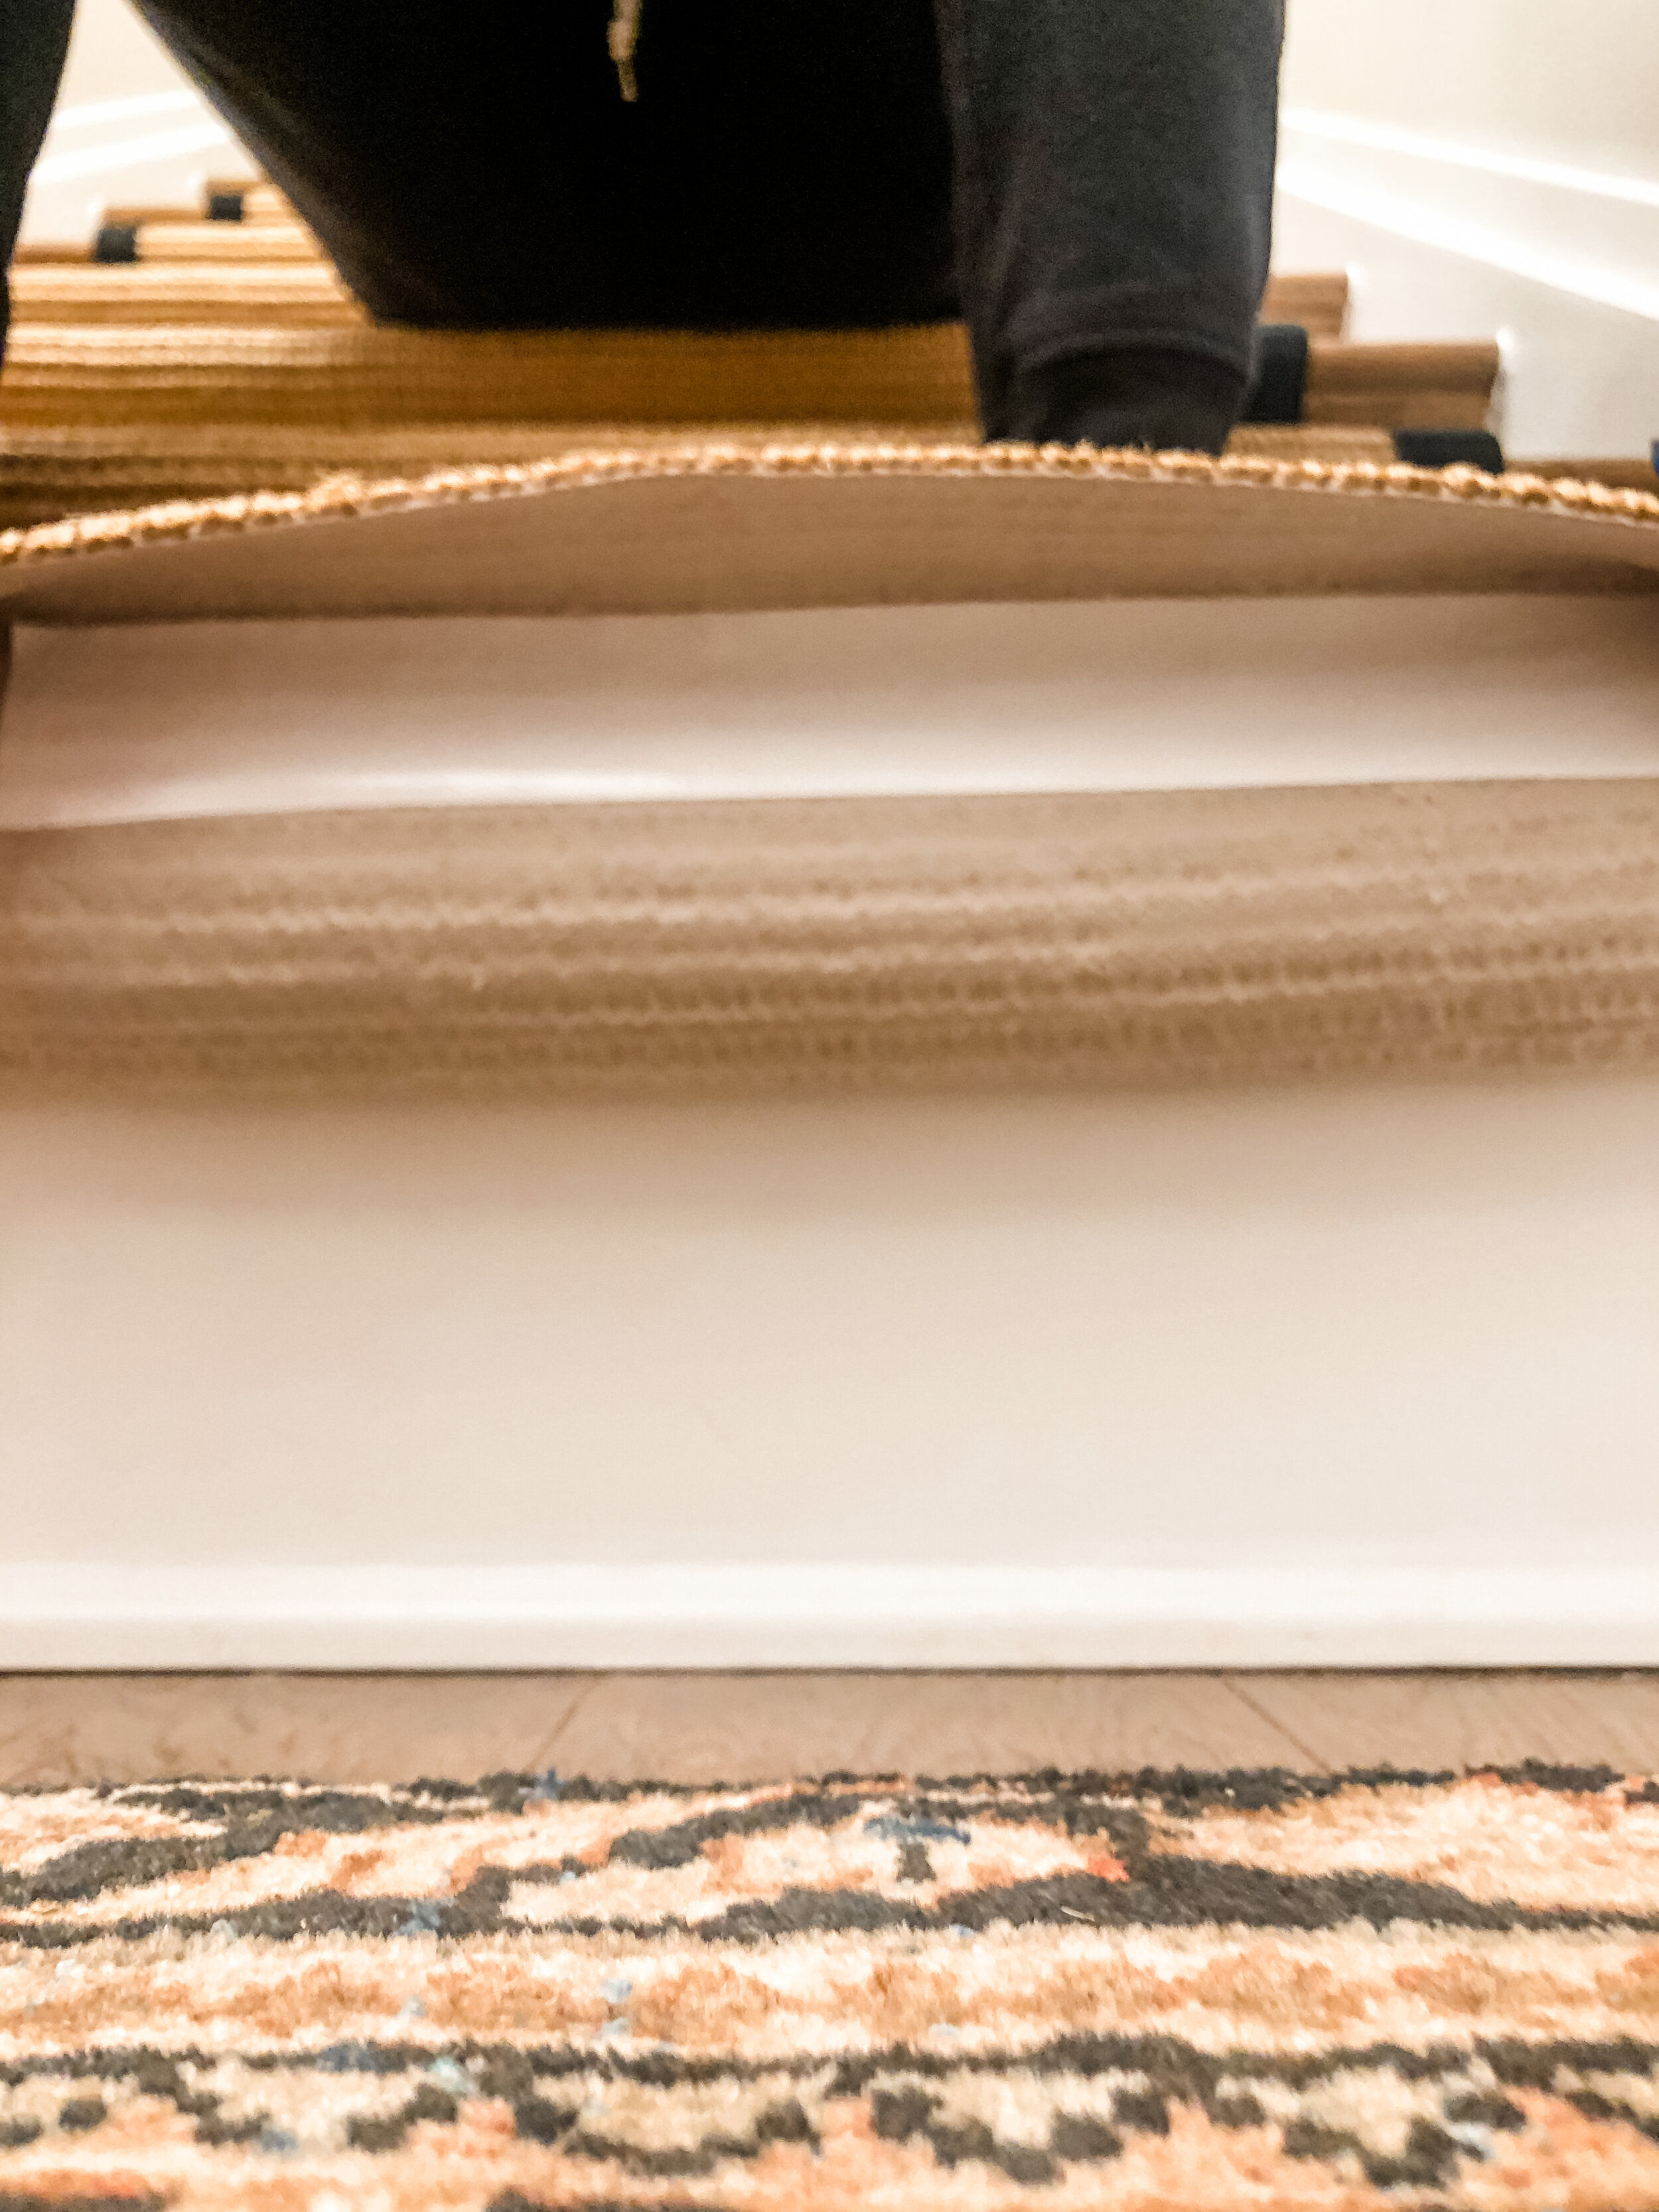
Andrew cut down an 8x10 foot rug pad into 10x28.5 inch rectangles
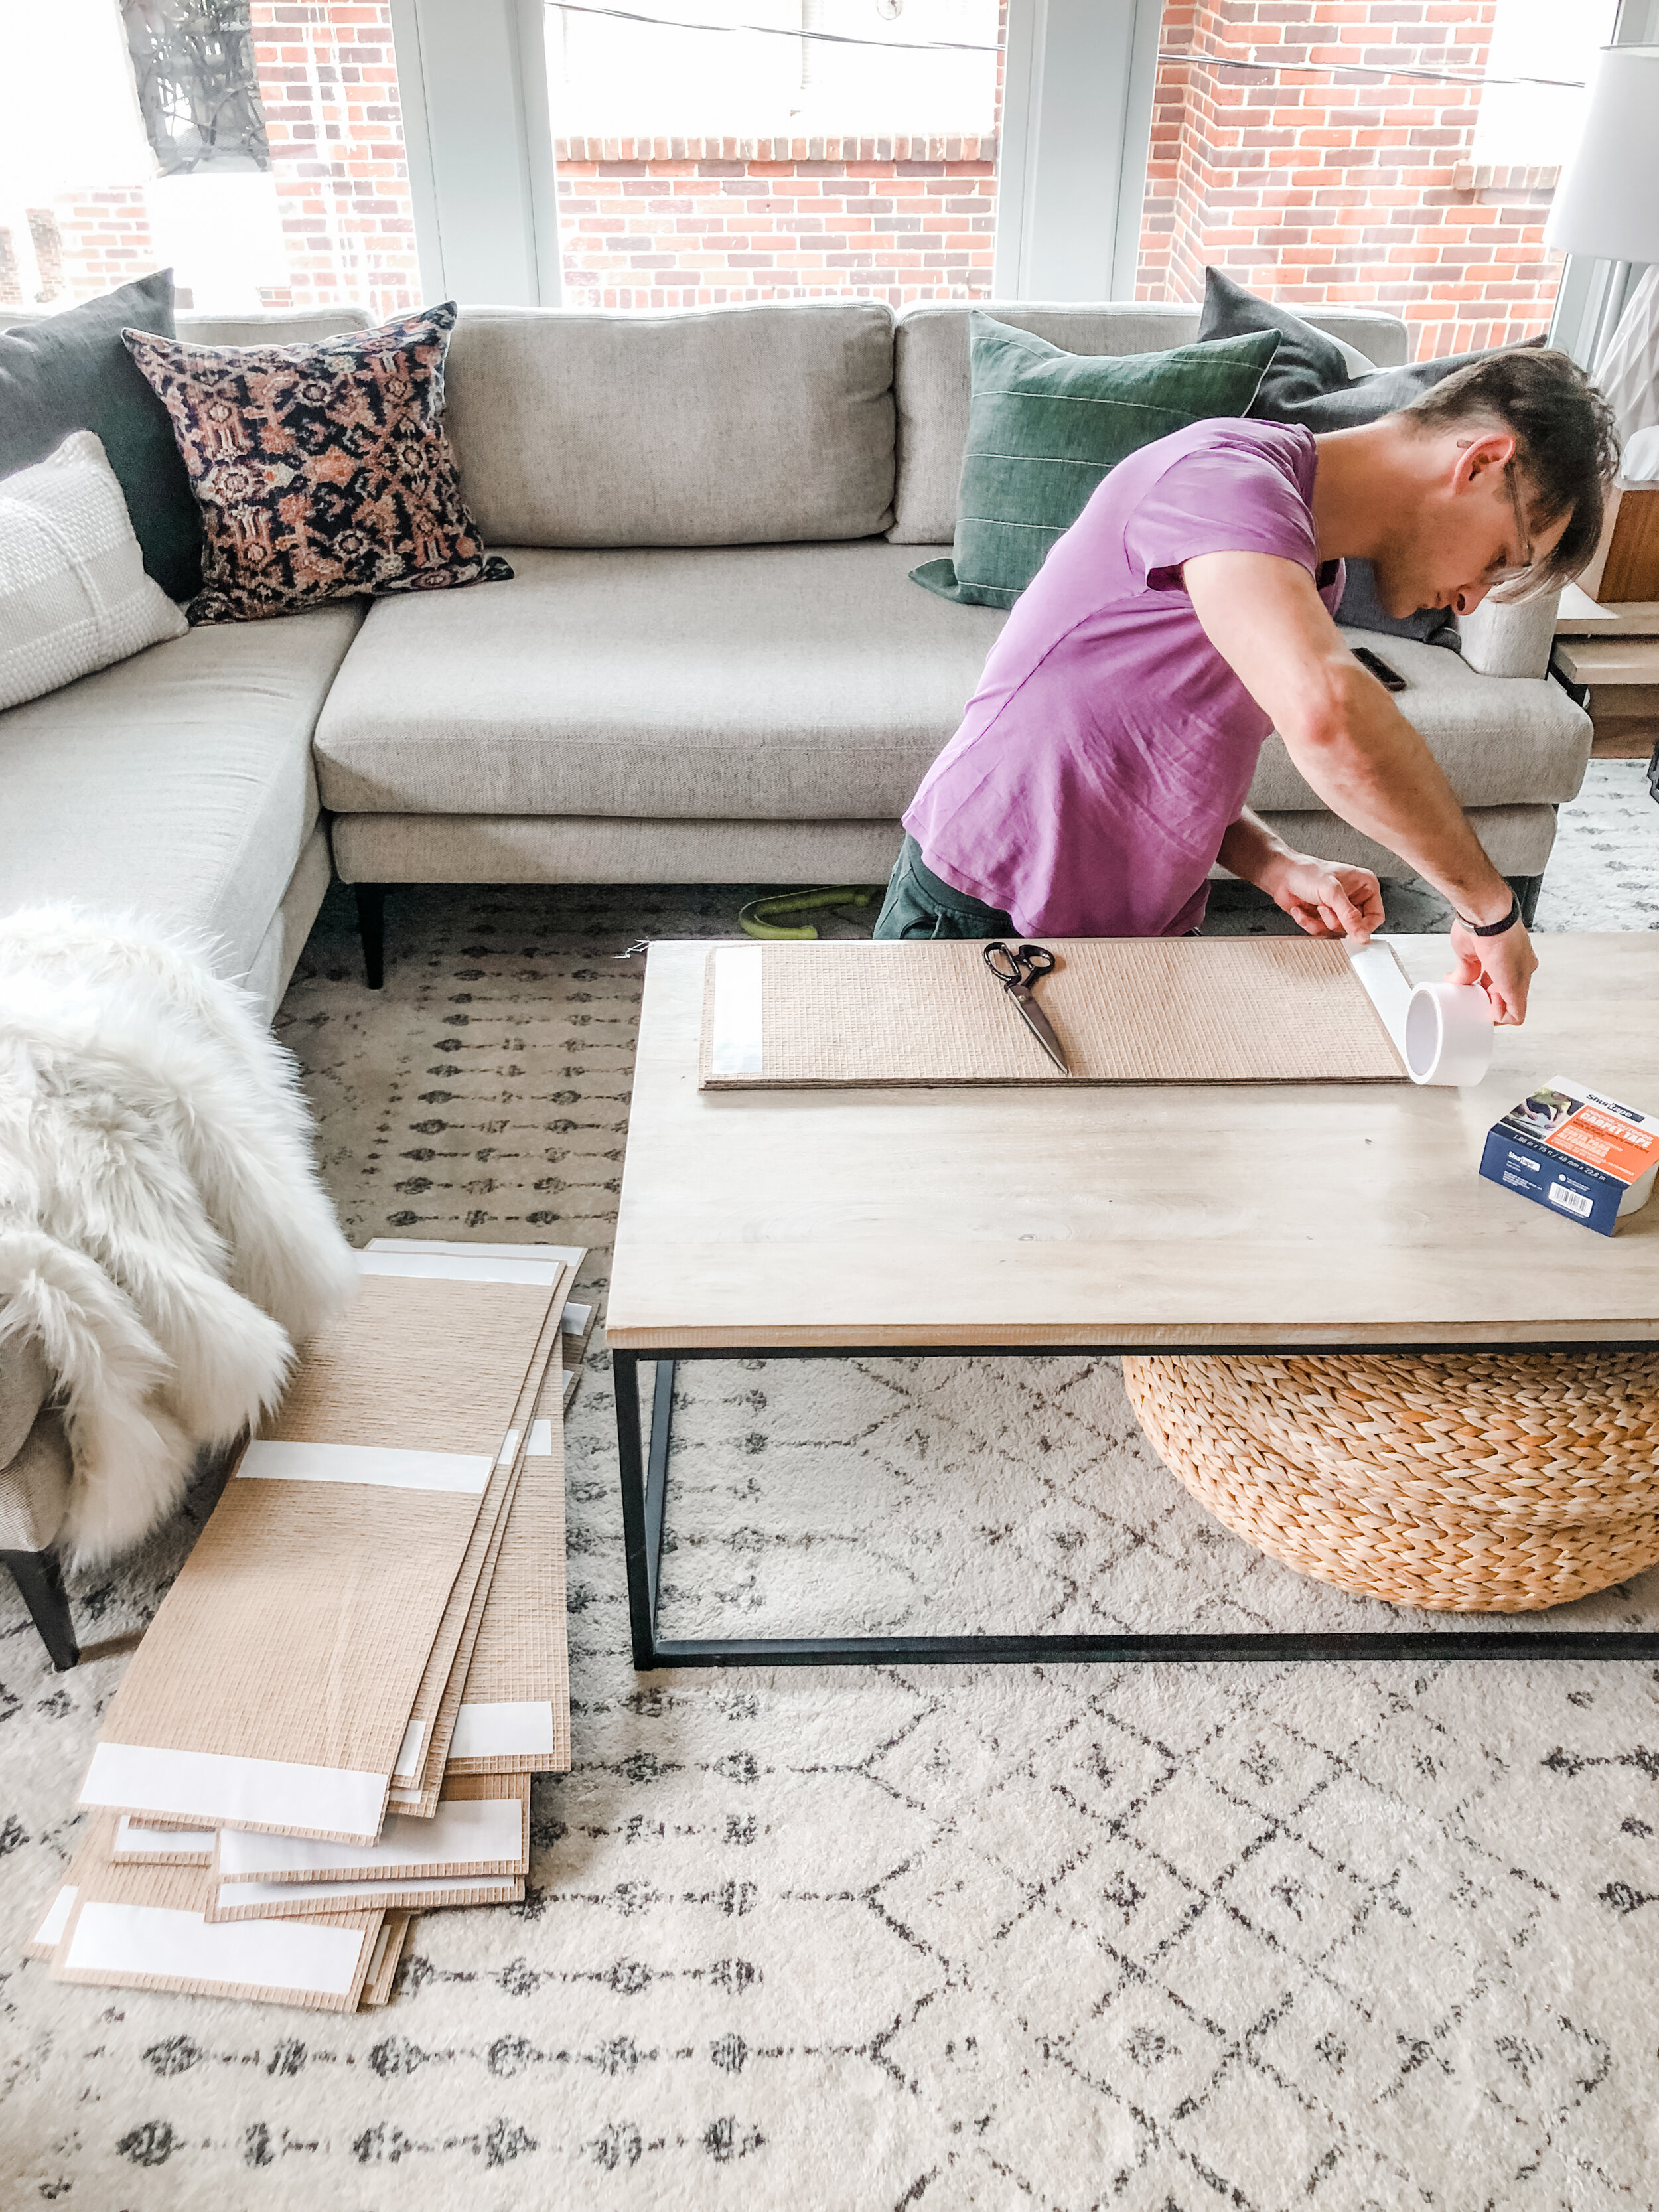
He used carpet tape on the back of the rug pad to hold it in place on each stair
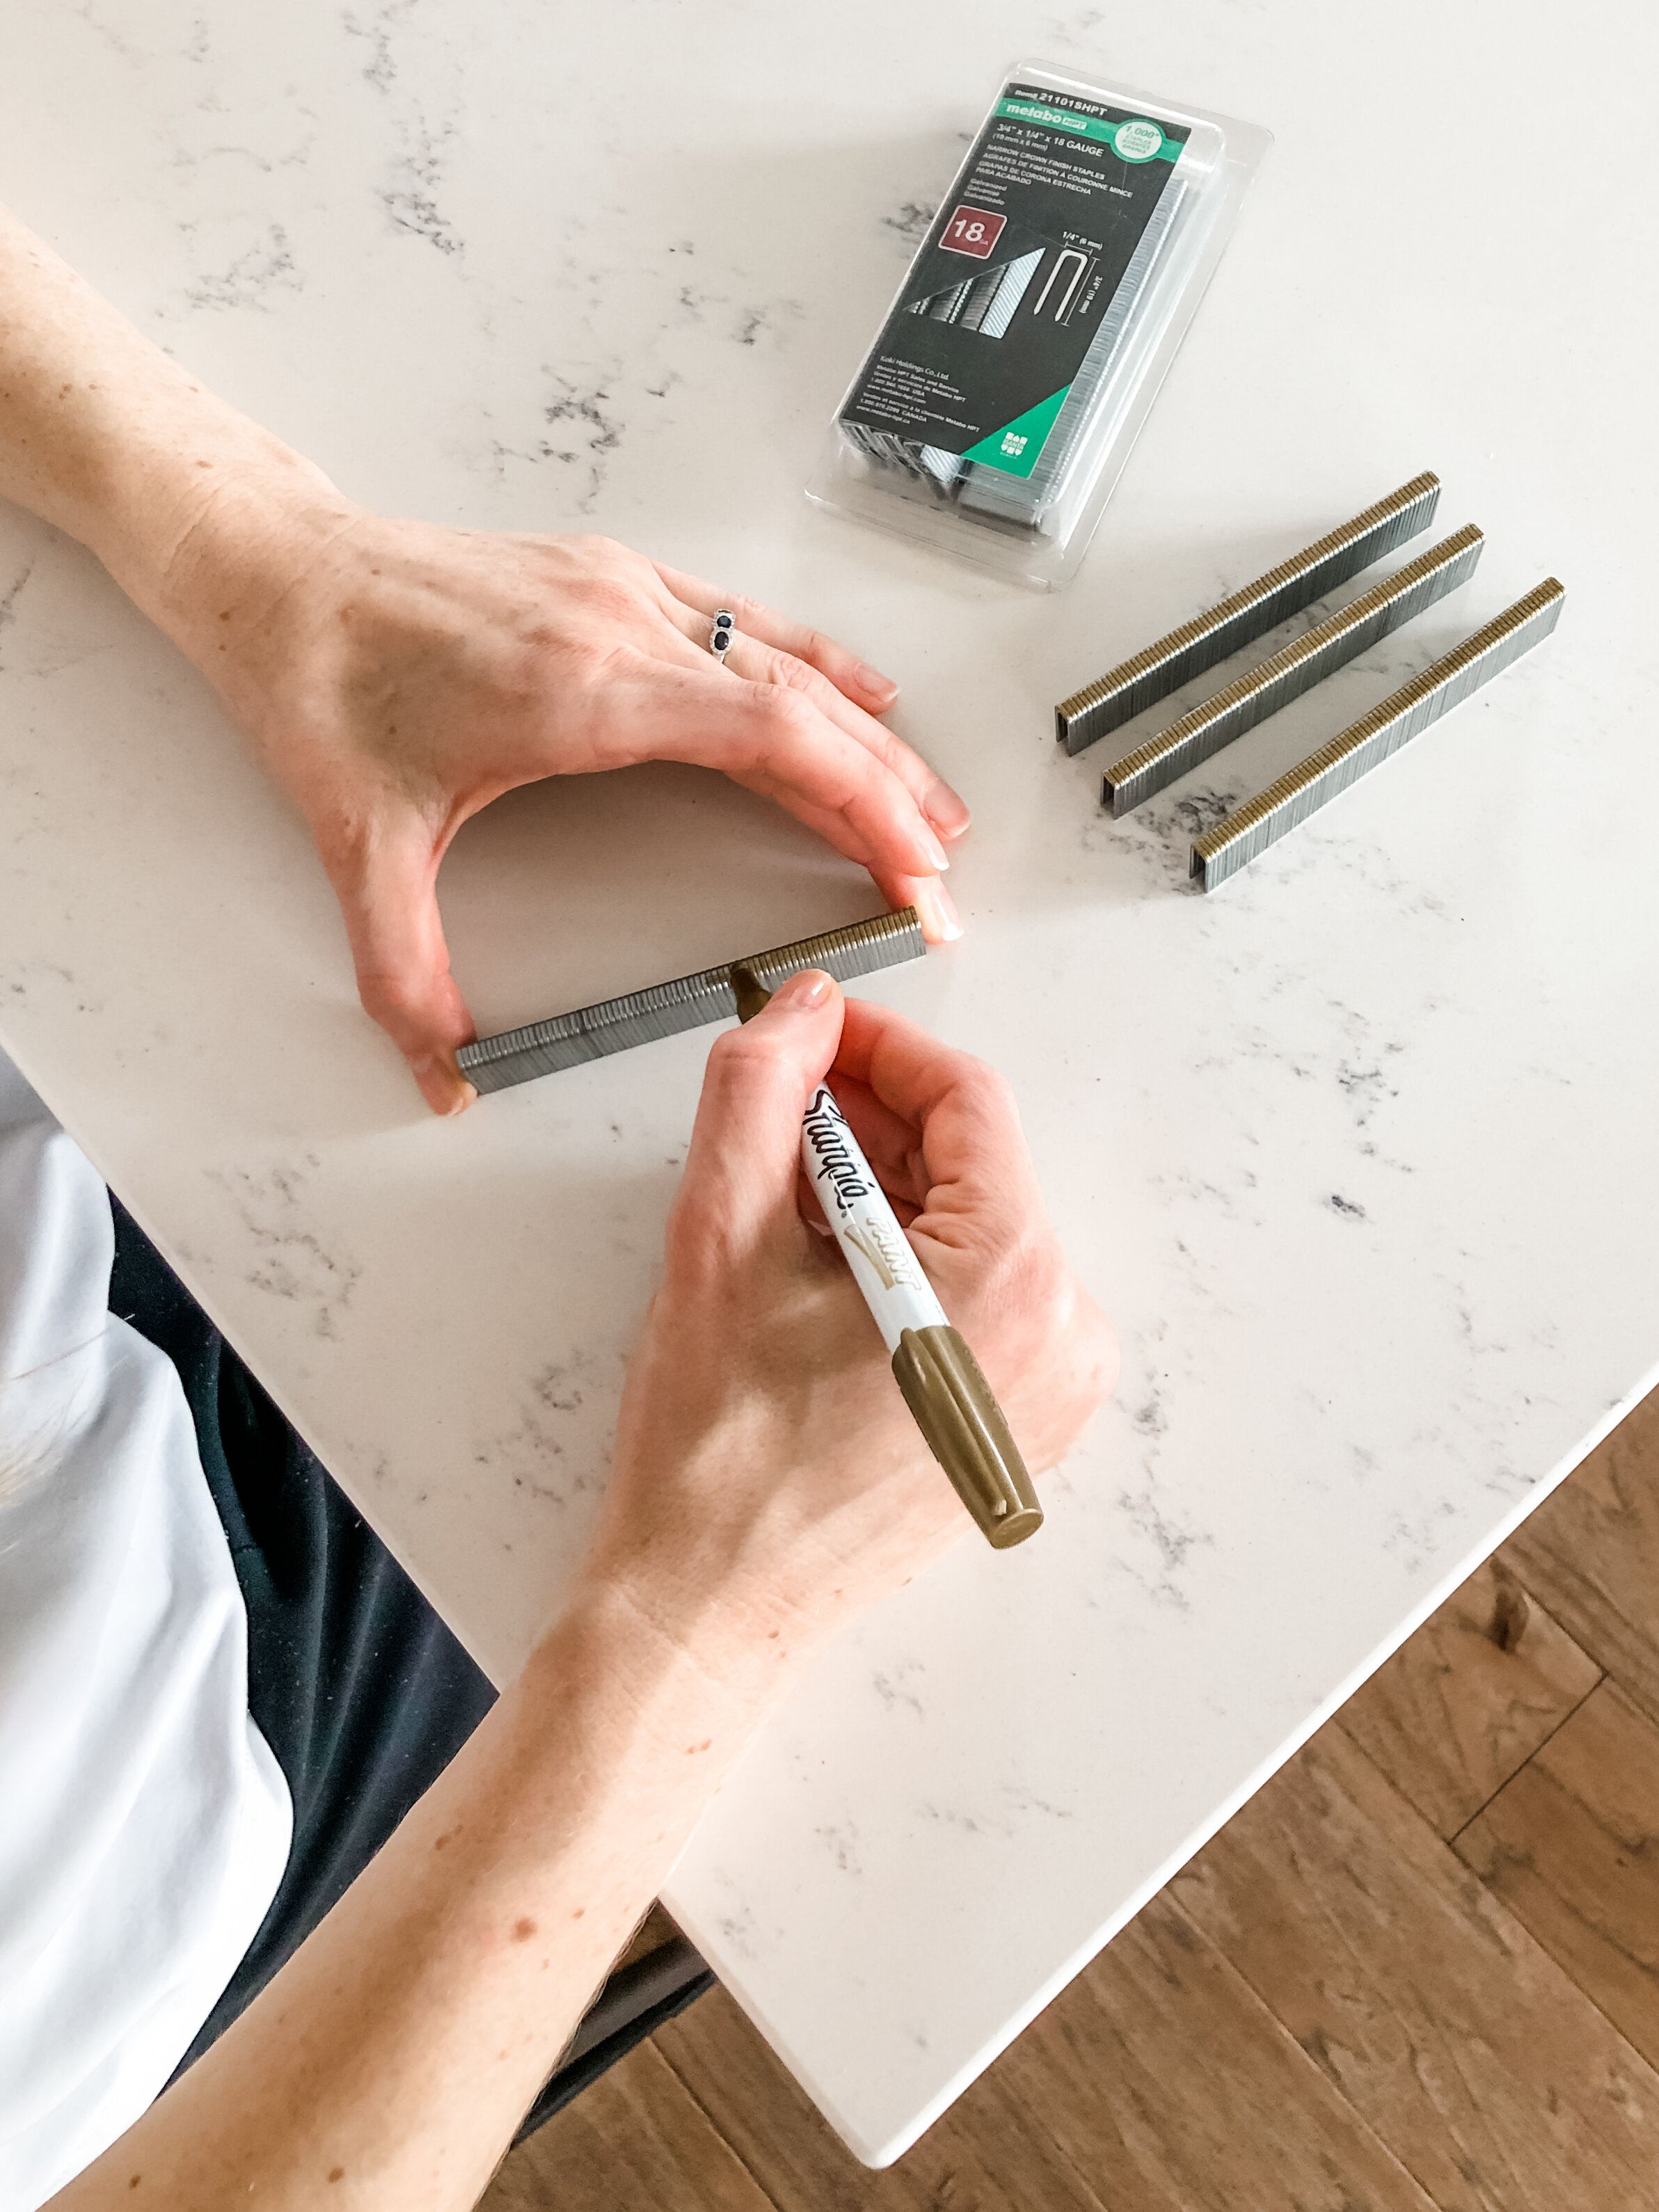
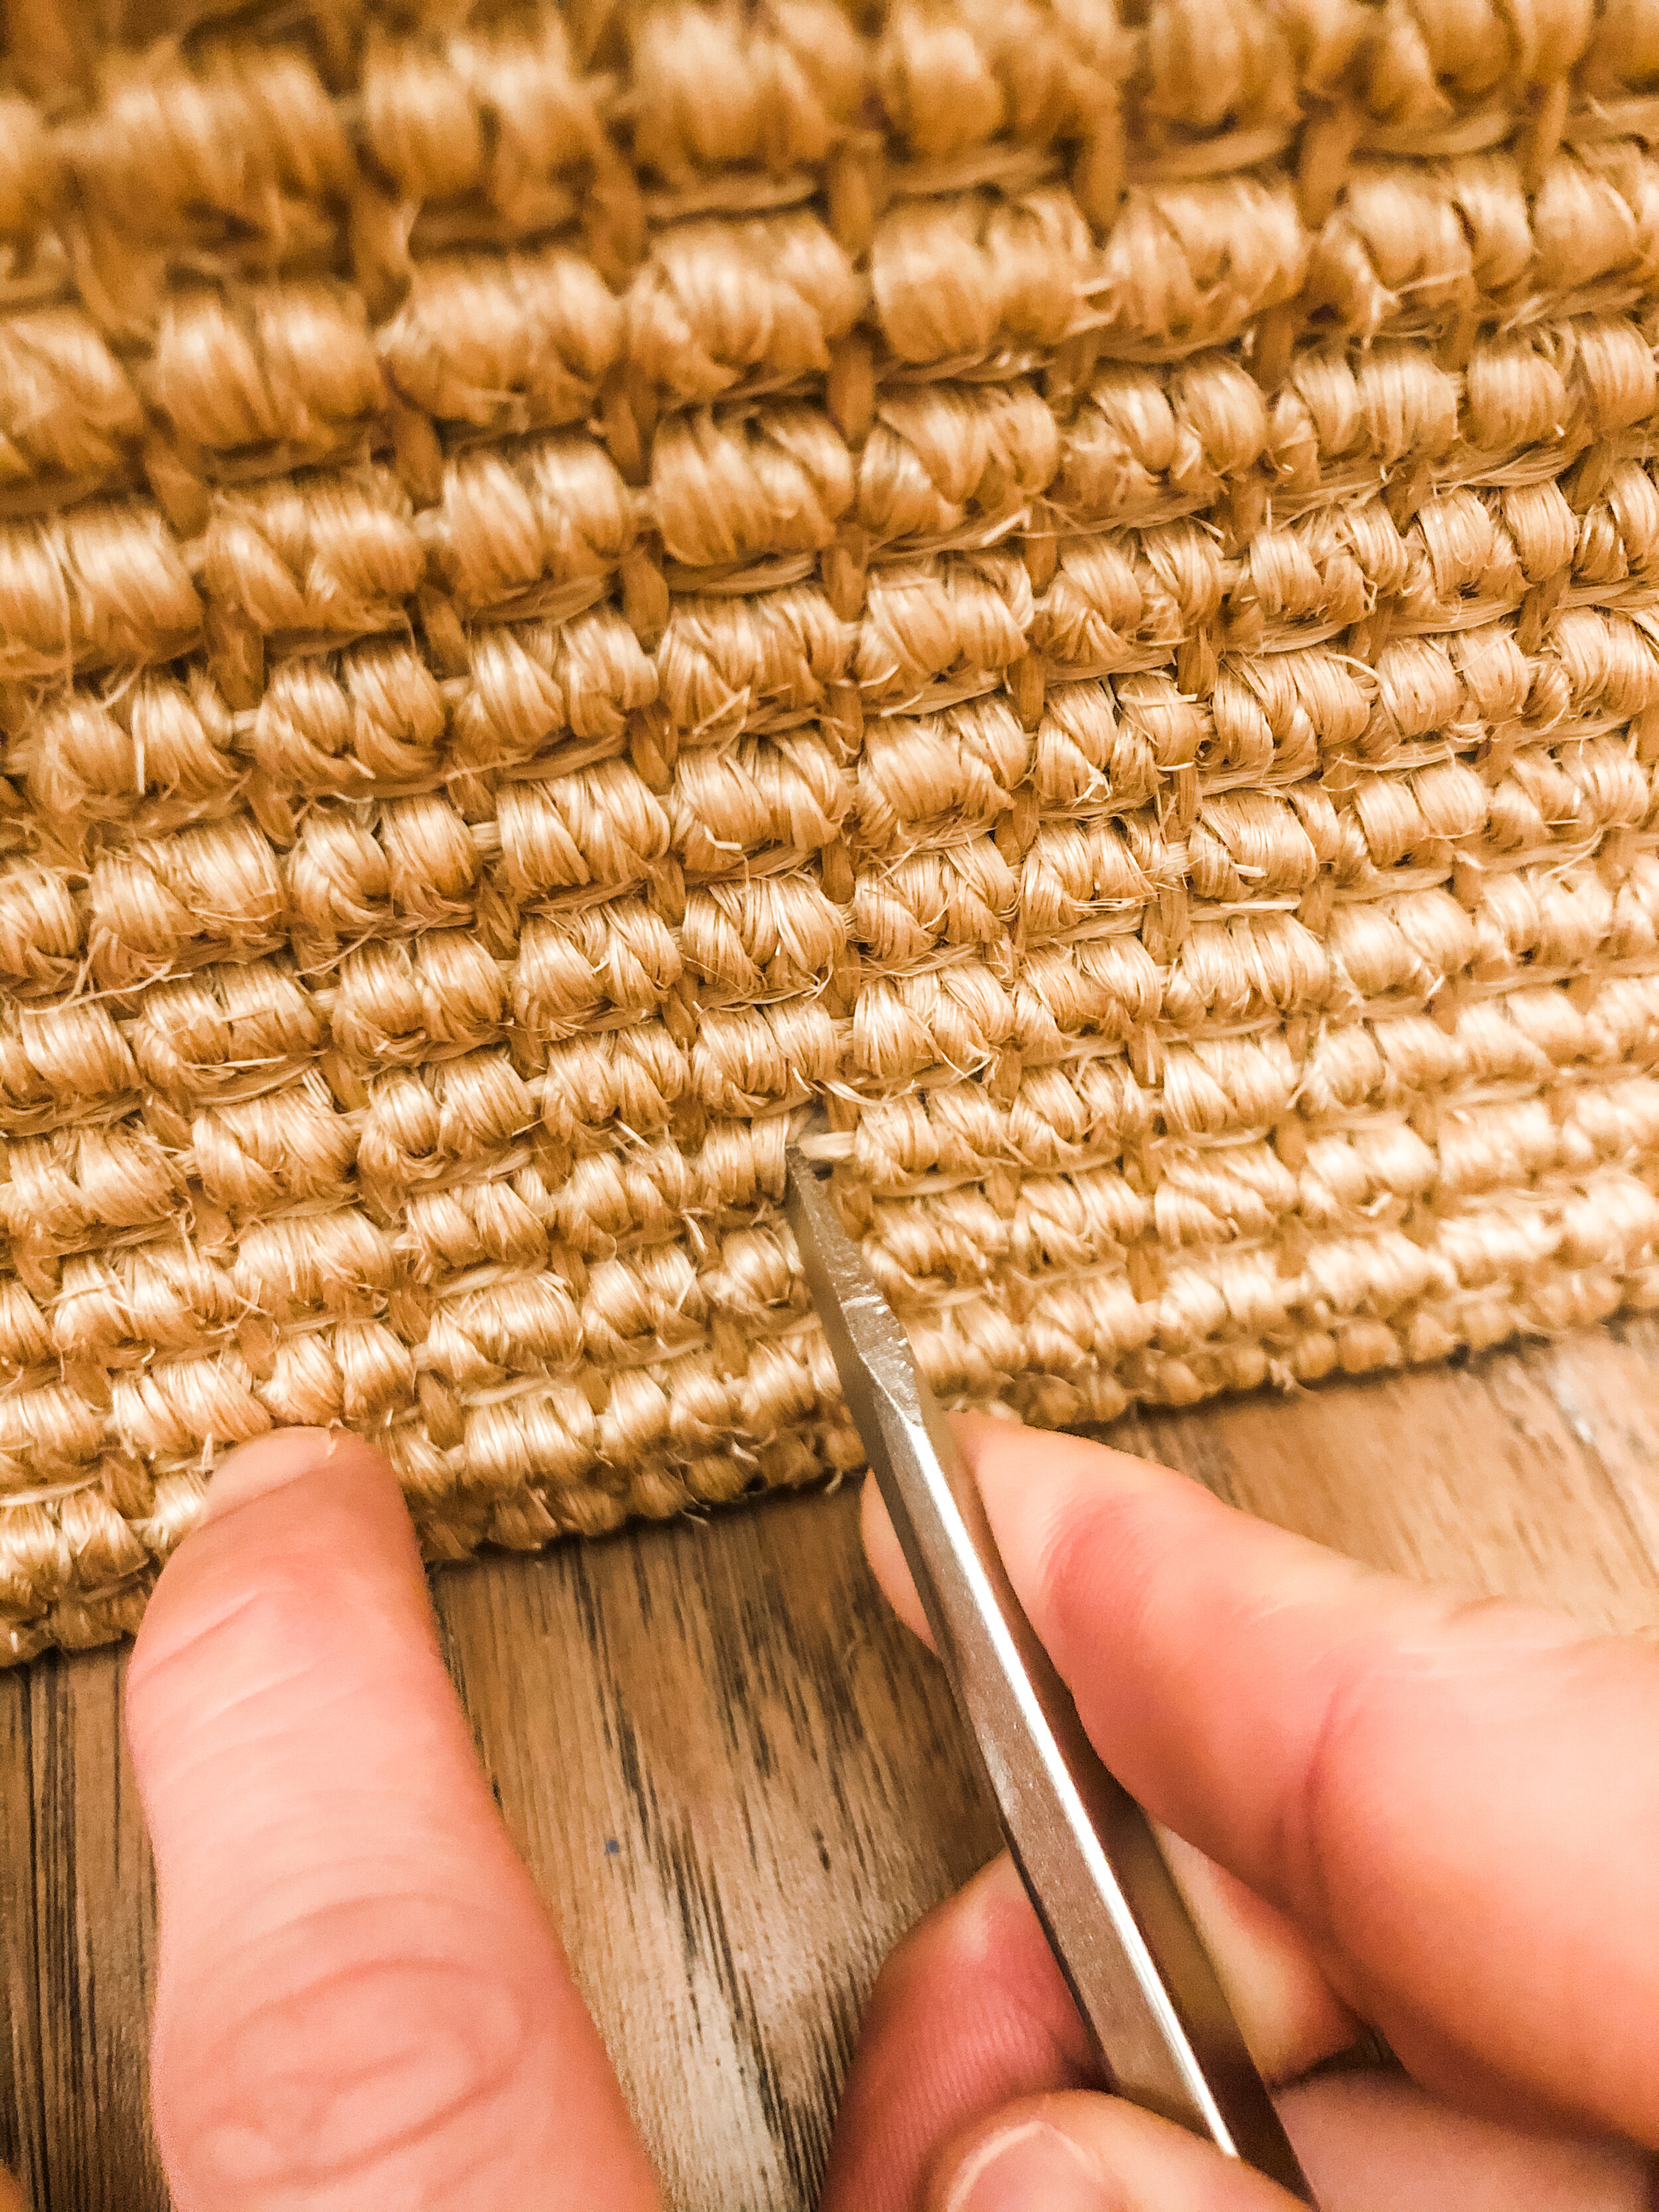
I colored the top of the staples with a gold paint sharpie to help them blend in with the sisal
Installation
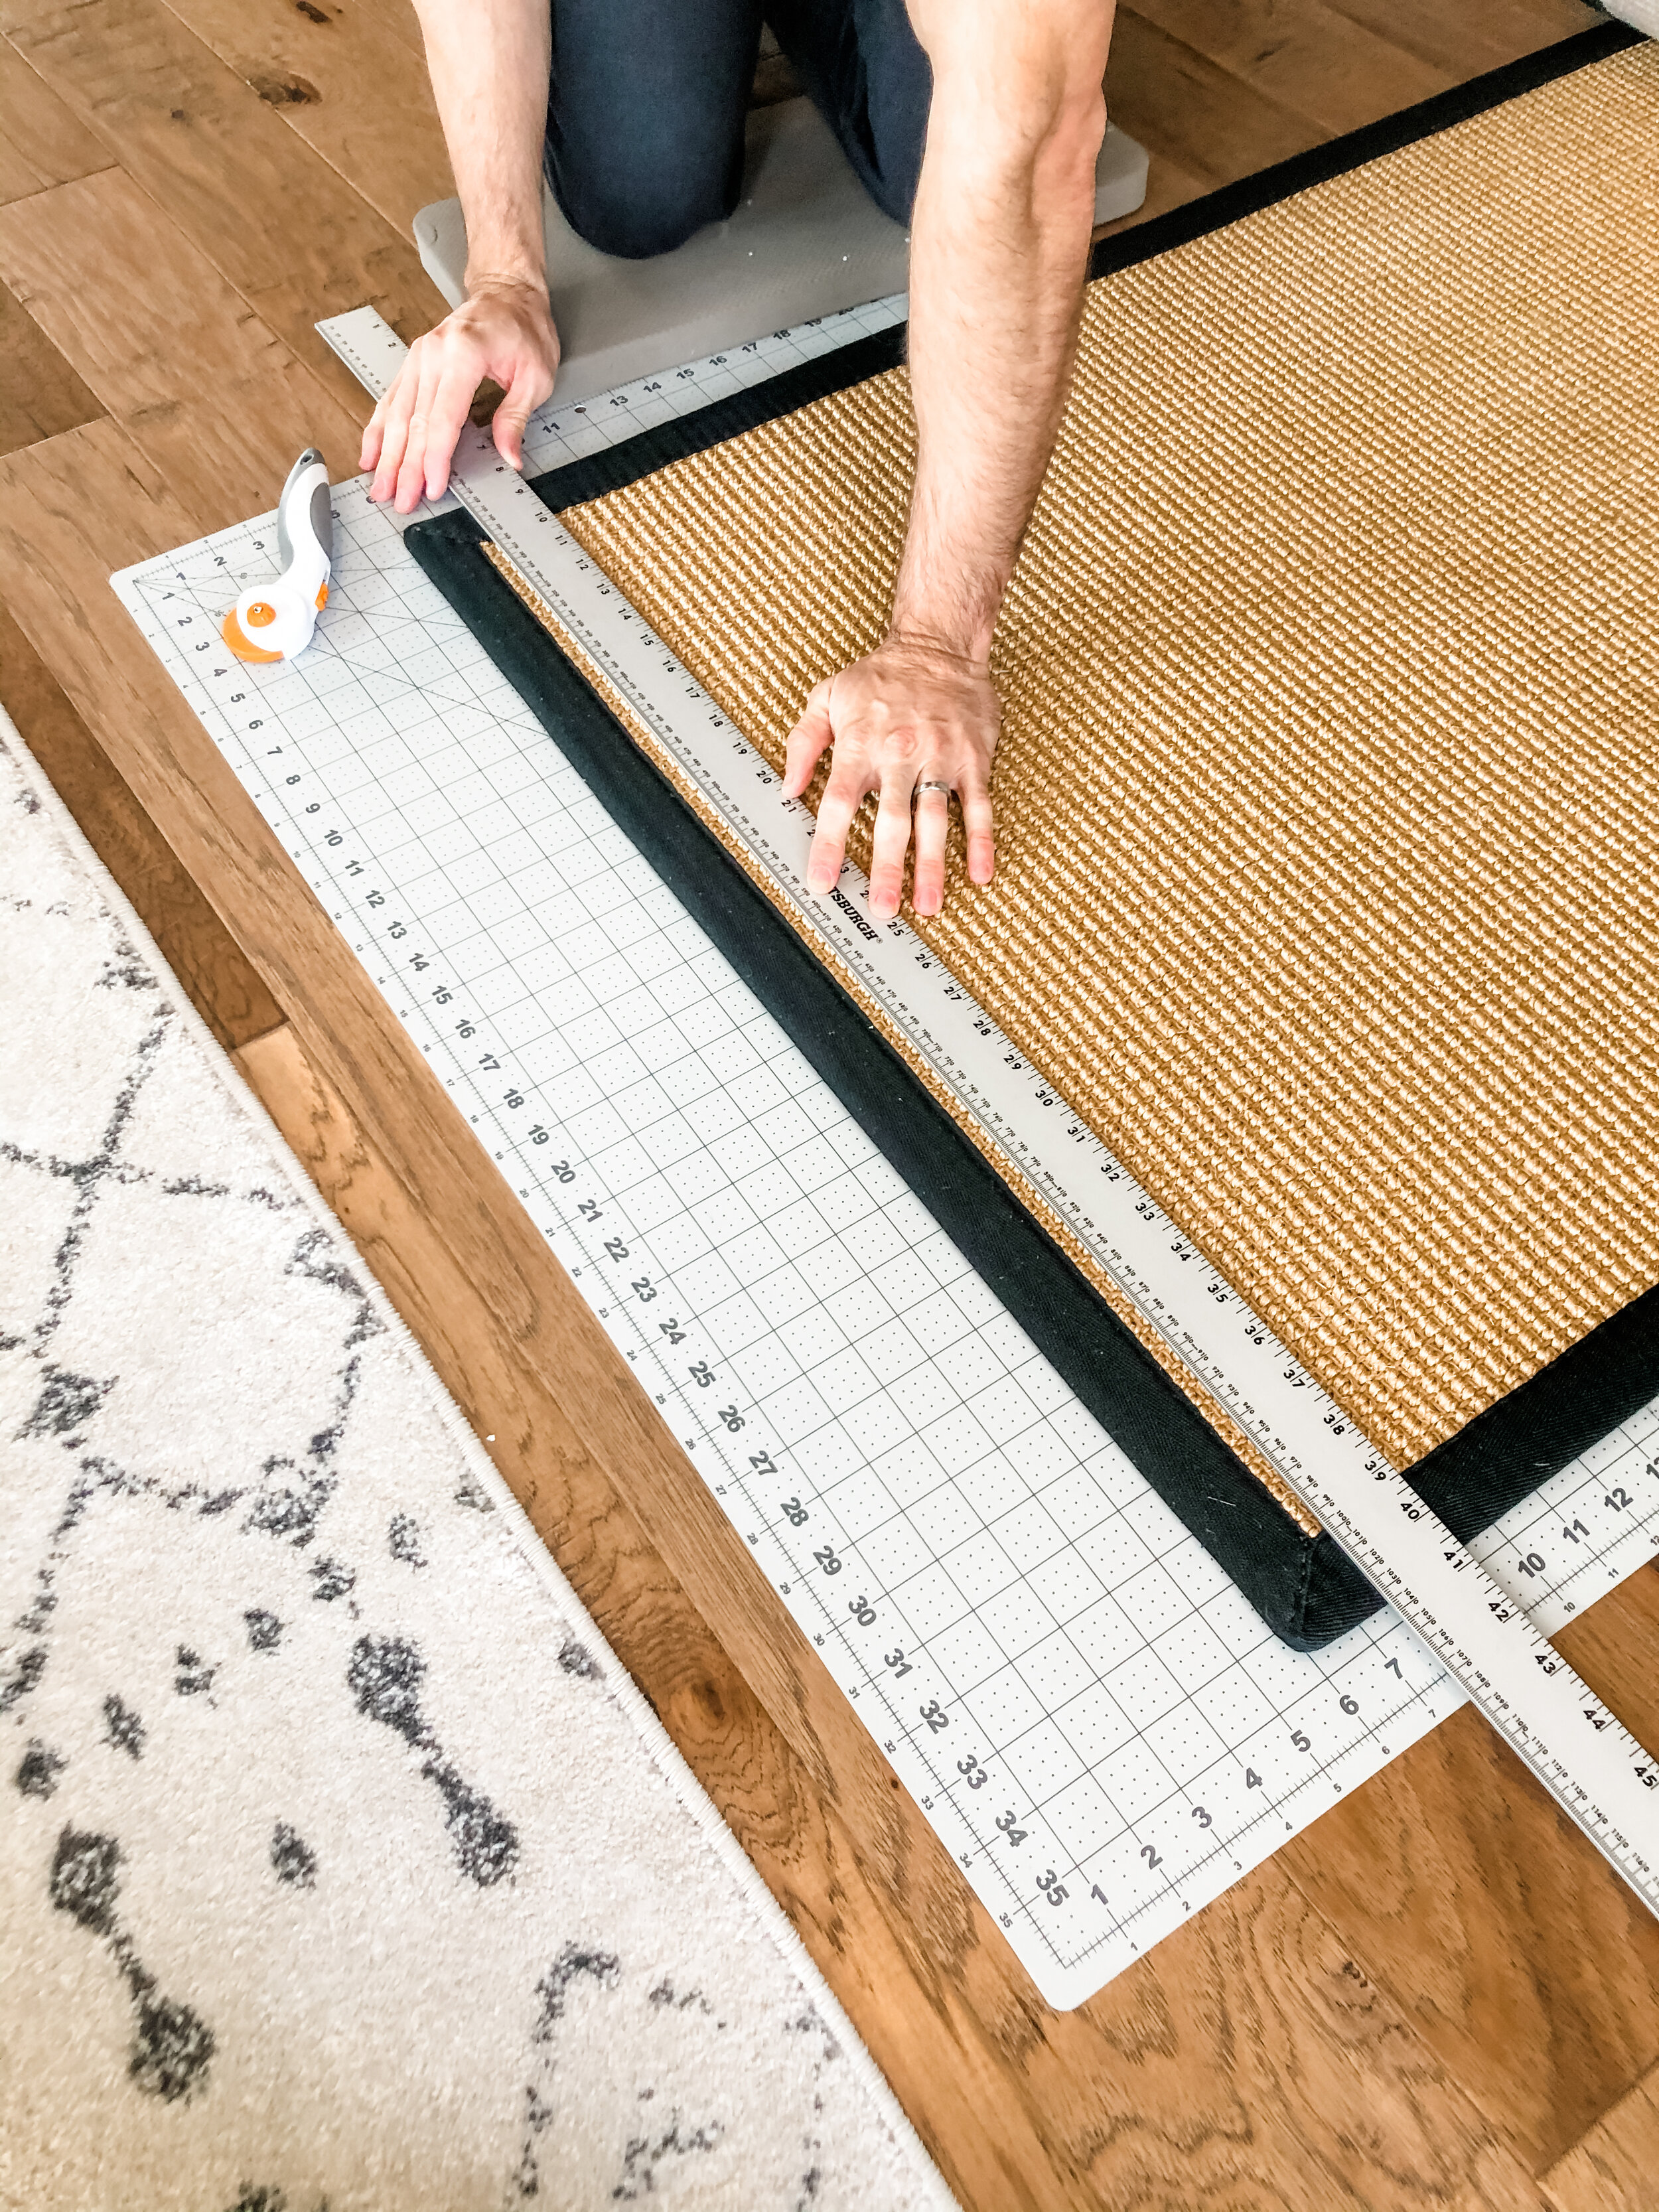
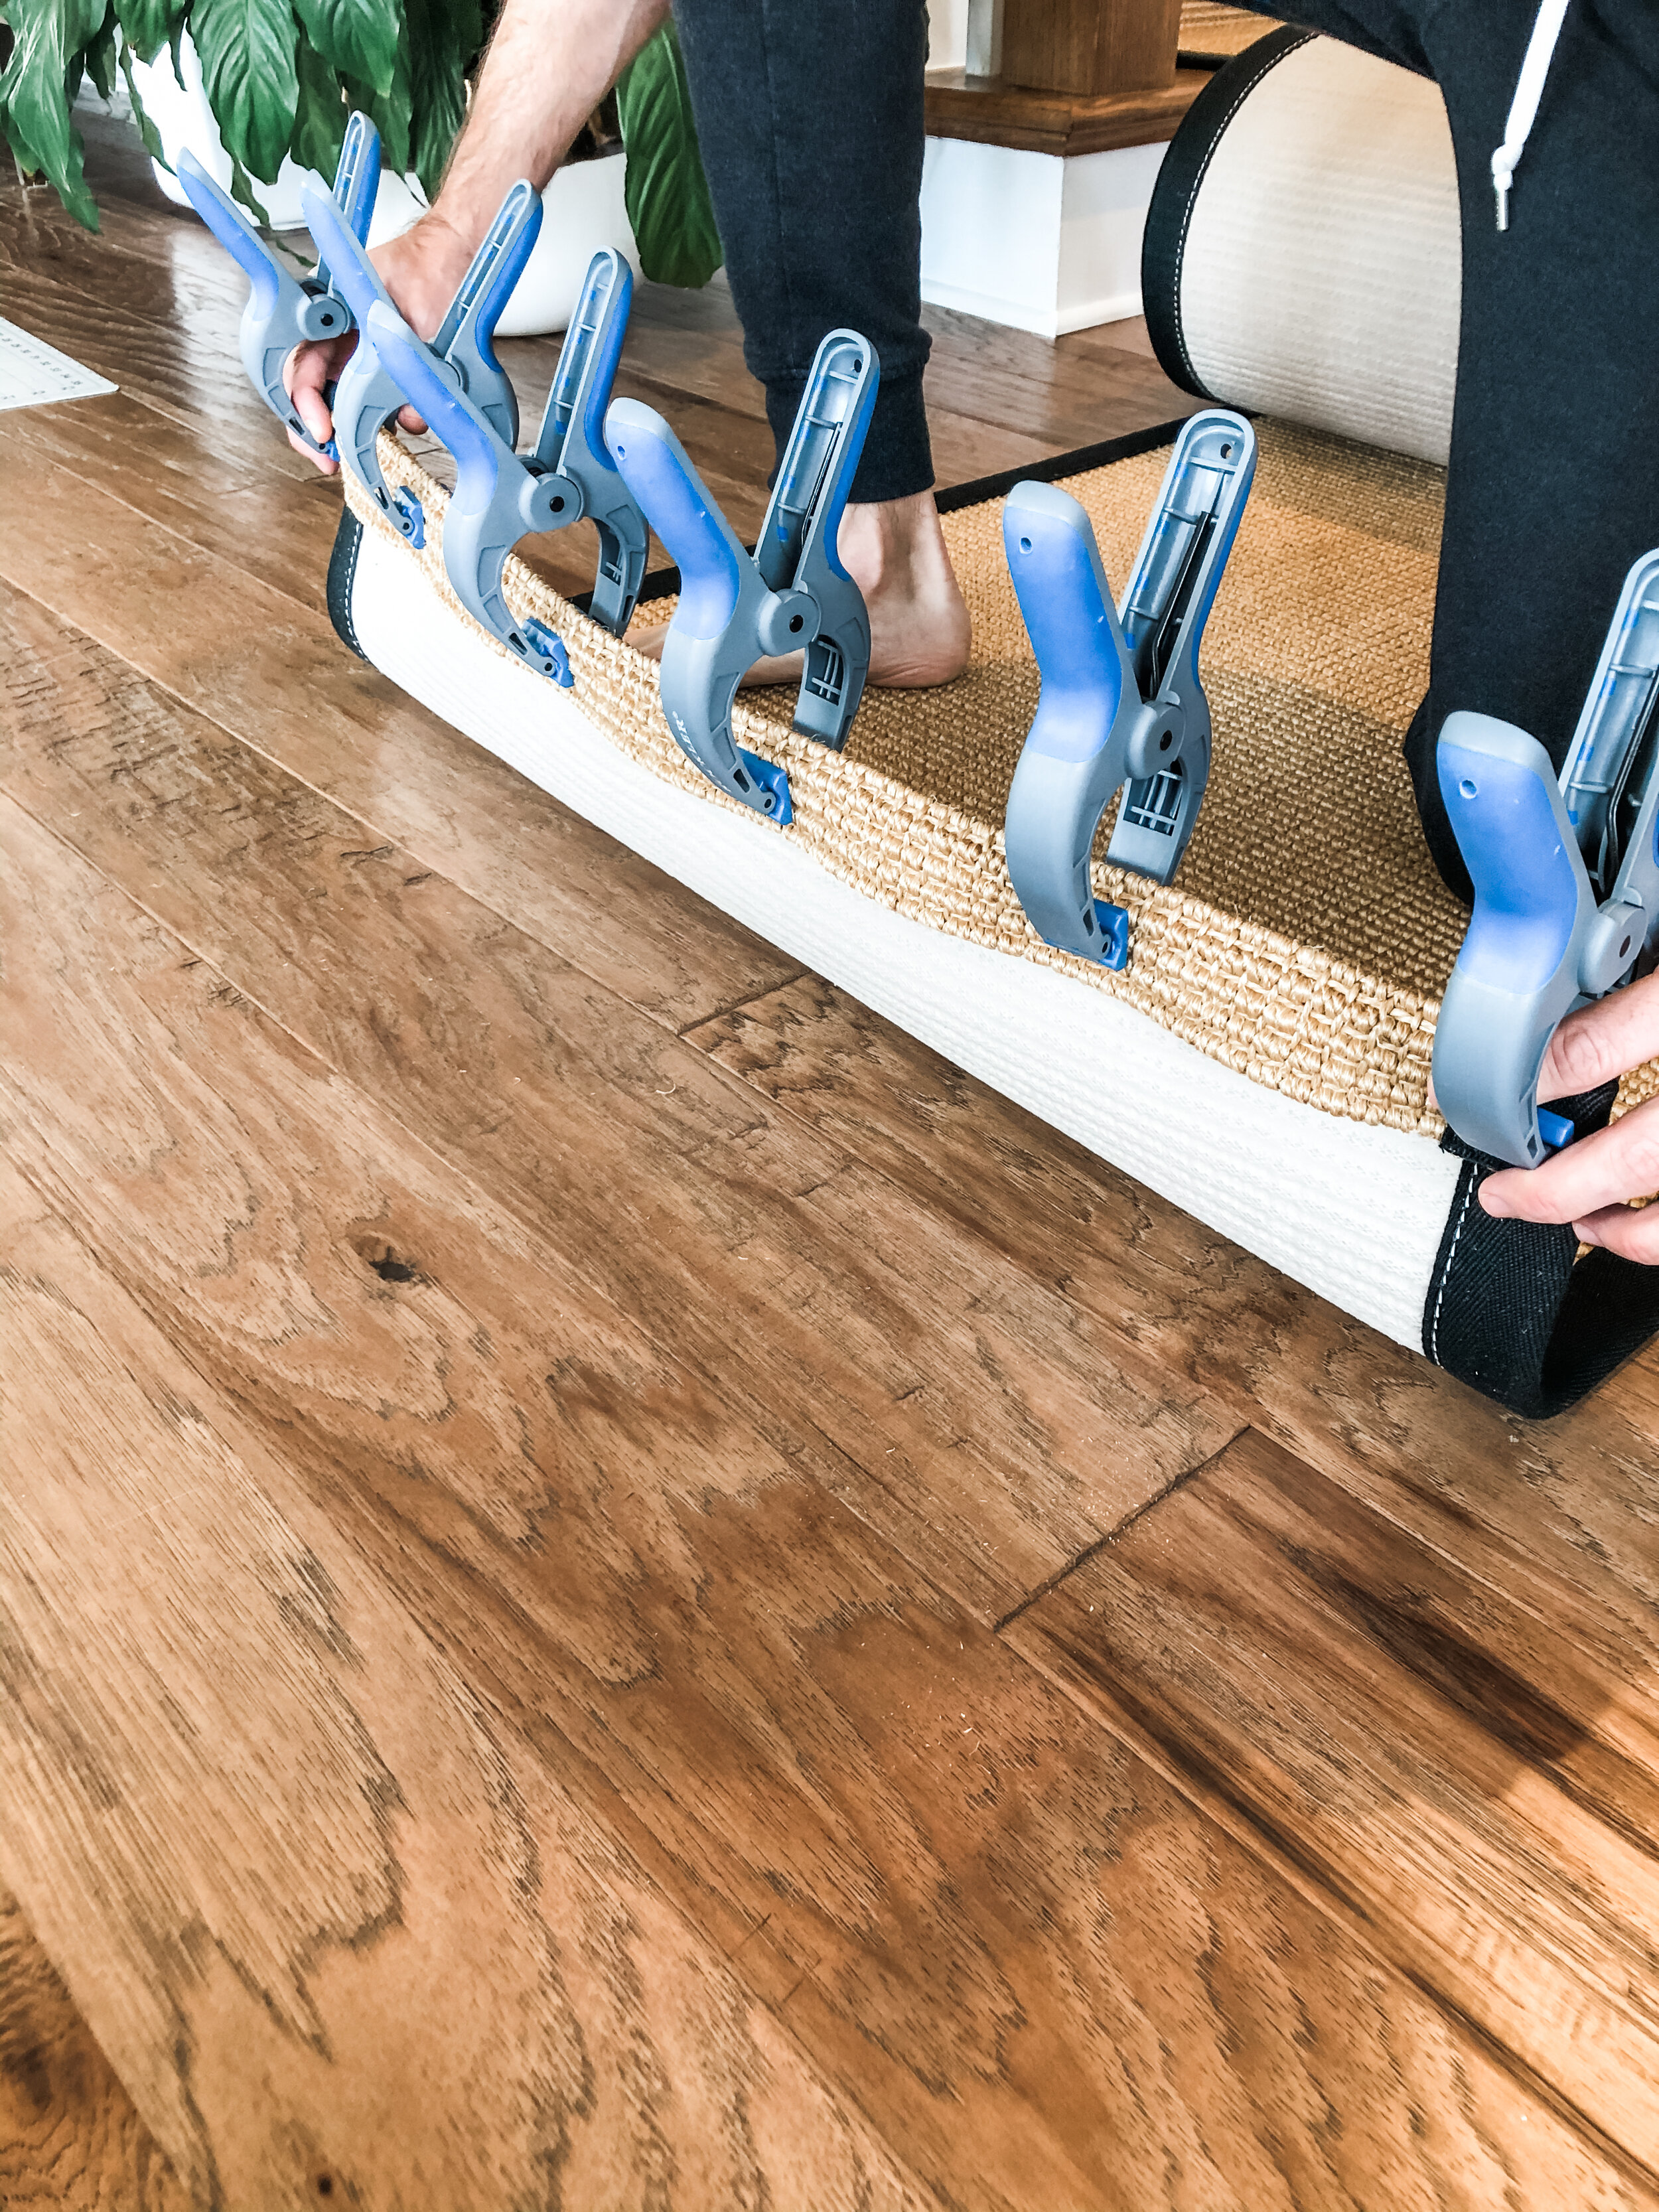
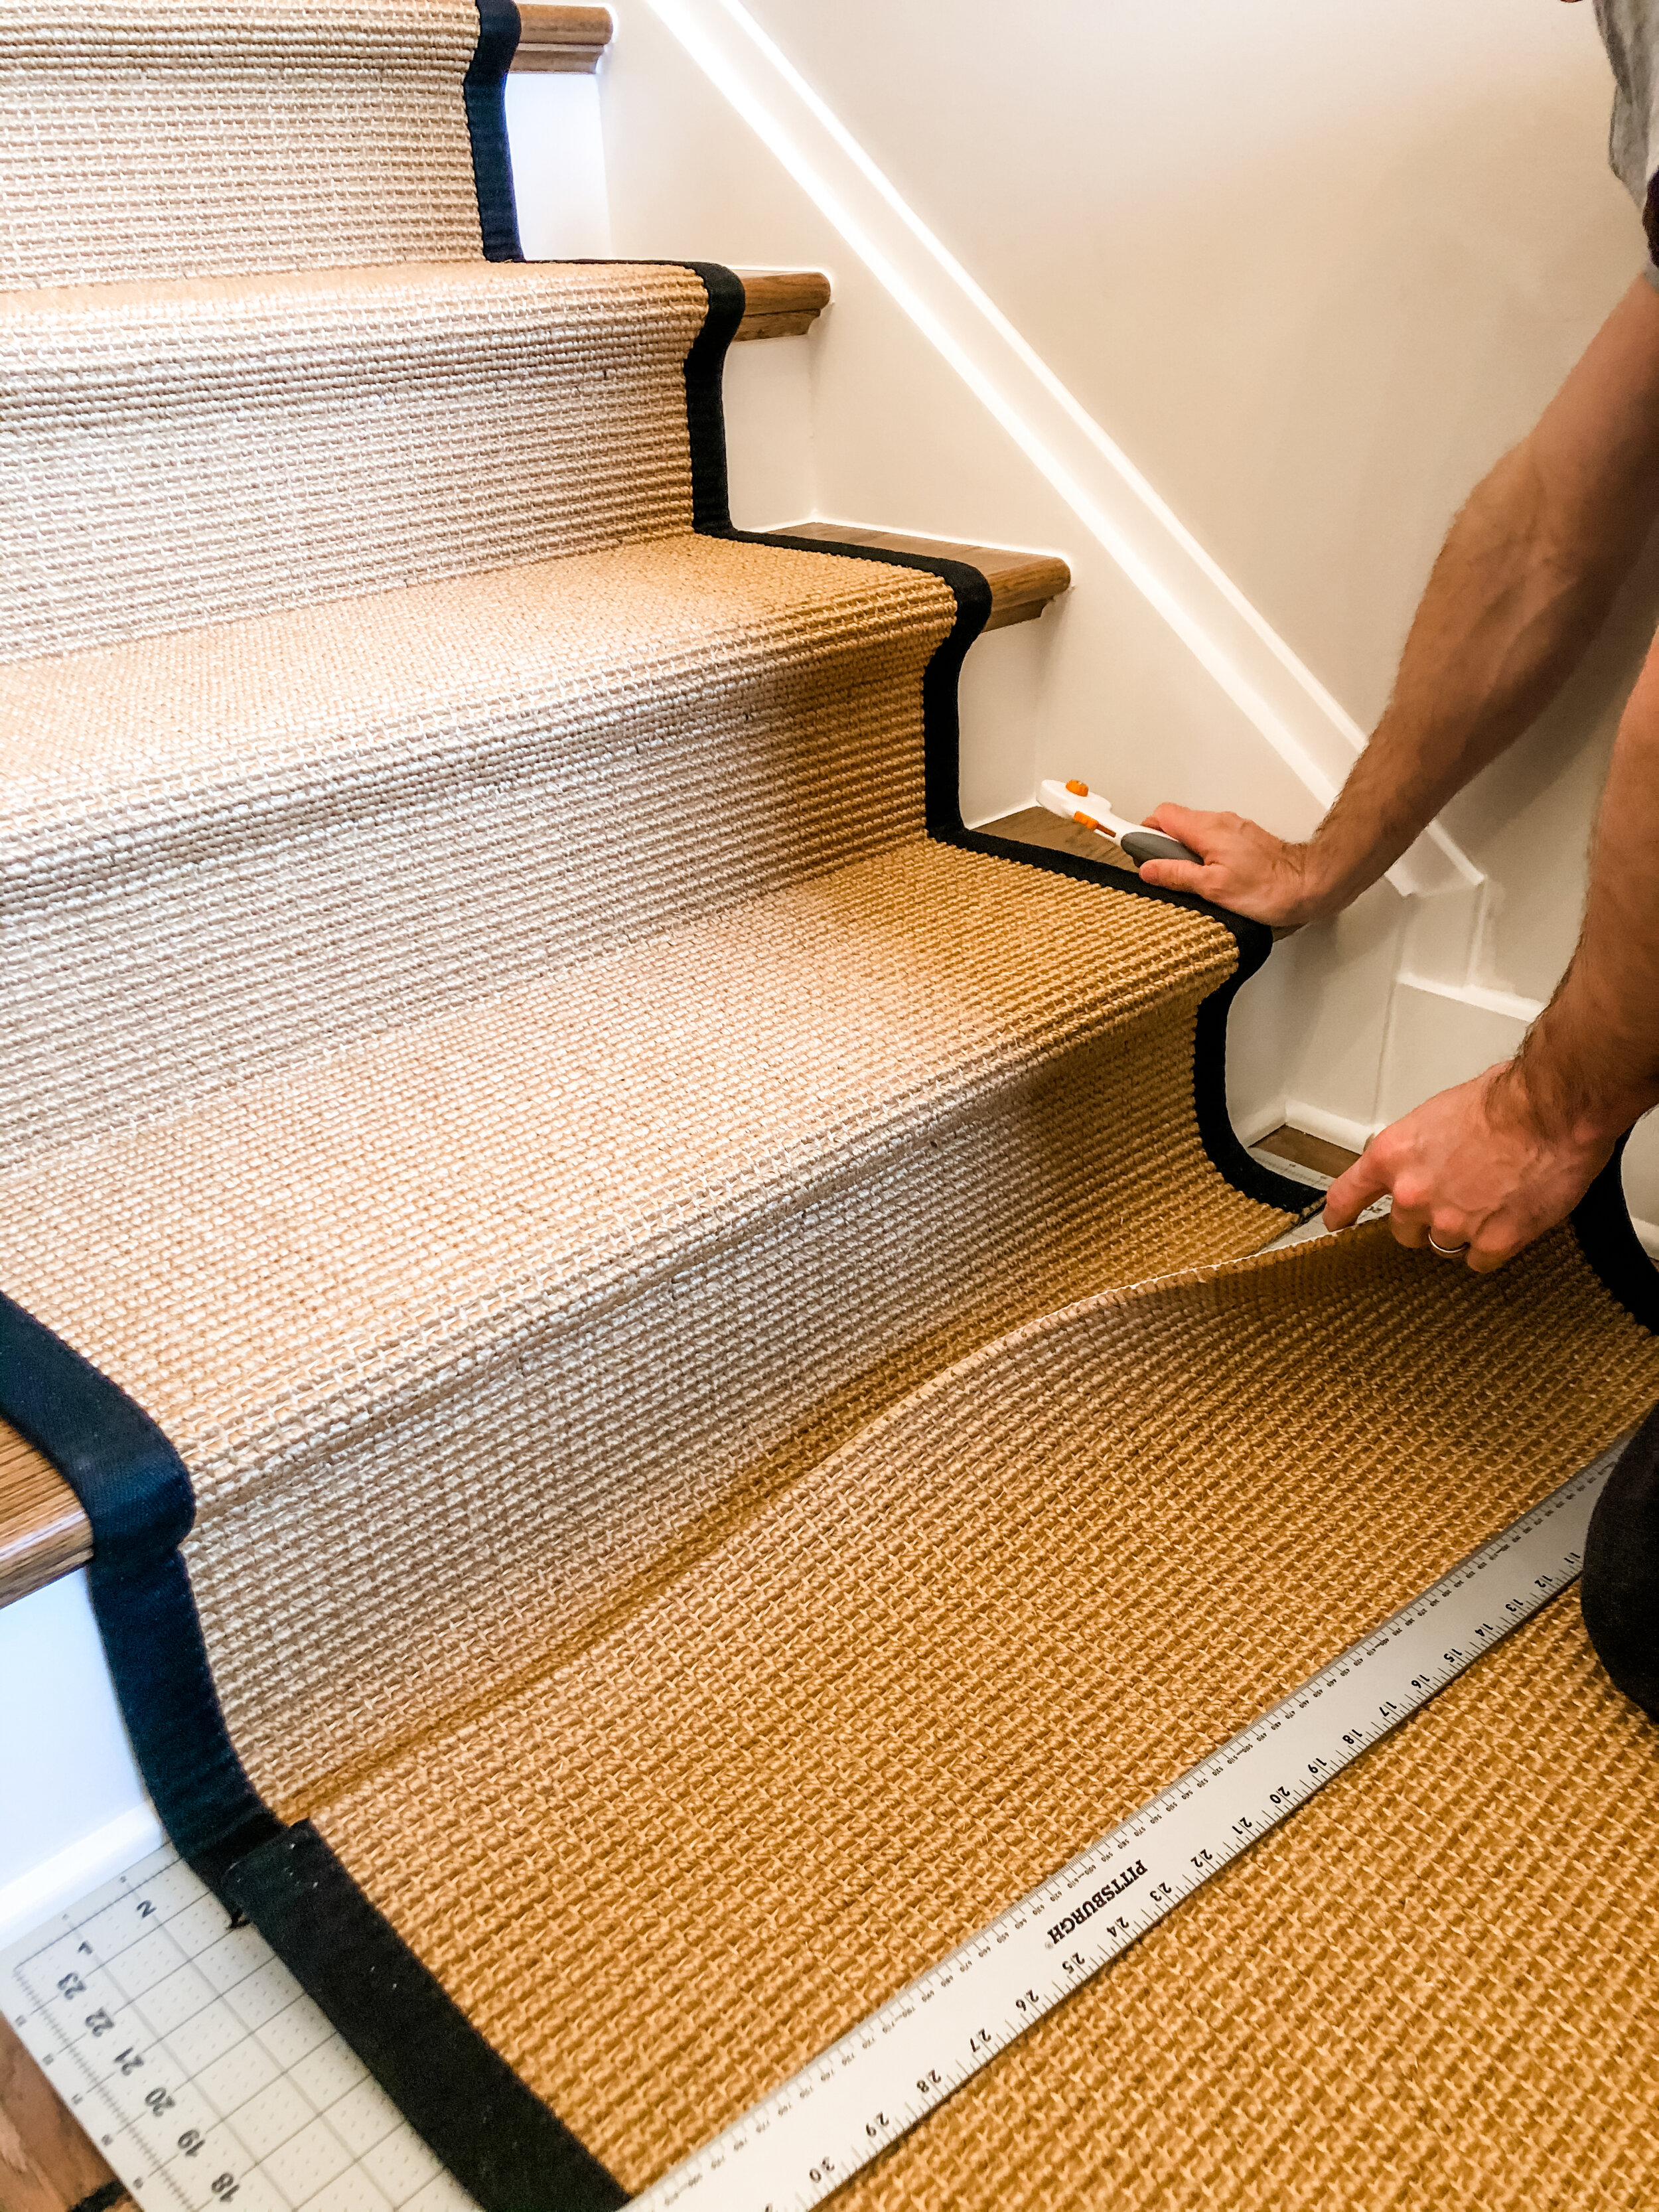
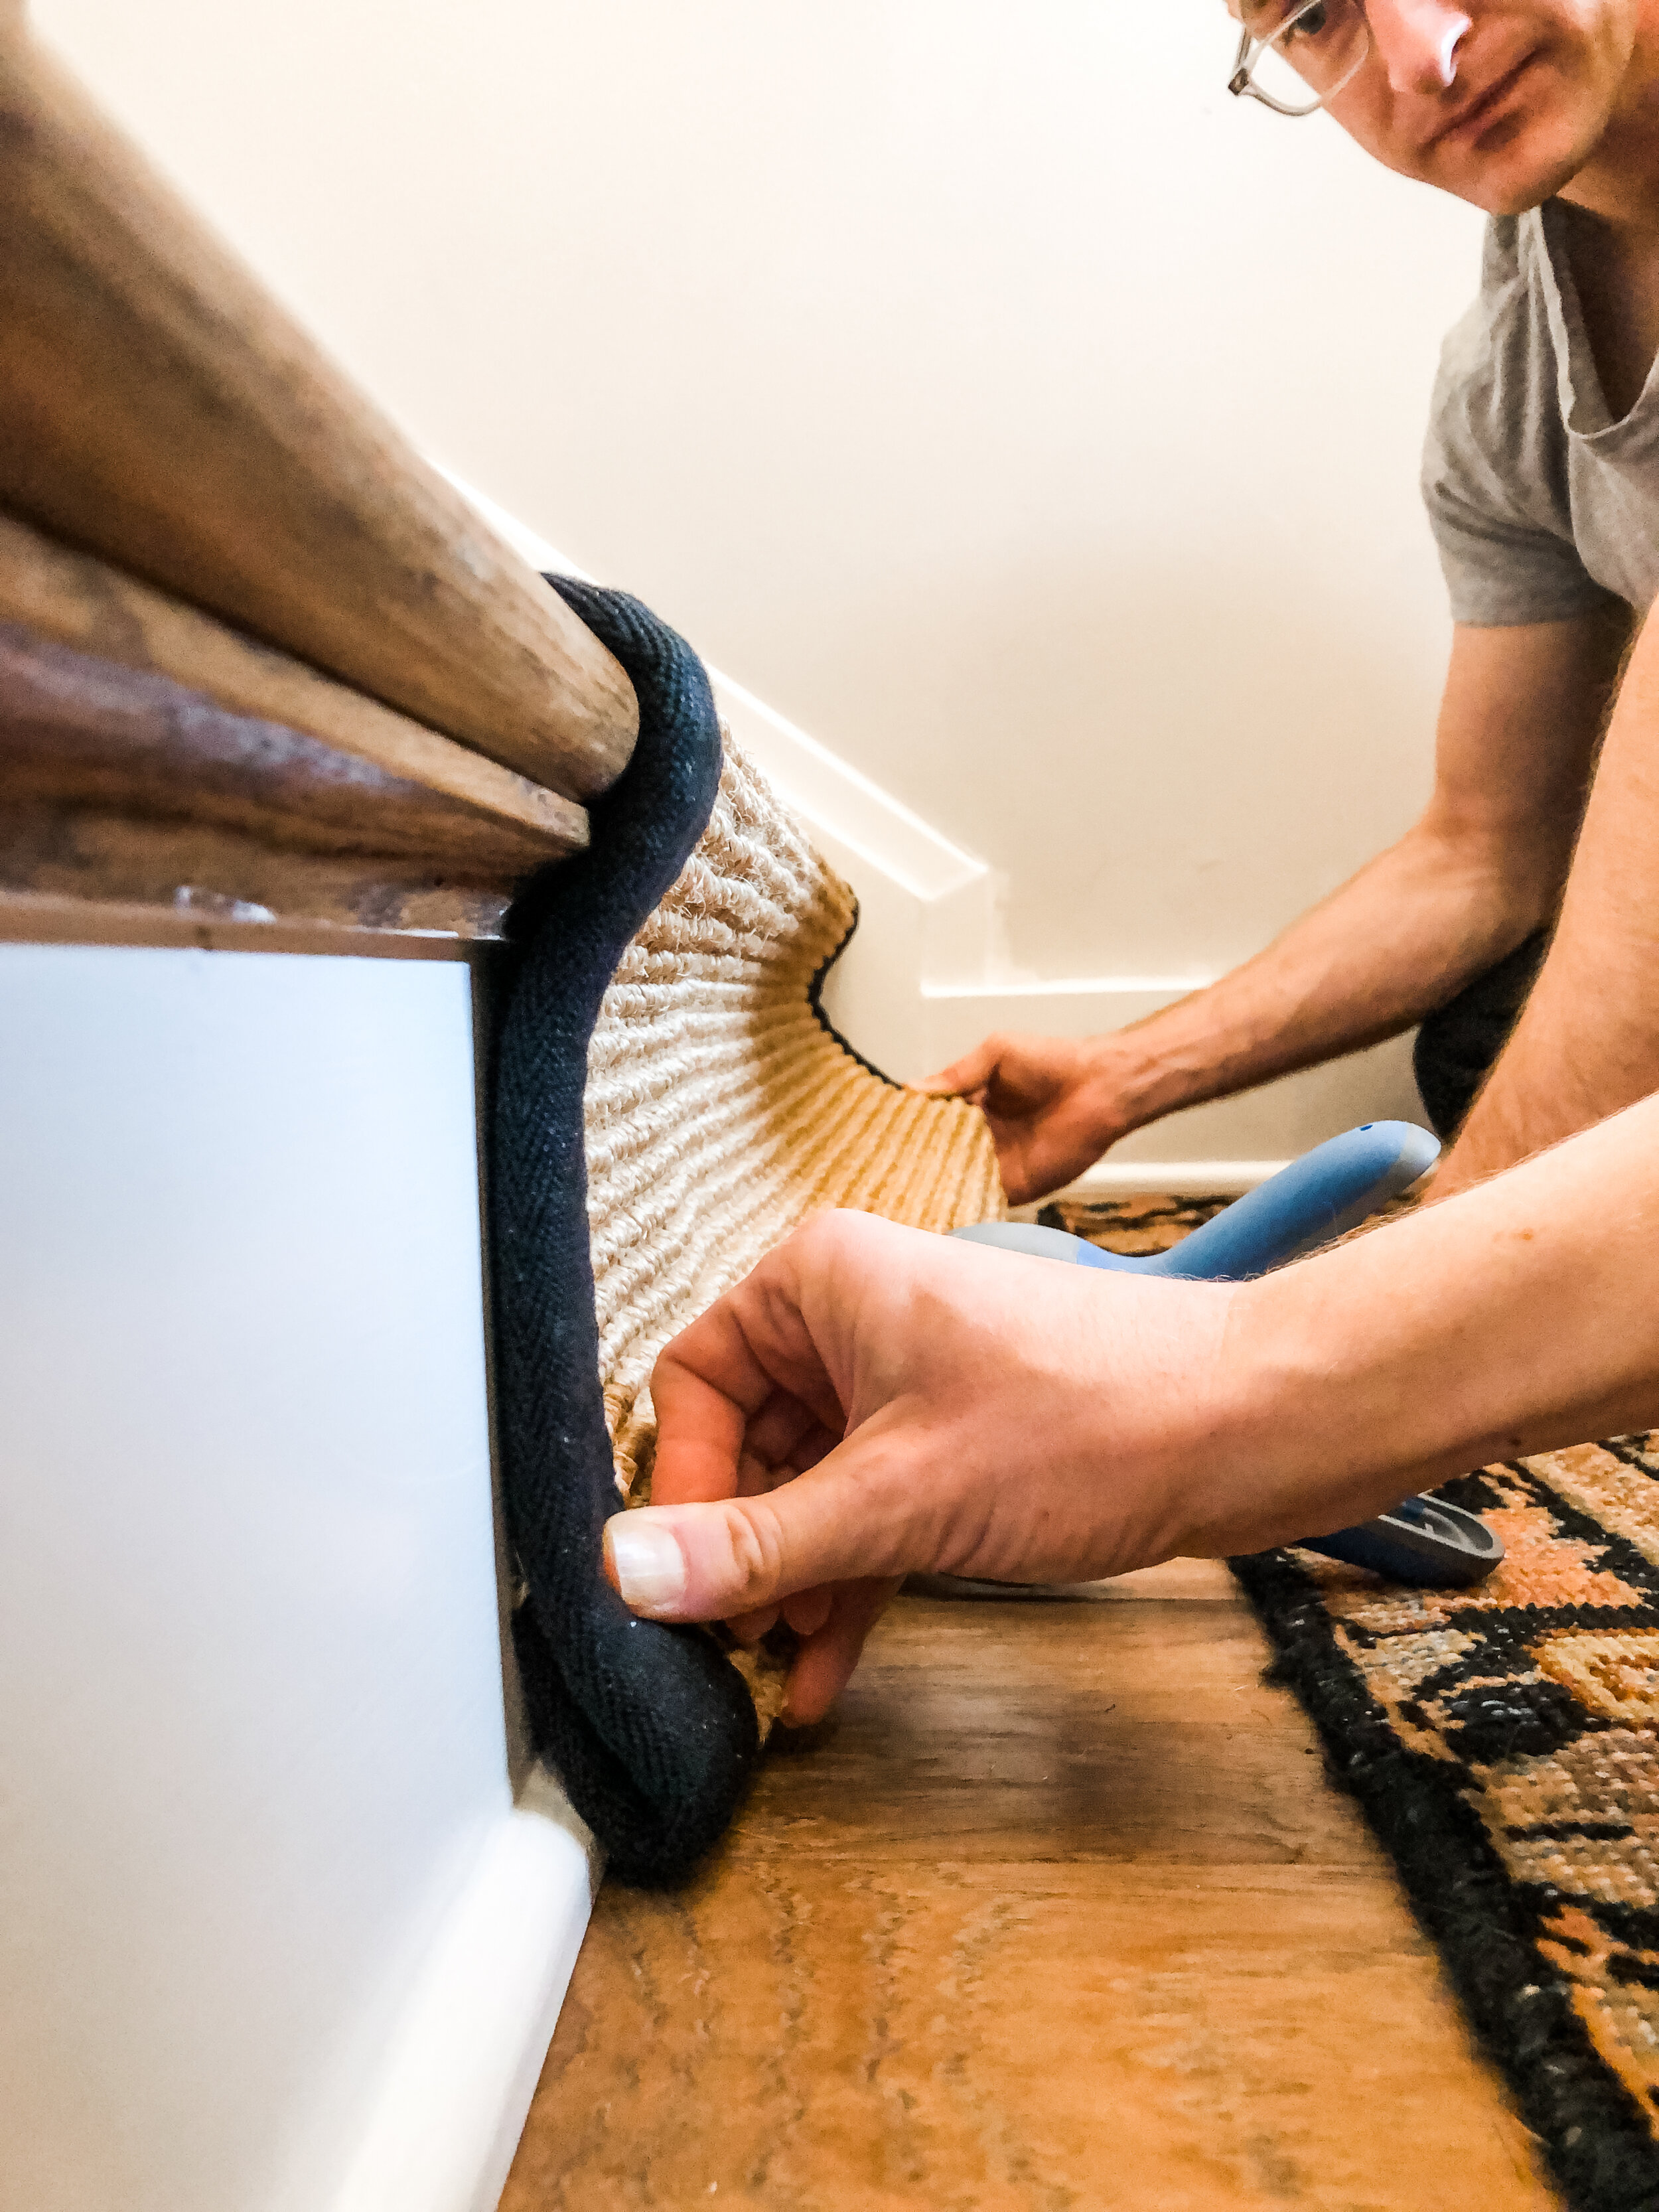
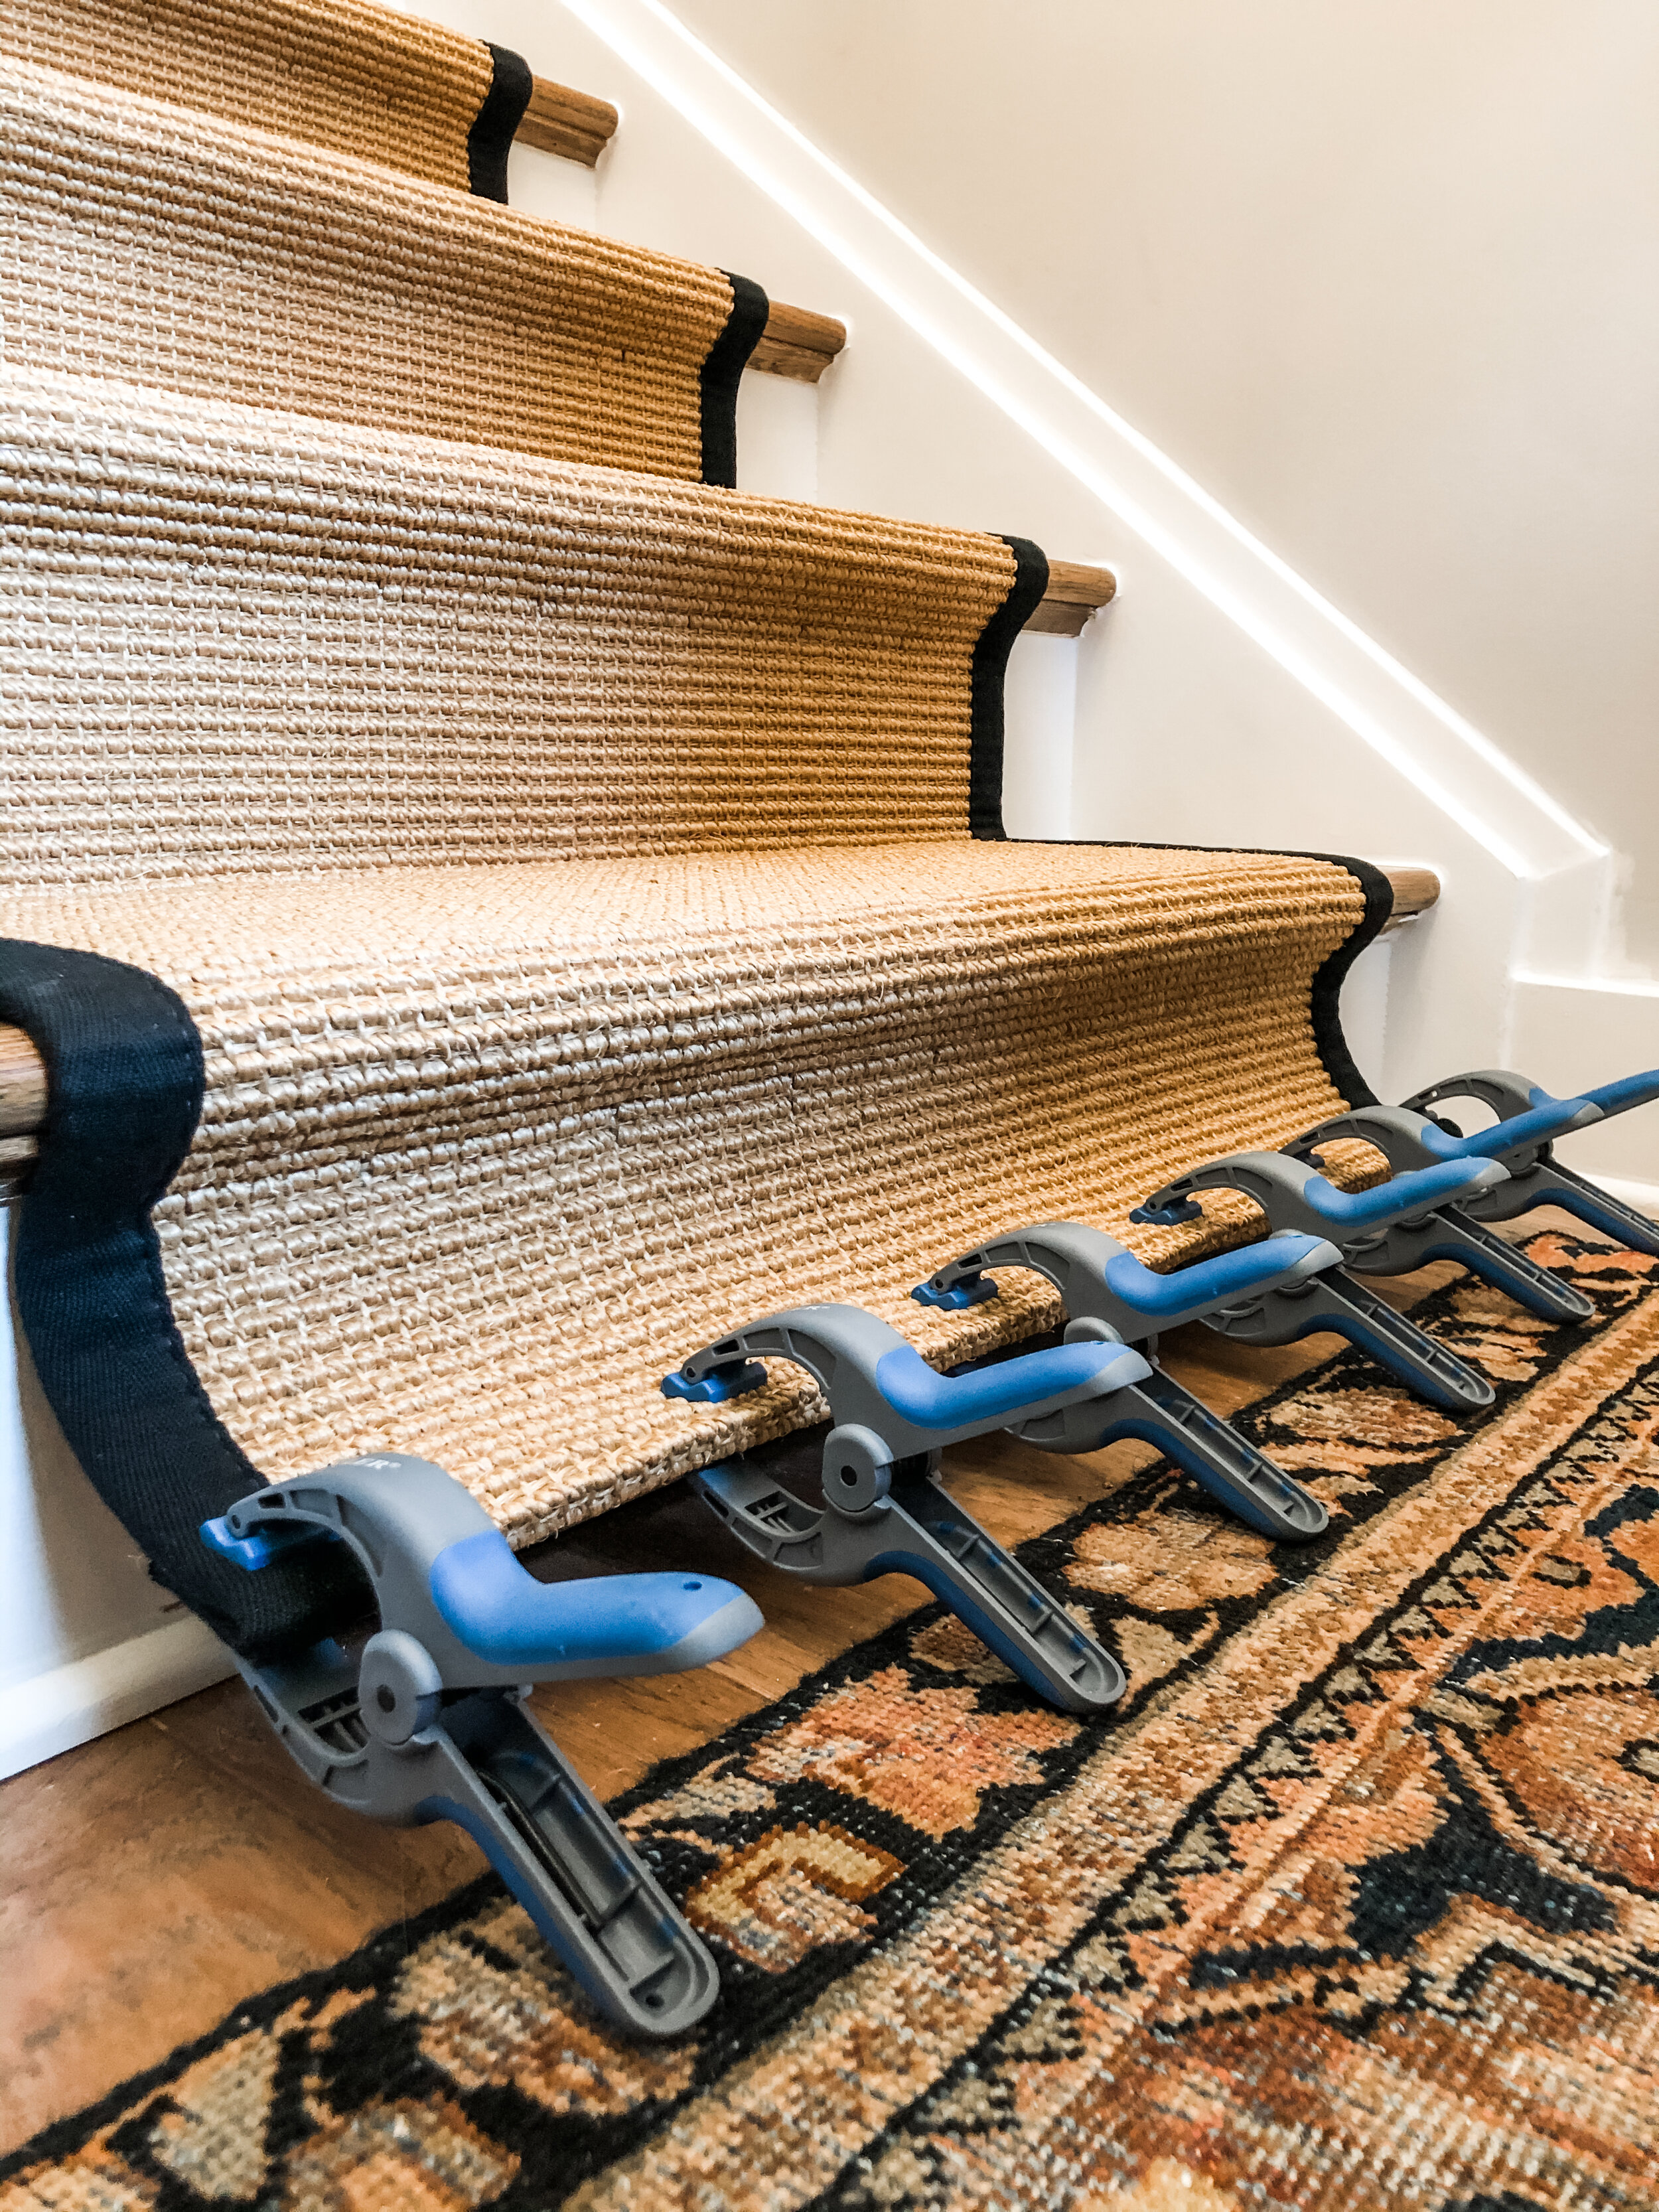
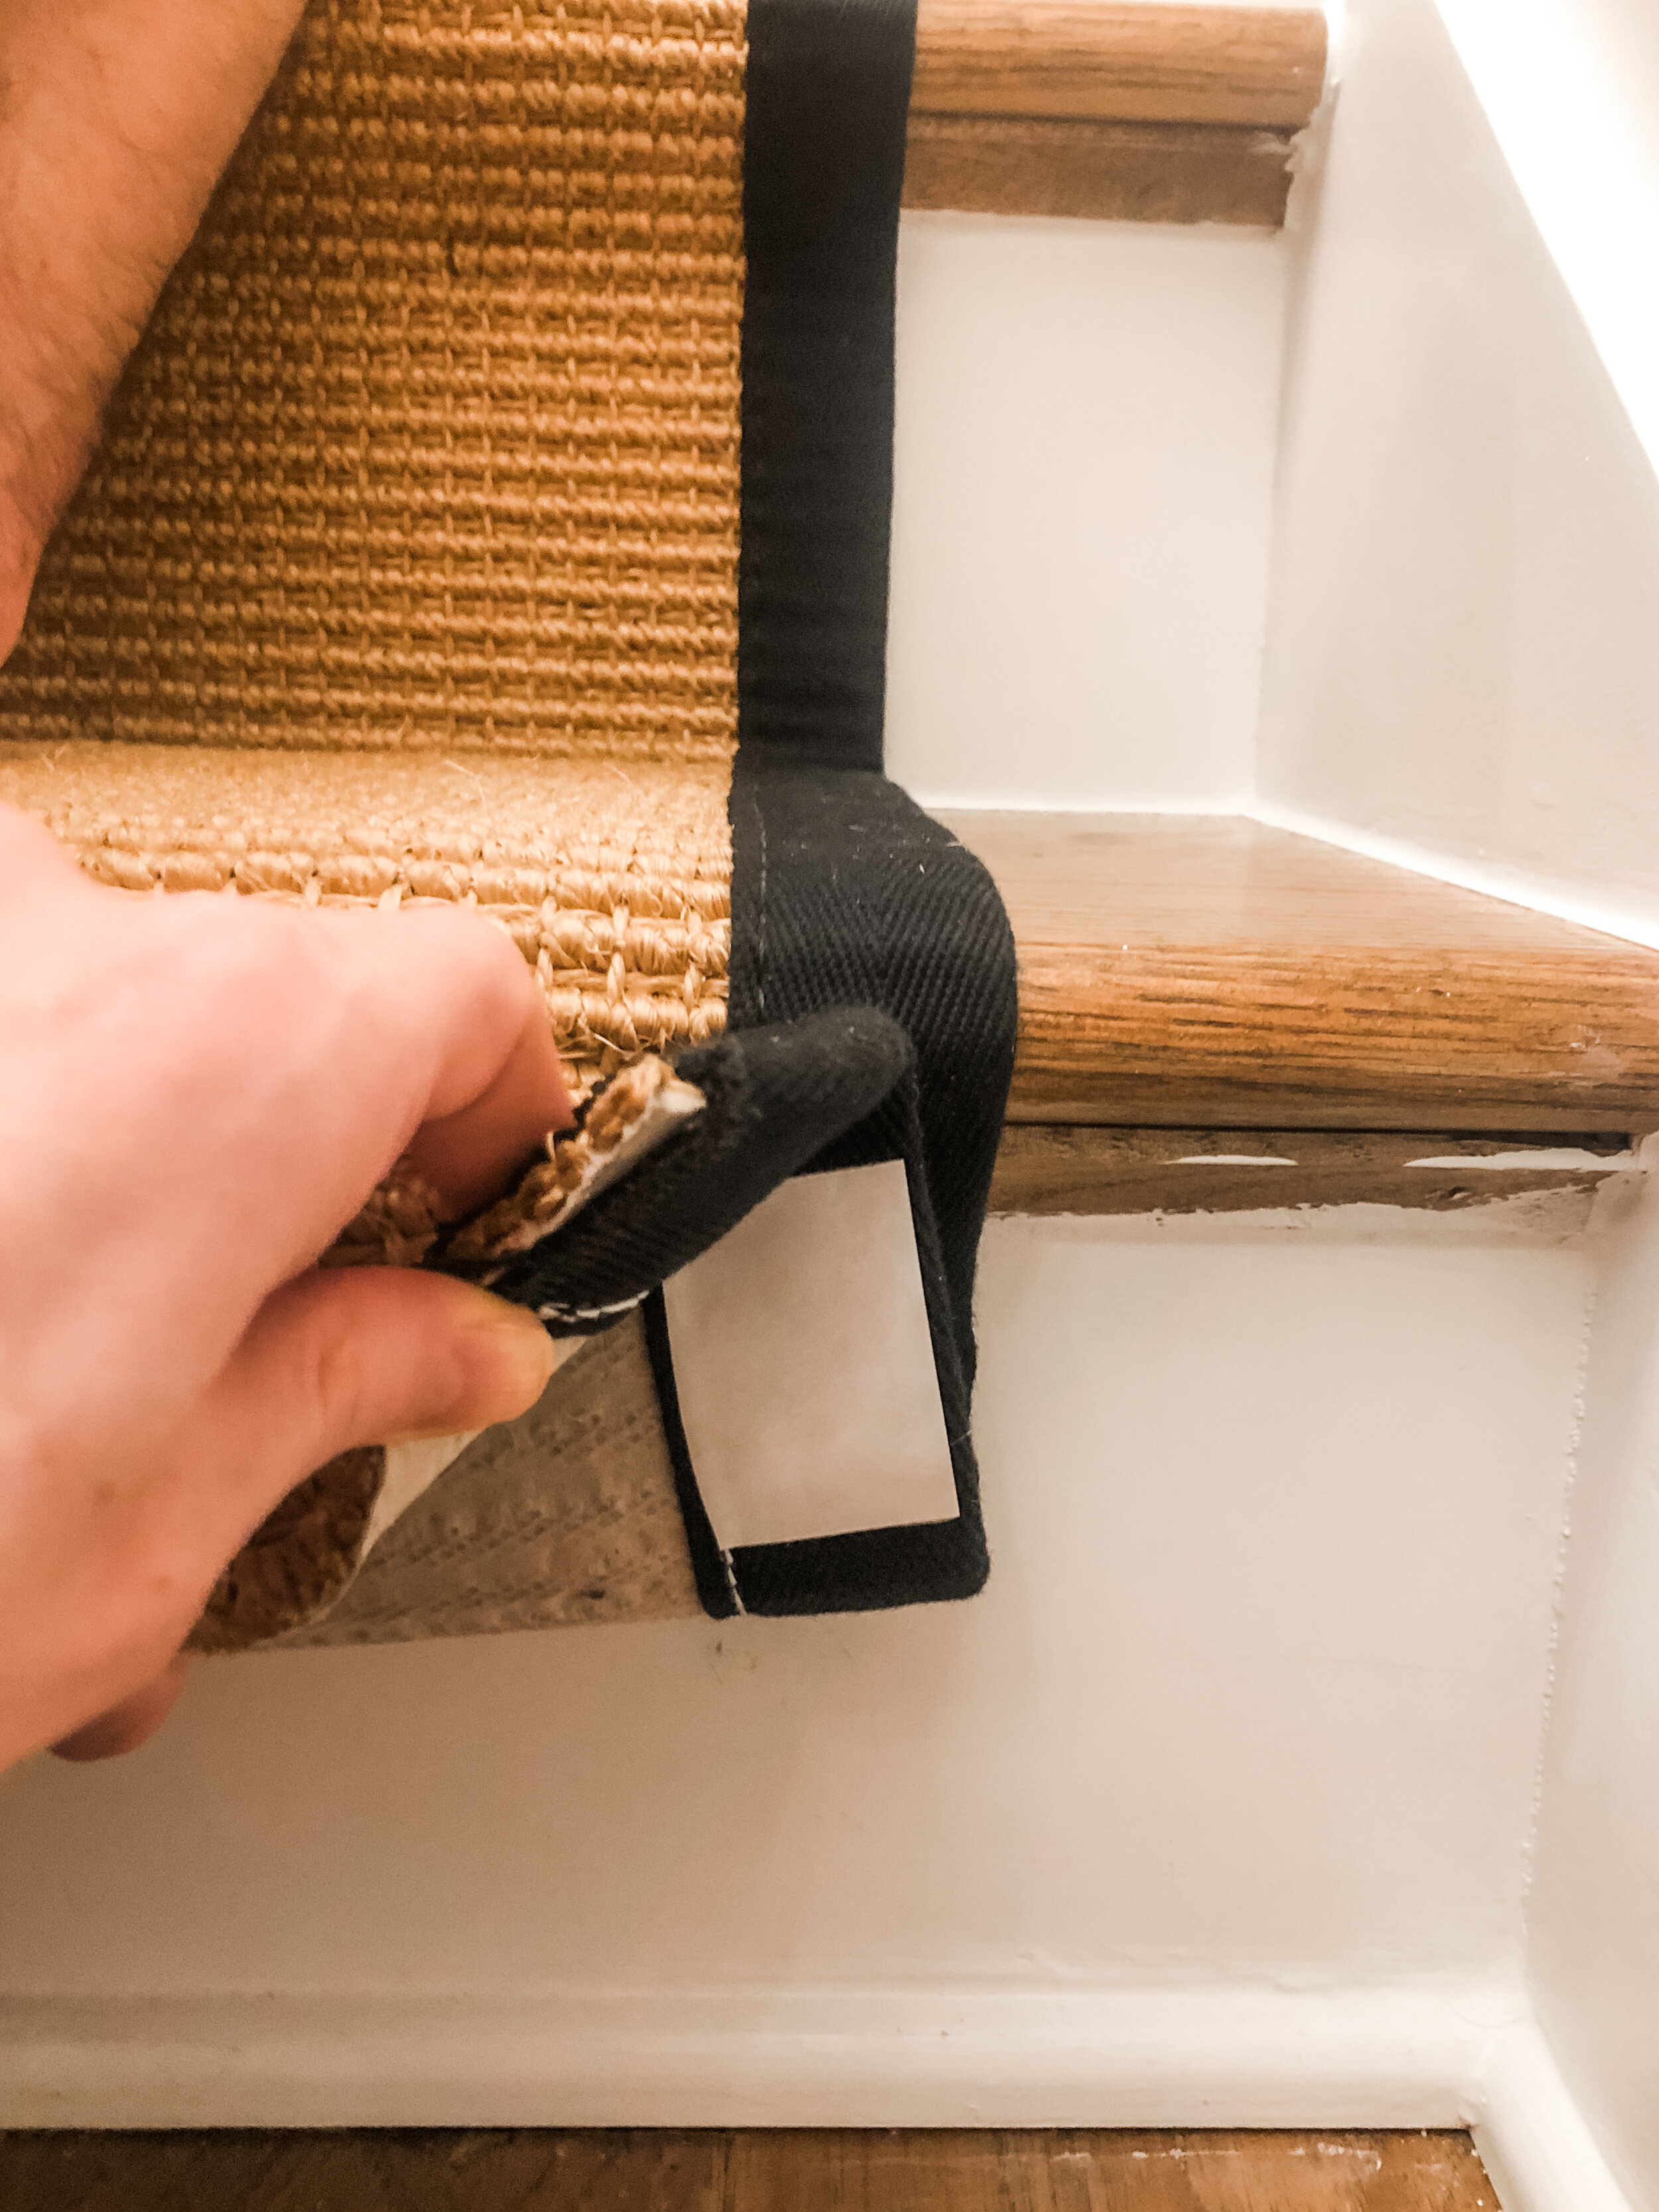
Andrew and I cut the binding off the end of each runner and trained the fold with clamps
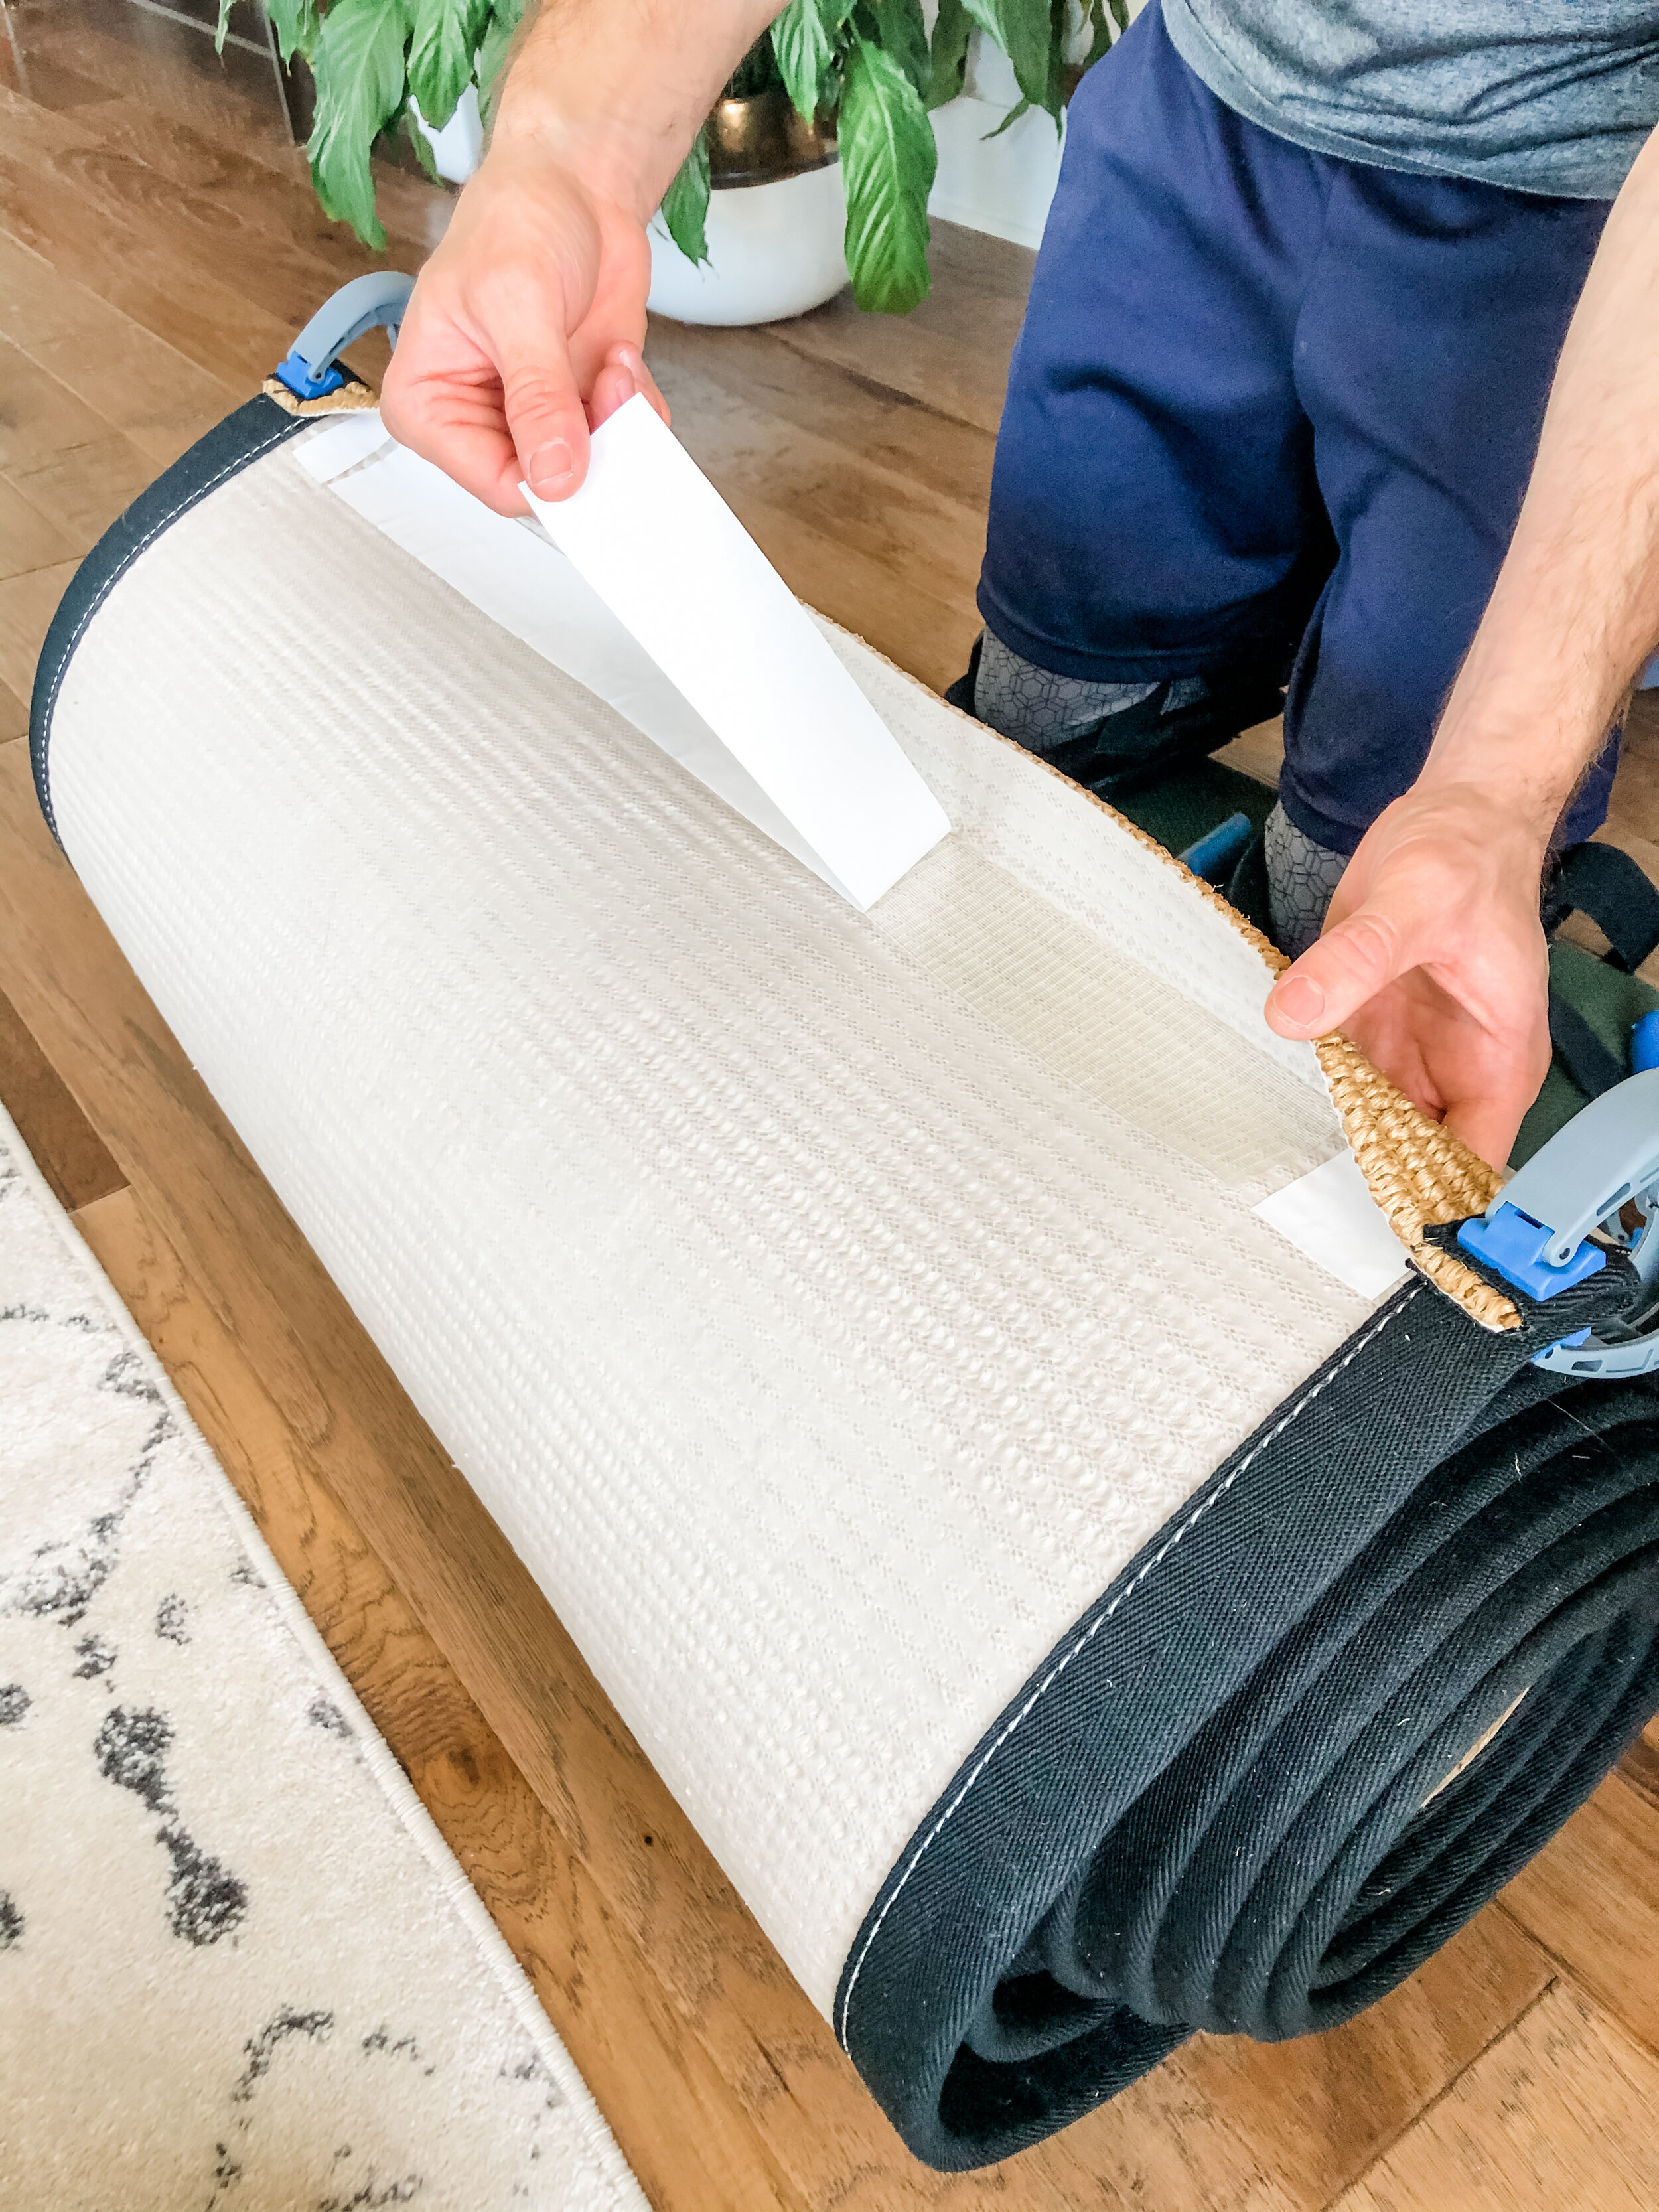
Next, we used carpet tape on the trained fold to keep it nicely folded while positioning
We unrolled the runner and loosely placed it—the rug pad underneath helped grip the sisal
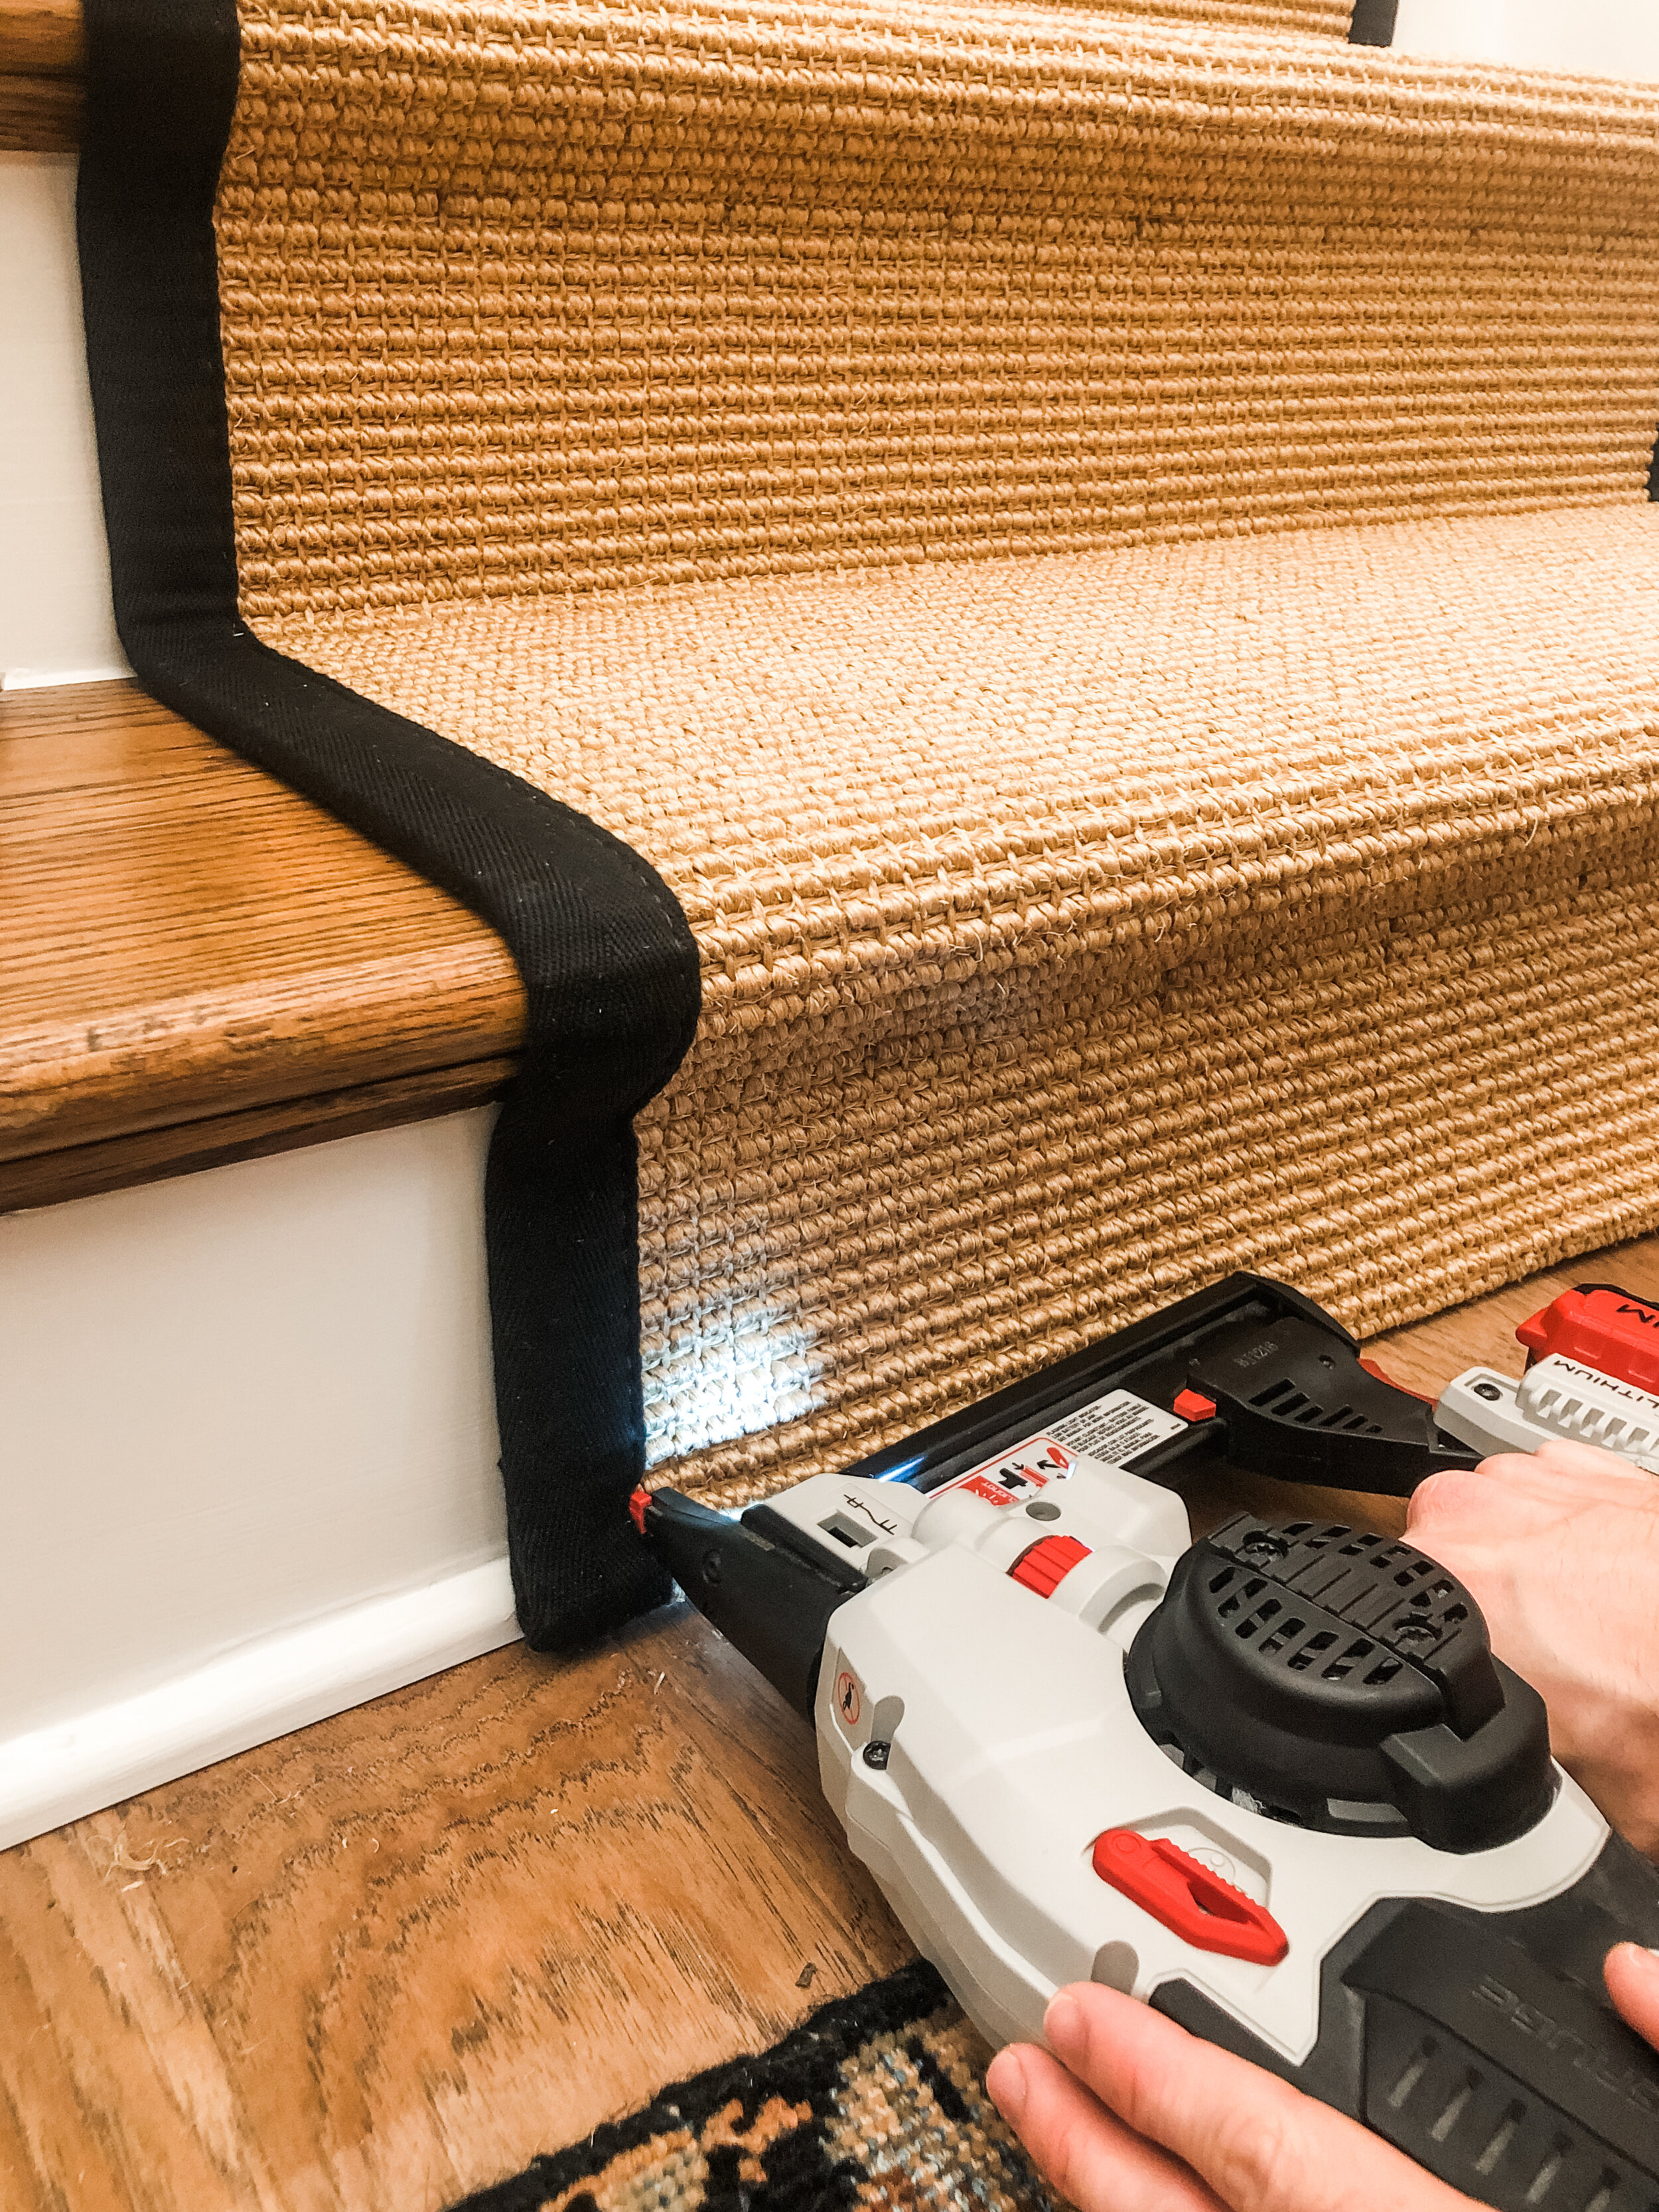
Andrew used a crown stapler to secure the runner under the first nose
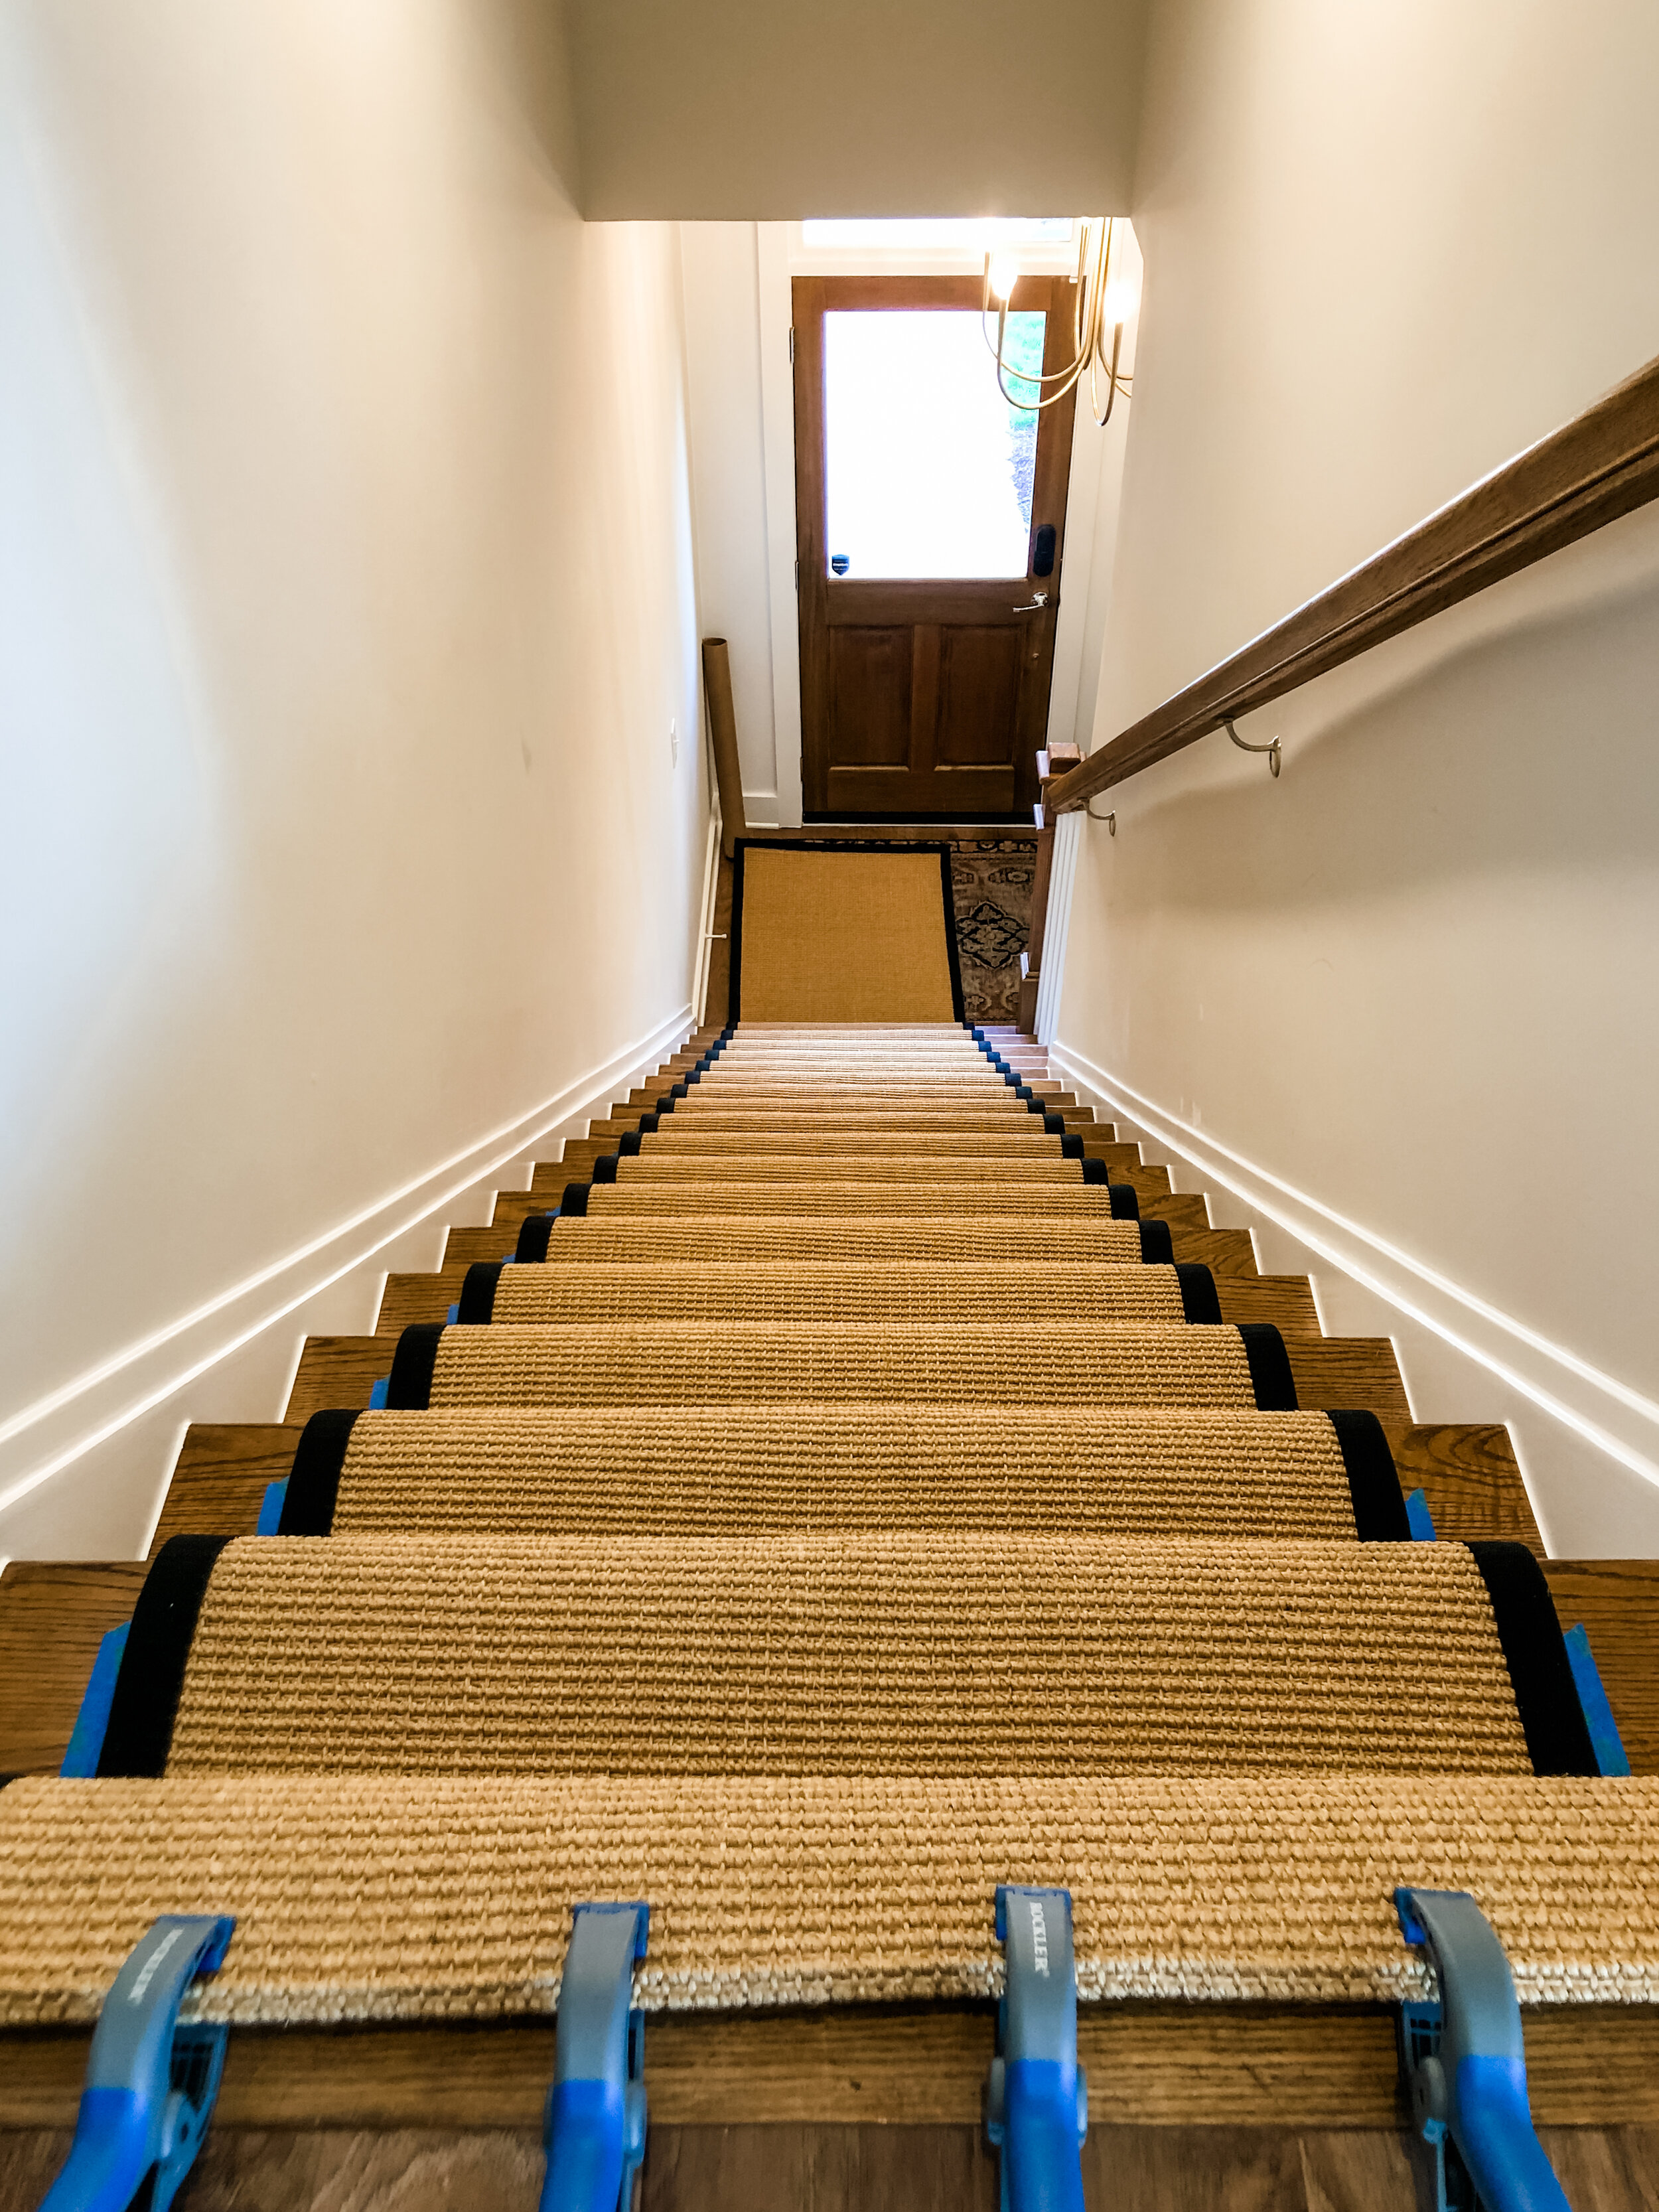
We worked in from the edges on the first step, pushing back the binding to hide a staple under the black binding and shifting the sisal with a screwdriver to hide the staples in the material
Each riser was pretty straightforward—Andrew would line the runner up to the guide of blue tape and secure the runner from the edges to the middle
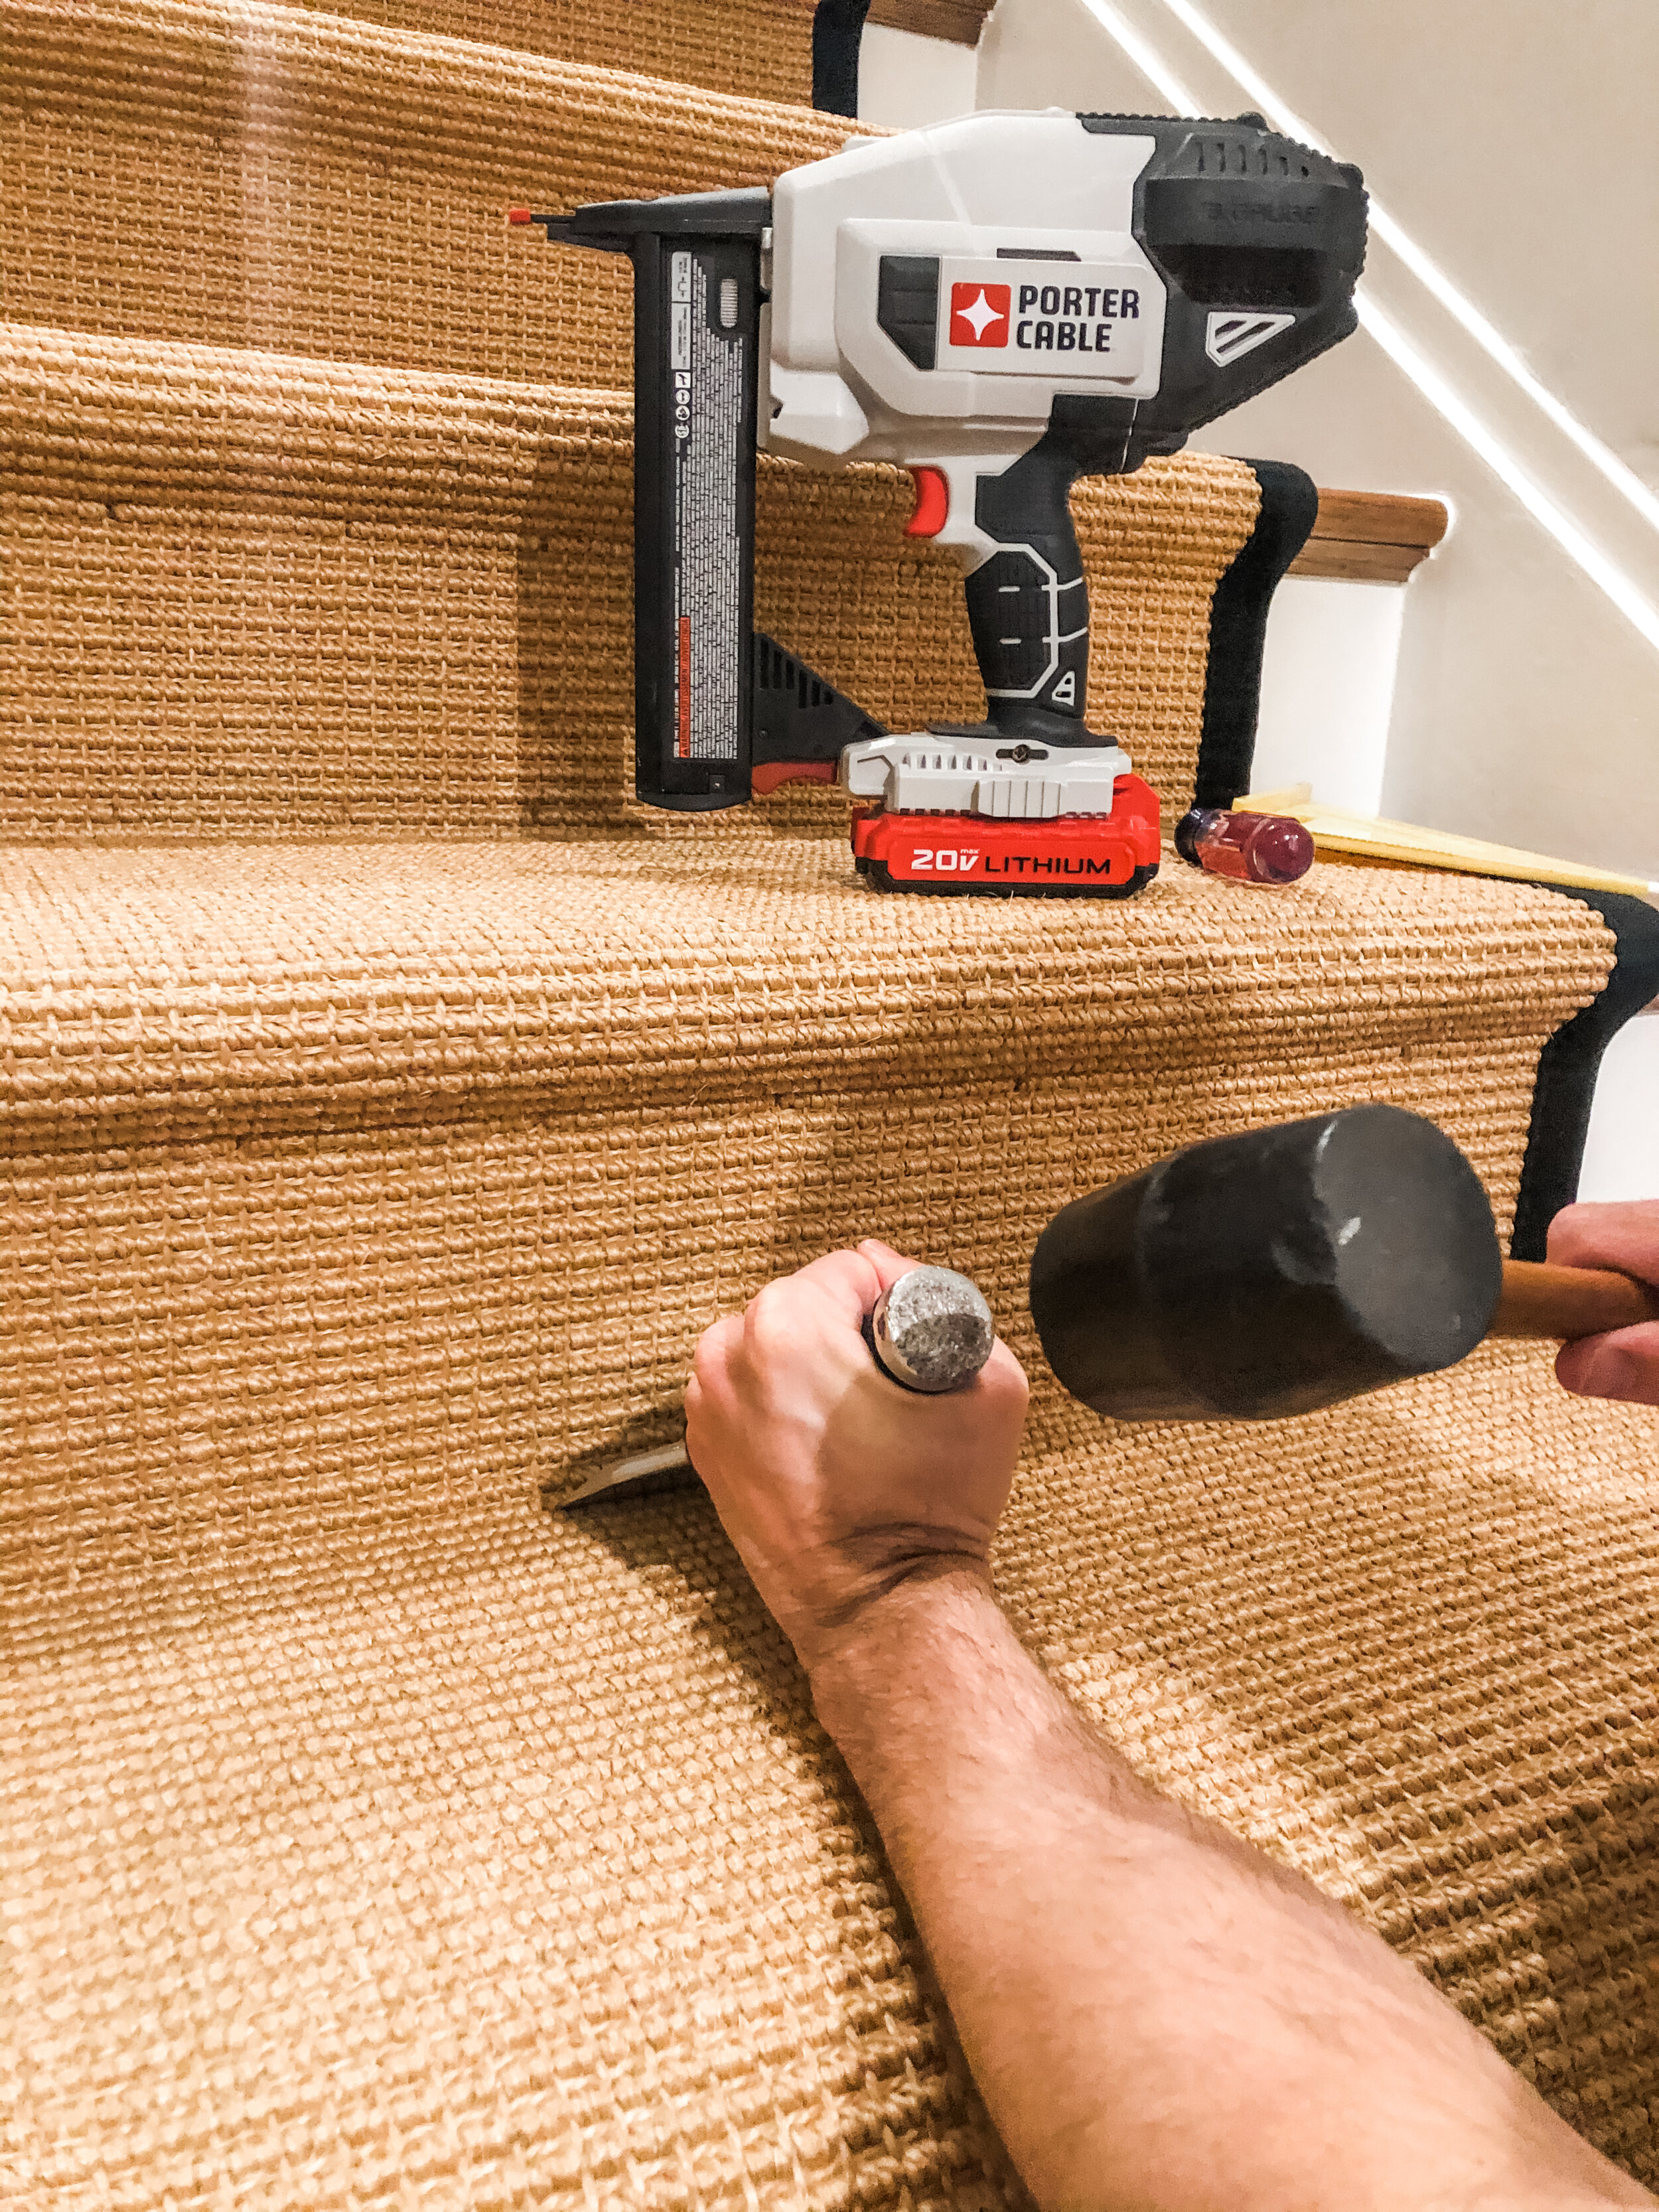
Stapling the nose was a little trickier and it took both of us: I helped pull the runner flat along the tread of the stair and Andrew would use the chisel to keep the runner pulled tight before stapling into place starting in the middle and working to the outside
He used nine staples under each nose and along the base of each riser—for us, it was a staple every 3–4 inches.
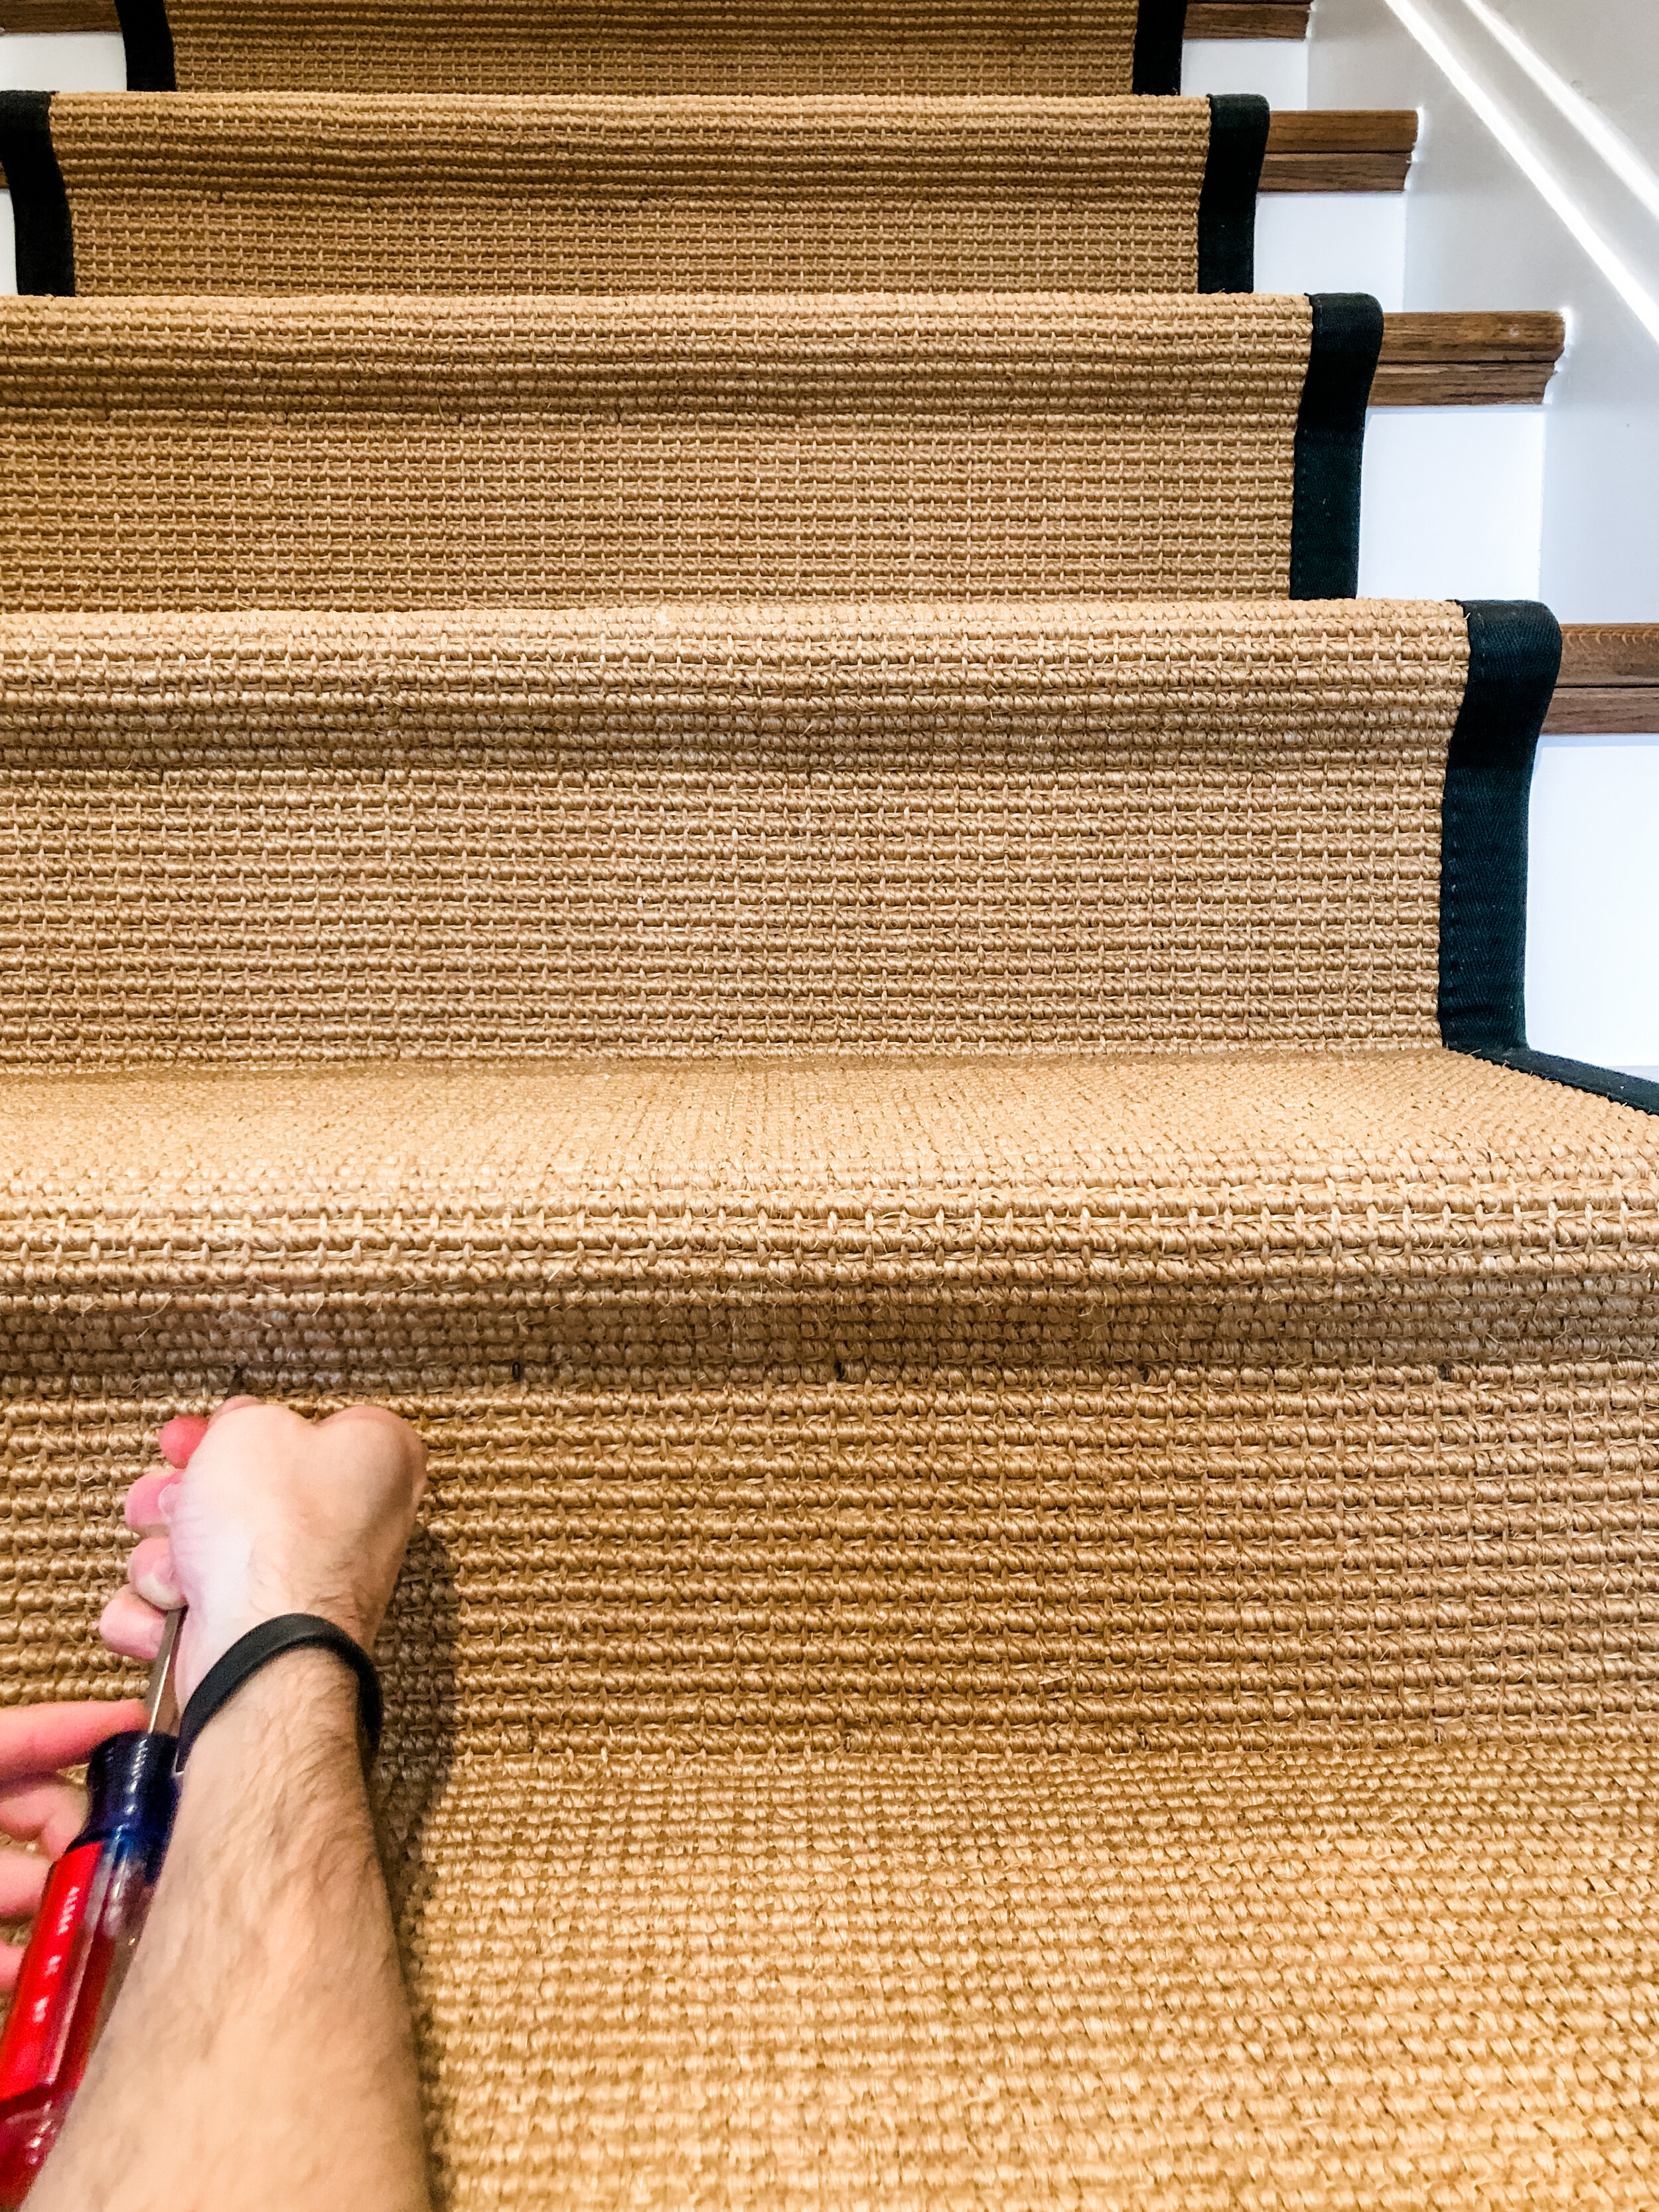
When we reached the bottom of each set of stairs, we used the rotary blade and cutting mat to trim off the excess runner
Once again, we used clamps to help train the runner and used carpet tape to keep the fold secure
Next, we stapled the folded edge along the bottom riser, just above quarter round trim
I used a flathead screw driver to push the fibers to help hide each staple
Finally, we celebrated that this DIY is done!!
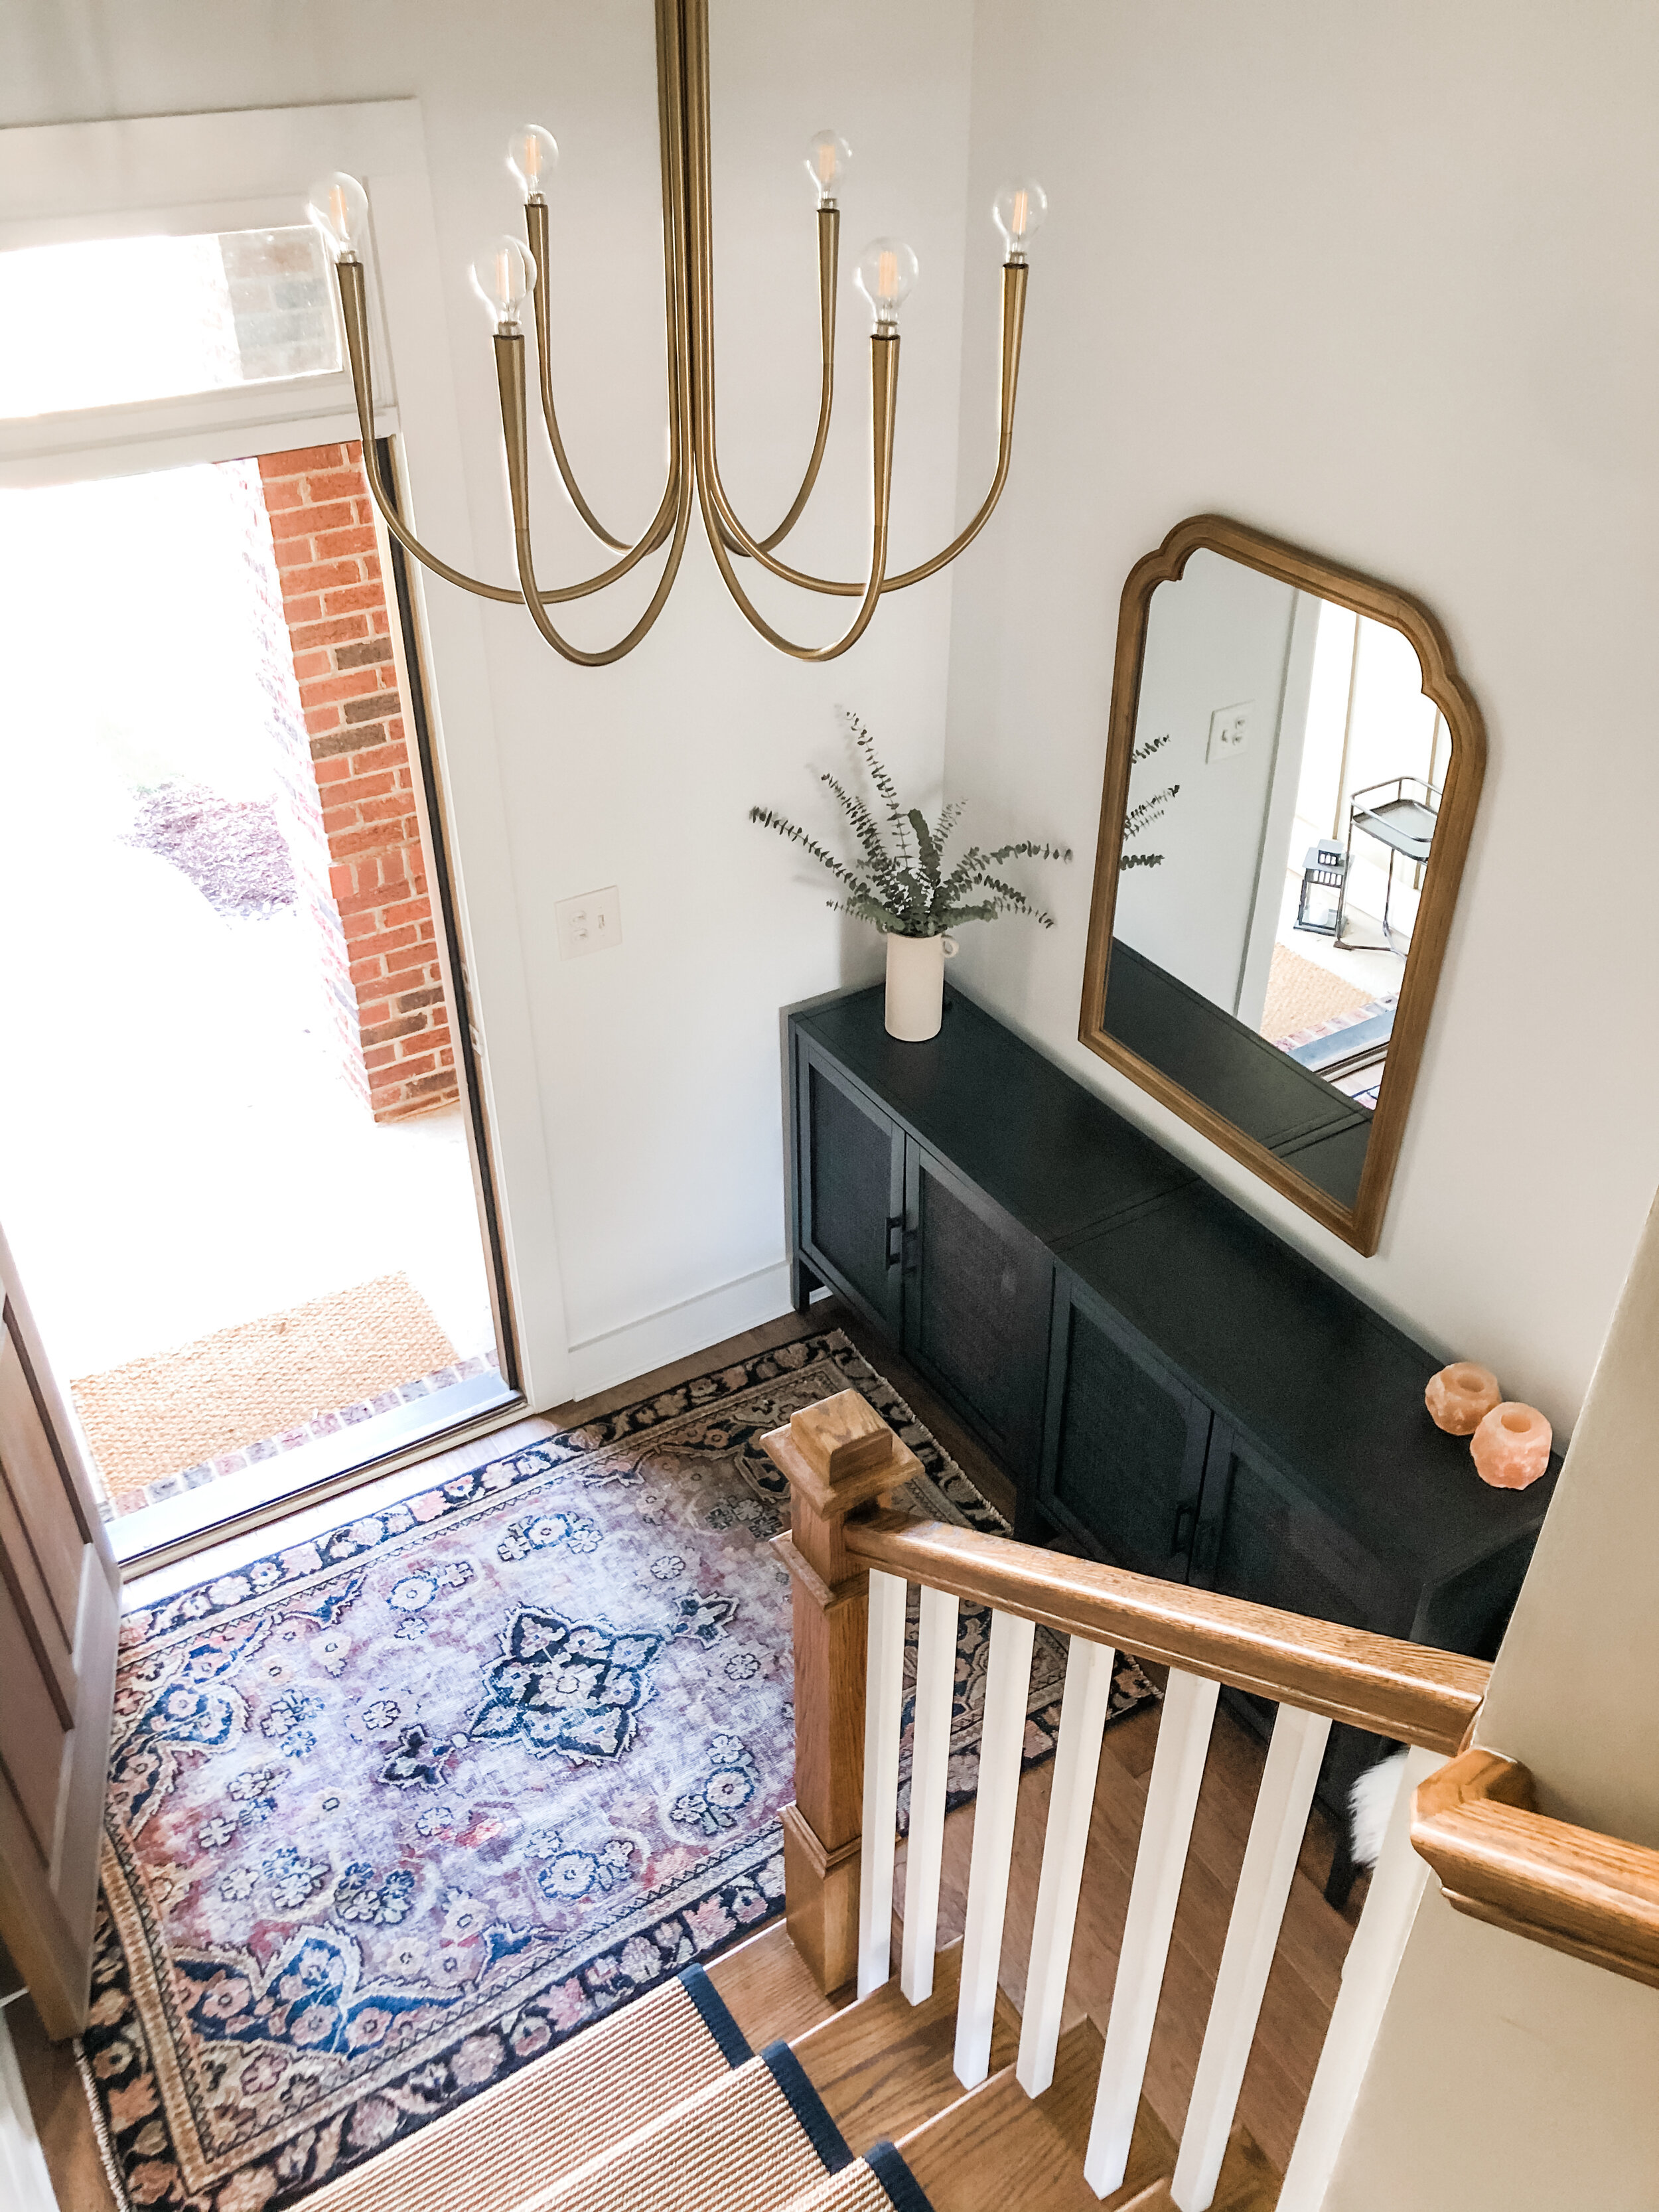
The Side-by-side


Cost Breakdown
Sisal Runners: $1,288.59
Carpet Tape: $21.41
Rug Pad: $75.34
Crown Staples: $6.84
Total: $1,392.18
We did not include materials needed for fixing up and painting our stairs beforehand. If you needed paint, tape, caulk, sanding items, I would estimate another $100 added to the total. We also borrowed a crown stapler from Andrew’s best man for this project. (Thanks, Evan!!) #freebie
sources: sisal runners (camel, wide canvas border in black); carpet tape; rug pad (8 x 10, 1/8” thick); staples